
Table of Contents >> Show >> Hide
- Why Painted Mason Jar Lanterns Are Everyone’s Favorite DIY
- Supplies You’ll Need for Painted Mason Jar Lanterns
- Step-by-Step: How to Make Painted Mason Jar Lanterns
- Design Ideas for Every Season
- Safety Tips for Mason Jar Lanterns
- How to Style and Use Your Painted Mason Jar Lanterns
- Troubleshooting: Common Mason Jar Lantern Problems
- Real-Life Crafting: Experiences with Painted Mason Jar Lanterns
- Conclusion
If you’ve ever scrolled through Hometalk or Pinterest and thought,
“Wait… people made that out of a pickle jar?”, you are absolutely
the target audience for painted mason jar lanterns. These little glass
workhorses turn into glowing, custom lanterns with just paint, a brush,
and a battery tea light. They’re budget-friendly, beginner-friendly, and
look like you raided an expensive boutique instead of the dollar aisle.
In this guide, we’ll walk through everything you need to know to make
painted mason jar lanterns worthy of any Hometalk DIY feed: supplies,
step-by-step instructions, seasonal design ideas, safety tips, and
troubleshooting. Then we’ll wrap up with some hands-on “real life”
experiences to help you avoid the mistakes most crafters make the first
time around.
Why Painted Mason Jar Lanterns Are Everyone’s Favorite DIY
Painted mason jar lanterns hit that sweet spot between “I can totally do
this” and “Wow, did you make that?” Here’s why they’re so popular
for patios, weddings, holidays, and every random Tuesday night:
- They’re inexpensive. Jars, paint, and LED tea lights
are all easy to find and budget-friendly. - They’re customizable. Change colors, motifs, and
finishes to match seasons, parties, or your front porch mood. - They’re forgiving. A streak here, a bubble there?
That’s called “handmade charm.” - They’re versatile. Use them as table centerpieces,
hanging lanterns, pathway lights, or kids’ night-lights. - They’re safer with LEDs. Battery-operated tealights
or fairy lights give you the glow without the open flame drama.
Supplies You’ll Need for Painted Mason Jar Lanterns
Basic Materials
For classic painted mason jar lanterns, gather:
- Mason jars or recycled glass jars – pint or quart
size work well; smooth-sided jars are easier to paint. - Acrylic or chalk paint – craft paint, multi-surface
or chalk-style for a matte, farmhouse look. - Foam brushes or soft bristle brushes – foam is great
for smooth coats; bristle brushes add a rustic texture. - Rubbing alcohol and cotton balls – to clean the
glass so paint adheres properly. - Painter’s tape, stickers, or vinyl shapes – for
stars, hearts, or words you want to “mask” and leave clear. - Mod Podge or clear sealer (spray or brush-on) – to
protect painted designs on the outside of the jar. - LED tealights or fairy lights – safe, flameless glow
inside your lantern.
Optional Add-Ons
If you want to go full Hometalk showstopper, consider:
- Thin floral wire or pre-made jar hangers – for
hanging lanterns from hooks or tree branches. - Twine, ribbon, or jute – to wrap around the neck of
the jar for a farmhouse touch. - Fake leaves, pressed flowers, tissue paper, or lace –
to decoupage onto the outside of jars. - Glitter, glass beads, or sand – for filling the
bottom or adding sparkle. - Stencils – text, florals, or geometric patterns for
more precise designs.
Step-by-Step: How to Make Painted Mason Jar Lanterns
There are dozens of variations out there, but most painted mason jar
lantern tutorials follow the same basic process. Here’s a simple,
reliable method you can tweak to fit your style.
Step 1: Clean and Prep the Jars
- Remove labels and sticker residue from your jars.
- Wash with warm, soapy water and let them dry completely.
- Wipe the outside with rubbing alcohol to remove oils from your hands.
This helps the paint stick and prevents random bald spots later.
Step 2: Plan Your Design
Decide what kind of lantern you’re going for:
- Solid color, frosted look: Great for farmhouse or
minimalist style. - Peek-a-boo cutouts: Use stars, leaves, hearts, or
words masked with stickers or vinyl shapes, then peel them off after
painting. - Stained glass effect: Watered-down paint, glass
paint, or tissue paper pieces give a colorful glow.
Apply painter’s tape or vinyl shapes where you want the glass to stay
clear. Press edges firmly so paint doesn’t sneak underneath.
Step 3: Paint the Jars
Now for the fun part. You have two main approaches: painting the
outside or painting the inside.
Painting the Outside
This is the easiest and most versatile option:
- Use a foam brush to apply thin, even coats of paint.
- Let each coat dry before adding another to avoid streaks.
-
For a distressed farmhouse look, lightly sand raised areas once the
paint is dry so bits of glass peek through.
Painting the Inside
Want a more glassy, “tinted” look with the outside left smooth? Try this:
- Pour a small amount of thinned-down acrylic or glass paint inside.
- Swirl the jar around to coat the interior completely.
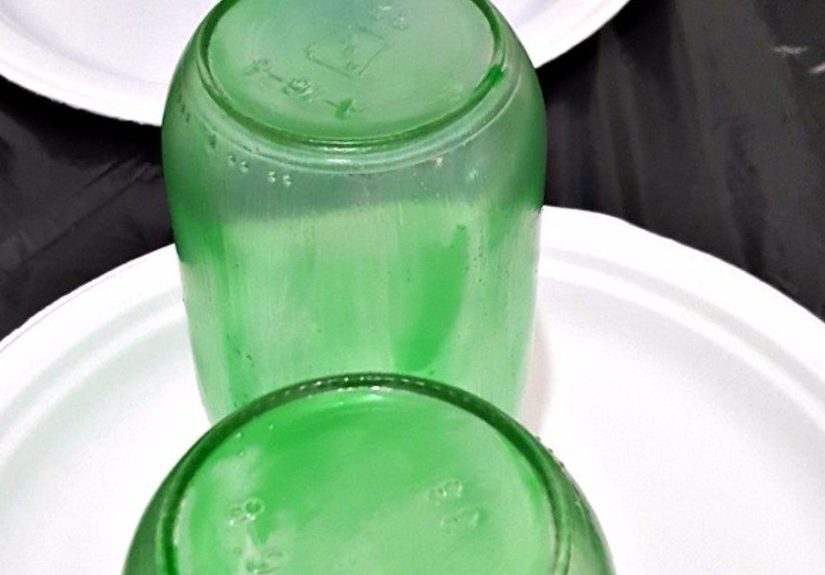
- Turn the jar upside down on a paper towel so excess can drip out.
- Let it dry thoroughly before adding any lights.
This method works especially well for lanterns that mimic colored glass in
jewel tones like amber, teal, or plum.
Step 4: Add Details and Seal
Once your base paint is dry:
- Peel off painter’s tape or stickers to reveal clear glass shapes.
- Add simple designs with a small brush: dots, florals, stripes, or
lettering. -
When everything is fully dry, seal painted areas with a light coat of
clear sealer or outdoor Mod Podge on the outside of the jar.
Avoid sealing the inside where heat or LEDs will sit; sealant can cloud,
yellow, or off-gas if it gets too warm.
Step 5: Add Handles and Lights
To turn your painted jars into actual lanterns:
-
For hanging lanterns: Wrap floral wire around the neck
of the jar, twist tightly, and form an arching handle. Double up the
wire if you plan to hang them outdoors. -
For tabletop lanterns: Keep it simplejust tie twine or
ribbon around the top and drop in your LED tealight or fairy lights. -
For extra stability: Add a layer of sand, pebbles, or
tiny shells to the bottom so the light stays centered.
Design Ideas for Every Season
One of the best parts of painted mason jar lanterns is how easily they
adapt to whatever season or holiday you’re decorating for. Here are some
fun themes inspired by popular DIY projects.
Cozy Fall Leaf Lanterns
For a warm autumn glow, decoupage fake fall leaves onto the outside of
your jar using Mod Podge, then tuck a tealight inside. The light shines
through the thin leaves, making them look like glowing stained glass. Use
reds, oranges, and golds for classic fall, or muted browns and greens for
a more rustic vibe.
Patriotic Red, White & Blue Lanterns
For the Fourth of July or Memorial Day, stick vinyl stars onto your jars
before painting them navy blue. Once dry, peel off the stars to reveal
clear glass “fireworks” where the light shines brightest. Add red and white
twine or small flags around the neck for an easy patriotic centerpiece.
Fairy-Tale and Fantasy Lanterns
Spray or paint your jars in deep jewel tonespurple, blue, or emerald
then add silhouettes of castles, forests, or fairies in black. When lit,
the designs glow like a storybook illustration. These look stunning in a
child’s bedroom or at an outdoor evening party.
Kid-Friendly “Stained Glass” Lanterns
For younger crafters, skip the precision painting and go for tissue paper:
- Cut or tear tissue into small squares.
- Brush a thin layer of Mod Podge onto the jar.
- Press tissue pieces onto the sticky surface and seal with more
Mod Podge.
The overlapping colors create a stained glass effect when lit. Kids can
choose colors to match their room or a specific holiday, and LEDs make
them safe night-lights.
Spooky Halloween Lanterns
Paint jars orange, white, green, or purple, then add simple faces with
black paint or permanent markers: jack-o’-lanterns, ghosts, mummies, or
monsters. Line them up along your walkway or porch steps for an easy,
reusable Halloween display.
Safety Tips for Mason Jar Lanterns
Lanterns sound harmless, but any time you mix glass and light sources,
safety mattersespecially if kids are involved.
-
Choose LED lights whenever possible. They don’t heat up
like real candles and are safer around paint, Mod Podge, and tissue
paper. -
If you use real tealights, keep flammable materials outside.
Don’t coat the inside of the jar with Mod Podge, tissue paper, or leaves. -
Place jars on stable surfaces. If they’re on steps or
railings, make sure they can’t be knocked off easily. -
Hang with sturdy wire. If your lanterns are outdoors,
wind can swing them. Use strong wire and secure hooks. -
Supervise kids. Let them handle the painting and
decorating, but adults should manage wiring, hanging, and any open
flames.
How to Style and Use Your Painted Mason Jar Lanterns
Once your lanterns are done, you’ve got options:
-
On the patio or deck: Cluster 3–5 jars of different
heights in the center of a table for a cozy glow. -
Hanging from trees or shepherd’s hooks: Use wire
handles to create floating points of light for evening gatherings. -
Down a walkway: Line steps or a garden path with jars
to guide guests to your door or backyard party. -
As wedding or party decor: Coordinate paint colors with
your themesage and cream for rustic weddings, navy and gold for
evening events. -
Indoors on mantels and shelves: Use soft white or warm
amber LED lights for a subtle, cozy glow all year long.
Troubleshooting: Common Mason Jar Lantern Problems
“My Paint Looks Streaky”
Streaks usually mean the paint coat was too thick or you didn’t let the
first layer dry. Use two to three thin coats instead of one heavy one, and
don’t overwork the brush once the paint starts drying.
“The Paint Is Peeling Off”
That’s almost always a prep issue. Next time, make sure you clean the
glass thoroughly with soap and then wipe it with rubbing alcohol. Sealing
the finished design with a clear topcoat also helps protect it from
chipping and handling.
“The Lantern Isn’t Bright Enough”
Dark or heavily opaque paint can block a lot of light. Try:
- Leaving a larger clear glass window or cutout.
- Using lighter or more translucent colors.
- Switching from a single tealight to a small strand of fairy lights.
“My Wire Handle Is Crooked”
When wrapping wire, keep it snug under the jar’s rim and twist your
starting and ending points together at one side, not the front. If your
jar has those classic mason jar shoulders, tuck the wire into that groove
to help keep it level.
Real-Life Crafting: Experiences with Painted Mason Jar Lanterns
Tutorials are great, but sometimes it helps to hear what actually happens
when people sit down with paint, jars, and a wild amount of enthusiasm.
Here are some “experience-based” tips and stories that can help you plan
your own mason jar lantern sessionwhether it’s just you and a podcast or
a full-blown craft night.
Hosting a Mason Jar Lantern Craft Night
Painted mason jar lanterns are perfect for group projects because everyone
can follow the same basic steps while personalizing colors and designs.
If you’re hosting friends or family:
-
Pre-wash and prep the jars. This is the least glamorous
step, and your guests will have more fun if they can dive straight into
painting. -
Set up a “paint bar.” Offer a mix of neutral shades
(white, cream, gray) and accent colors (navy, teal, mustard, blush).
People who say “I’m not creative” suddenly become very creative when
there are options. -
Have a drying station. A side table or shelf lined with
parchment or freezer paper gives everyone a place to park jars between
coats without accidentally gluing them to your good tablecloth. -
Plan for snacks and dry time. Paint layers and sealer
need time to set, which conveniently creates built-in snack breaks.
The best part? When the lights are finally turned down and everyone flips
on their LED tealights, the room instantly looks like a cozy backyard
bistro. People love taking home something they actually want to display.
Crafting with Kids (Without Losing Your Mind)
Kids adore mason jar lanterns, especially when they get to pick the
colors. To keep the experience fun instead of chaotic:
-
Use washable paint whenever possible. You can always go
back and add a more durable sealer later. -
Pre-tape designs for them. Add stars, hearts, or
stripes with painter’s tape so kids can slap paint on and still get a cool
reveal when the tape comes off. -
Offer simple add-ons. Let them choose ribbon, stickers,
or pre-cut vinyl shapes instead of asking them to paint tiny details. -
Stick to LEDs. Lanterns become instant room decor or
night-lights when they’re safe to keep near beds or bookshelves.
You’ll end up with some jars that are surprisingly stylish and a few that
are pure chaos in glass formbut those tend to be the favorites.
Outdoor Reality Check: Weather, Dust, and Real Life
If you plan to leave lanterns outside for more than a single evening, a
few extra steps can help them last:
-
Use outdoor-rated sealer. Regular craft sealers are
fine for indoor decor, but outdoor sealers handle moisture and UV better. -
Store them between seasons. Bring lanterns inside when
not in use to avoid dust buildup, faded paint, and spider tenants. -
Choose simple designs for high-traffic areas. If a jar
might get bumped or knocked over (porch steps, kids’ play spaces),
simpler designs are easier to touch up later.
Over time, most people realize they prefer a mix: a few “showpiece”
lanterns that get brought out for special events and a collection of
simpler jars that live on the patio for everyday use.
Why You’ll Probably Make More Than One
The sneaky truth about painted mason jar lanterns is that it’s almost
impossible to make just one. Once you figure out what colors look great on
your porch or dining table, you’ll start thinking:
- “What if I did a mini version for the bathroom shelf?”
- “These would make great teacher gifts…”
- “I should do a whole set for the next backyard party.”
Before you know it, you’ve got your own little glass lantern army. And
honestly? That’s not a bad problem to have.
Conclusion
Painted mason jar lanterns are one of those rare DIY projects that check
every box: low cost, low stress, high impact, and endlessly adaptable.
Whether you’re copying a Hometalk project, designing your own pattern from
scratch, or handing jars and paint to a group of kids and seeing what
happens, you’ll end up with something warm, personal, and surprisingly
polished.
Start with a few simple jars, a couple of favorite paint colors, and a
handful of LED tealights. Once you see your lanterns glowing in the dark,
you’ll understand why mason jar projects never seem to go out of style.
SEO Snapshot
tips, and design ideas for every season.
sapo:
Painted mason jar lanterns turn simple glass jars into glowing decor that
looks straight out of a Hometalk featurewithout the designer price tag.
In this in-depth guide, you’ll learn exactly how to clean, paint, and
decorate jars for that dreamy, diffused glow, plus smart tips for choosing
colors, adding seasonal designs, and keeping everything safe with LED
lights. From cozy fall leaf lanterns and patriotic porch displays to
kid-friendly stained glass jars and fairy-tale night-lights, you’ll find
step-by-step instructions, troubleshooting advice, and real-world
experience to help your first batch turn out beautifully. Whether you’re
crafting solo or hosting a DIY night with friends, these mason jar
lanterns will quickly become your favorite go-to project for gifts,
parties, and everyday ambiance.





