Table of Contents >> Show >> Hide
Hummingbirds are beautiful creatures that add charm and wonder to any garden. These tiny birds are known for their rapid wing flaps and vibrant plumage. If you’ve ever wanted to attract hummingbirds to your garden, creating a homemade hummingbird feeder using a simple soda bottle is a fun and cost-effective way to do it. Not only will you be able to observe these fascinating creatures up close, but you’ll also be helping to sustain their diet. Let’s dive into how you can make a hummingbird feeder using a soda bottle.
Why Use a Soda Bottle for a Hummingbird Feeder?
Repurposing an old soda bottle to create a hummingbird feeder is an eco-friendly and budget-friendly way to attract these beautiful birds. Instead of buying expensive store-bought feeders, this DIY project allows you to use something you already have, reducing waste and giving your bottle a new purpose. Additionally, it provides a great opportunity for creativity and customization.
Materials You’ll Need
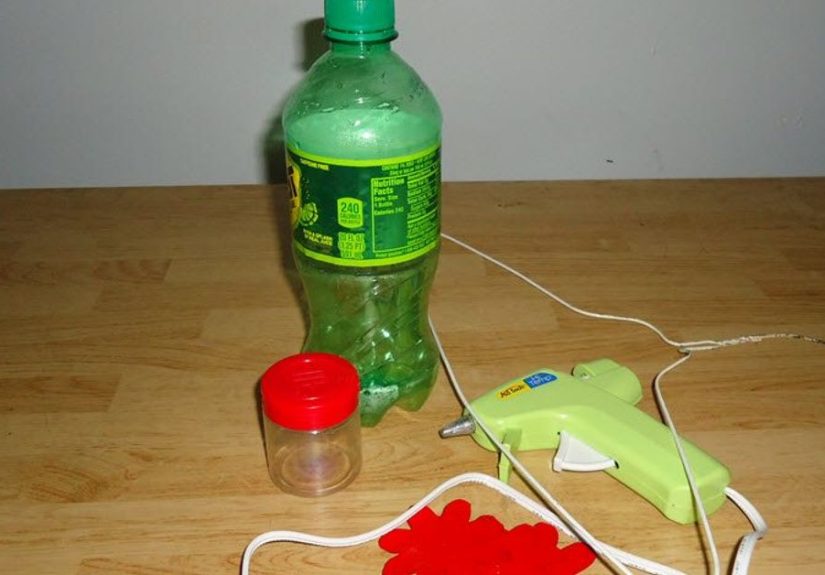
- 1 empty soda bottle (preferably 16-20 oz.)
- Red acrylic paint (optional)
- Plastic flowers or small red plastic pieces
- Small rubber stopper (for the bottle opening)
- Plastic tubing or small straw (optional for a more controlled flow)
- Drill or sharp object (to make holes for the feeding ports)
- Hummingbird nectar (1 part sugar to 4 parts water)
- String or wire (for hanging the feeder)
Step-by-Step Instructions
Creating your own hummingbird feeder with a soda bottle is simple, and here’s a step-by-step guide to help you get started:
Step 1: Clean the Soda Bottle
Start by thoroughly cleaning the soda bottle. Remove any labels and ensure that there’s no residue left inside. You want the bottle to be completely clean to avoid any harmful chemicals or residues that could harm the birds.
Step 2: Add Color
Hummingbirds are attracted to the color red, so adding a pop of red to the bottle will make it more inviting. You can paint the bottle with red acrylic paint, but make sure the paint is non-toxic. If you prefer a less permanent option, you can also glue red plastic flowers or pieces of red plastic to the bottle.
Step 3: Create the Feeding Ports
Using a drill or a sharp object, carefully make a few small holes around the lower portion of the soda bottle. These will serve as the feeding ports. Be sure that the holes are just big enough to allow nectar to drip out but small enough to prevent the nectar from flowing too freely, which could cause a mess.
Step 4: Attach the Flower Feeding Ports
To make the feeder more realistic, you can attach plastic flowers to the holes you’ve made. These will act as the feeding ports, allowing the hummingbirds to access the nectar. You can find small plastic flowers at craft stores, or even use small red plastic pieces. Secure the flowers or plastic pieces with glue, ensuring they are firmly attached.
Step 5: Prepare the Nectar
Next, you need to prepare the hummingbird nectar. This is a simple mixture of water and sugar. For every 1 part sugar, add 4 parts water. Boil the water to dissolve the sugar, then let it cool to room temperature. Avoid using honey or artificial sweeteners, as they can harm hummingbirds.
Step 6: Fill the Bottle with Nectar
Once the nectar is cool, carefully pour it into the soda bottle. Fill it about three-quarters of the way full. You don’t want to overfill it, as this can cause spilling when the feeder is in use.
Step 7: Secure the Stopper and Attach the Tube
Fit a small rubber stopper into the bottle’s opening. This will prevent the nectar from leaking out. If you’re using a plastic tube or straw to control the flow, attach it to the stopper to ensure a slow drip that won’t overwhelm the hummingbirds. Make sure the flow is gentle enough to prevent drowning.
Step 8: Hang the Feeder
Now that your hummingbird feeder is ready, it’s time to hang it up. Use string or wire to create a hanging loop. Choose a location in your yard that’s visible and has flowers or plants nearby to attract the hummingbirds. Hang the feeder in a place that’s safe from predators, like a tree branch or a hook on your porch.
Maintenance and Tips
To keep the hummingbird feeder in top condition, make sure to clean it regularly. Nectar can spoil quickly, especially in hot weather, so clean the bottle and feeding ports every few days. Replace the nectar as needed to ensure that the birds have fresh food.
Why Hummingbird Feeders Are Important
Hummingbirds are important pollinators, and providing them with a reliable food source can help support their population, especially during times when nectar-rich flowers may be scarce. By creating your own hummingbird feeder using a soda bottle, you’re not only offering a fun, interactive way to enjoy nature but also contributing to the well-being of these delightful creatures.
Conclusion
Making a hummingbird feeder using a soda bottle is an easy, creative, and eco-friendly way to attract these beautiful birds to your garden. With a few simple materials and a little creativity, you can create a functional feeder that offers hours of enjoyment as you watch the hummingbirds flit and feed. It’s an affordable project that also serves as a wonderful way to contribute to your local ecosystem. So, grab that empty soda bottle and get started on your own DIY hummingbird feeder today!
Additional Experiences with Soda Bottle Hummingbird Feeders
Over the years, I’ve had the pleasure of watching many different kinds of birds, including hummingbirds, feed at my homemade soda bottle feeder. It’s amazing to see how quickly they learn to find it, and their agility as they hover in front of the bottle is truly mesmerizing. I’ve tried several different methods for making the feeder more efficient, including experimenting with different-sized holes for the nectar flow. Sometimes, adding a little bit of extra red coloring helps to draw the birds in, but I’ve also found that natural nectar, without added dyes, works just as well.
One tip I’ve learned through experience is that positioning the feeder is key. I initially hung my feeder right next to a bush, but I quickly realized that the birds were often distracted by the surrounding foliage. So, I moved it to a more open area, where the birds felt safer and more comfortable. This small change made a huge difference in the frequency with which the birds visited the feeder. Another lesson learned was to avoid overfilling the bottle with nectar. Too much nectar can cause spills when the birds drink, leading to sticky messes on the surrounding plants.
Cleaning the feeder regularly is also essential. I’ve found that, especially during hot weather, the nectar can ferment quickly, making it unsafe for the birds. A good cleaning routine not only ensures that the birds are getting fresh food, but it also prevents mold from building up in the feeder. It’s a bit of a hassle, but the joy of seeing those tiny birds come and go makes it well worth the effort.
In conclusion, the experience of creating and maintaining a hummingbird feeder using a soda bottle has been incredibly rewarding. It’s a simple and affordable DIY project that can make a huge difference in attracting and supporting hummingbirds in your local environment. Whether you’re a beginner or a seasoned bird watcher, making a soda bottle hummingbird feeder is a fun and meaningful way to connect with nature.