
Table of Contents >> Show >> Hide
- Know Your Cuts: Miter vs. Bevel (and Why the Words Matter)
- Miter Saw Safety: The Rules That Prevent “Emergency Room Content”
- Set Up Your Miter Saw for Accurate Cuts
- Pick the Right Blade (Because Teeth Matter More Than Confidence)
- Marking and Measuring: The Two Minutes That Prevent Re-Cutting Everything
- How to Make a Basic 90° Crosscut (The Bread-and-Butter Cut)
- How to Make a Miter Cut (Angles for Frames, Trim, and Clean Corners)
- How to Make a Bevel Cut (Tilting the Blade)
- How to Make Compound Cuts (Crown Molding Without the Tears)
- Using a Sliding Miter Saw the Safe Way (Push, Don’t “Pull Cut”)
- Accuracy Upgrades That Cost Little (But Feel Like Cheating)
- Common Miter Saw Mistakes (and How to Avoid Them)
- Maintenance: Keep It Cutting Like a Pro (Not Like a Haunted Door Hinge)
- Real-World Experiences: What People Learn After the First “Oops” Cut (About )
- Conclusion
- SEO Tags
A miter saw is basically a woodworking time machine: you set an angle, pull a handle, andpoofyour board becomes “exactly the right length” (or, if you’re like most of us on a Tuesday, “exactly 1/8" too short”). The good news: once you learn a few core habitssafe setup, clean marking, and the right cutting sequenceyou can make crisp, repeatable cuts for trim, frames, flooring, furniture parts, and anything else that benefits from “square” being more than a vague suggestion.
This guide walks you through how to use a miter saw safely and accurately, including basic crosscuts, miter cuts, bevel cuts, compound cuts (hello, crown molding), and the real-world tricks that keep your fingers attached and your joints tight.
Know Your Cuts: Miter vs. Bevel (and Why the Words Matter)
Most miter saw confusion comes from one simple mix-up: people call everything an “angle cut.” A miter is an angle across the face/width of the board (think: picture-frame corners). A bevel is an angle through the thickness of the board (think: tilting the blade to chamfer an edge). A compound cut combines both at oncecommon in crown molding and other trim where the workpiece meets walls/ceilings at angles.
Types of miter saws (quickly, without the marketing confetti)
- Standard miter saw: rotates left/right for miter cuts, no blade tilt.
- Compound miter saw: rotates and tilts for bevel + miter.
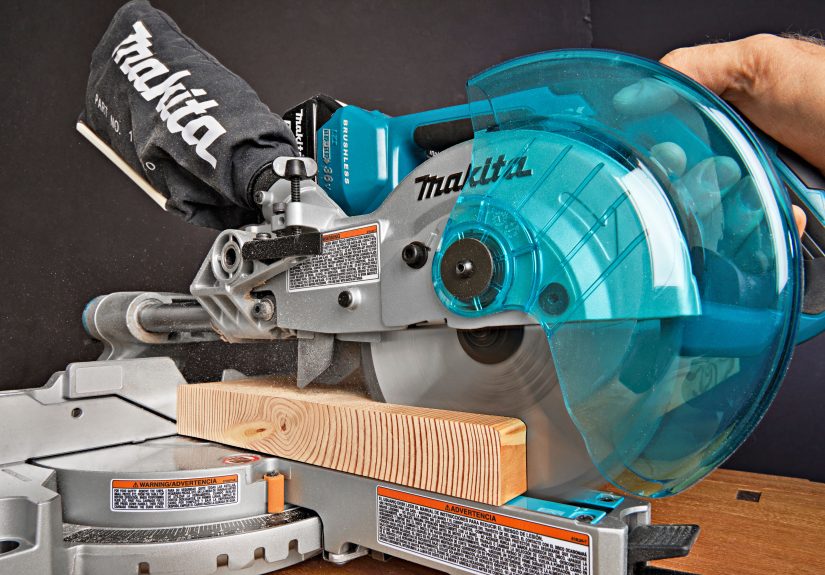
- Sliding compound miter saw: adds forward/back slide to cut wider boards.
- Dual-bevel: tilts both left and right so you don’t have to flip workpieces as often.
Miter Saw Safety: The Rules That Prevent “Emergency Room Content”
Miter saws are friendly-looking tools. They are also extremely good at turning wood into two pieces of woodand they are not picky about what else is in the way. Make these habits automatic:
1) Gear up and set up (before the switch ever clicks)
- Eye protection is non-negotiable; hearing protection is strongly recommended.
- Avoid loose sleeves, jewelry, and anything that can snag.
- Use the blade guard as designed; never tie or wedge it open.
- Work on a stable, level surface. If the saw wobbles, your cut (and confidence) will wobble too.
2) Respect the “no-hands zone”
Many shop safety guides emphasize keeping hands a safe distance from the blade and never reaching around the cutline. A simple rule: keep your hands well away from the blade path and use clamps when the piece is small, narrow, round, or awkward. If a cut would force your fingers near the blade, that’s your cue to change the planuse a clamp, a stop, a jig, or a different tool.
3) Clamp and support like you mean it
- Clamp whenever possible, especially for short pieces, round stock (dowels/tubing), or anything that can roll.
- Support long boards so the workpiece stays flat on the table. A board tipping mid-cut can pinch the blade or move unexpectedly.
- Never “freehand” a miter saw cut. The workpiece should be stationary and controlled.
4) Let the blade stop completely before you lift the head
After the cut, keep the saw head down, release the trigger, and wait until the blade fully stops before raising it or grabbing offcuts. Many accidents happen in the “cut is done, brain is already on the next step” moment.
Set Up Your Miter Saw for Accurate Cuts
If your saw isn’t square, your project becomes a time-consuming puzzle of “why won’t these corners close?” A 3-minute check can save an hour of putty and denial.
Step 1: Stabilize the saw
- Mount it to a bench, a stand, or a sturdy temporary platform.
- Make sure the table is cleanno screws, scraps, or tiny offcuts waiting to become airborne.
- Set up a roller stand or wing supports for long stock.
Step 2: Check the fence and blade are square
Unplug the saw (or remove the battery). Use a quality square to check that the blade is 90° to the fence at the 0° miter setting. If you see daylight where there shouldn’t be daylight, adjust the fence and re-check. Many saws also have adjustment screws or stops for bevel at 0° and 45°; if those stops drift, your “perfect” bevel won’t be.
Step 3: Confirm the pointer/scale isn’t lying
Even if the saw is mechanically square, the indicator needle might be off by a hair. If you rely on the scale for repeat cuts, calibrate the pointer so “0” actually means “0.”
Pick the Right Blade (Because Teeth Matter More Than Confidence)
A factory blade will cut wood. It may also chew wood, fuzz wood, burn wood, or leave you wondering if sandpaper is a lifestyle. For clean crosscuts and trim:
- General carpentry: 40–60 tooth crosscut blade is a solid all-around choice.
- Trim and finish work: 60–80 tooth blade typically leaves a cleaner edge.
- “Grabby” saw or heavy stock: many woodworkers prefer blades designed to reduce self-feeding (often discussed as “less aggressive” hook angles).
Also: sharp blades cut cleaner and safer. Dull blades encourage forcing the cut, and forcing the cut is where bad ideas go to breed.
Marking and Measuring: The Two Minutes That Prevent Re-Cutting Everything
Use a simple, repeatable marking system
- Mark the cutline clearly with a pencil or knife line.
- Mark an X on the waste side so you don’t “accurately” cut the wrong end. (It happens.)
- For trim, mark the face orientation: “TOP,” “WALL,” or “CEILING” as needed.
Line up the teeth, not the blade plate
The kerf (cut width) is made by the teeth, not the smooth body of the blade. When aiming for precision, line the teeth just to the waste side of the mark. If you’d rather sneak up on a perfect length, cut slightly long and trim down with small, controlled passes.
How to Make a Basic 90° Crosscut (The Bread-and-Butter Cut)
- Set the miter to 0° and lock it.
- Place the board flat on the table with the edge tight to the fence.
- Support long stock so it stays flat and doesn’t lift or tip.
- Clamp if needed (especially for small pieces).
- Dry-run the cut: lower the blade (with power off) to confirm alignment and clearance.
- Start the saw and let it reach full speed.
- Lower smoothly through the cutno forcing.
- Hold the head down, release the trigger, and wait for the blade to stop before lifting.
How to Make a Miter Cut (Angles for Frames, Trim, and Clean Corners)
A miter cut is made by rotating the base left or right. The classic example is a picture frame: four pieces, each end cut at 45° so the corners meet at 90°.
Example: Picture frame corner at 45°
- Set the miter to 45° (left or right depending on which corner you’re making).
- Keep the show face consistent (e.g., always face up) so your miters mirror correctly.
- Cut two opposing pieces with complementary angles (don’t accidentally cut four “left corners” unless you’re building a modern art trapezoid).
Pro accuracy tip: “flip test” your 45s
If two 45° cuts don’t close into a clean 90° when you put them together, the saw (or technique) needs attention. Tiny errors multiply fast across a room of trim.
How to Make a Bevel Cut (Tilting the Blade)
Bevel cuts happen when you tilt the saw head. Common bevel angles are 45° for chamfers and trim transitions, but your project may call for anything within the saw’s bevel range.
- Unlock the bevel and tilt to the desired angle.
- Check fence clearance before powering on (some bevel settings require sliding the fence out of the way).
- Lock the bevel, align your mark, and cut with the same smooth, controlled motion as a crosscut.
How to Make Compound Cuts (Crown Molding Without the Tears)
Crown molding is where miter saws earn their keepand where many DIYers discover new emotions. There are two common approaches:
Method A: Cut crown “nested” (as it sits on the wall/ceiling)
In the nested method, you hold the molding against the fence at the same angle it will sit in the room. The big advantage: you typically don’t need a bevel angleoften you’re adjusting the miter only. The tradeoff: you need solid support, sometimes crown stops or a simple jig, and consistent positioning.
Method B: Cut crown “flat” using compound settings
In the flat method, the molding lays flat on the saw table and you use both a miter angle and a bevel angle. Many saws even mark common crown settings (because enough people have suffered). For “standard” crown profiles, you’ll often see settings around 31.6° miter and 33.9° bevel for 90° corners but real rooms are rarely perfect, so always test on scrap and fine-tune.
Make crown molding less painful (three sanity-saving rules)
- Label the molding (ceiling edge, wall edge, and which corner you’re cutting).
- Cut test pieces for inside and outside corners before touching your expensive trim.
- Don’t trust the room to be square. Adjust for slightly-open or slightly-closed corners as needed.
Using a Sliding Miter Saw the Safe Way (Push, Don’t “Pull Cut”)
Sliding miter saws can cut wider stock by pulling the head forward and then moving it through the cut. The key is the sequence:
- With the saw off, pull the head forward to the front of the workpiece and line up your cut.
- Start the saw, let it reach full speed, then lower into the wood.
- Push the head back toward the fence to complete the cutsteady and controlled.
- Keep the head down, release the trigger, and wait for a full stop before lifting.
Why push? Because pulling through the cut can encourage a “climb” effect where the blade wants to self-feed toward you. Pushing back toward the fence helps keep the cut controlled and reduces the “lurch factor.”
Accuracy Upgrades That Cost Little (But Feel Like Cheating)
Add a sacrificial fence
Screw a straight piece of plywood or MDF to your saw’s fence (without interfering with blade travel). This tightens the gap around the blade and often reduces tear-out on delicate trim.
Use a stop block for repeat cuts
Cutting ten identical studs, rails, or trim returns? Don’t measure ten times. Clamp a stop block so each board registers in the same position, then cut. Consistency goes way up; errors go way down.
Support + clamp = calmer cutting
A wiggly board is a recipe for burning, binding, and bad language. Supporting long pieces and clamping short ones makes the saw feel “easier” because you’re removing variables.
Common Miter Saw Mistakes (and How to Avoid Them)
- Lifting too early: wait for the blade to stop before raising the head or grabbing offcuts.
- Cutting tiny pieces freehand: clamp, use a jig, or use a different tool that keeps hands farther away.
- Letting offcuts get trapped: don’t jam cutoff pieces against a stop where they can wedge and kick back.
- Ignoring warped stock: seat the board firmly and avoid gapswarped wood can rock and pinch the blade.
- Using the wrong blade: a rough blade can splinter trim; an overly aggressive blade can feel “grabby.”
Maintenance: Keep It Cutting Like a Pro (Not Like a Haunted Door Hinge)
- Unplug/remove battery before changing blades or making adjustments.
- Clean dust from the table, fence, and moving parts; buildup can affect accuracy.
- Check the guard for smooth operation.
- Inspect the blade for pitch buildup, missing teeth, or wobble.
- Keep rails clean on sliding models so the head moves smoothly without sticking.
Real-World Experiences: What People Learn After the First “Oops” Cut (About )
Here’s the funny thing about learning how to use a miter saw: most people don’t struggle with the motor, the blade, or the angles. They struggle with the tiny moments in betweenwhere the saw is technically capable, but the setup is quietly sabotaging them.
One of the most common “beginner mysteries” goes like this: you cut two pieces at 45°, you press them together, and there’s a gap you could mail a postcard through. The immediate instinct is to blame the saw (and sometimes it is), but just as often it’s a simple consistency issue: the board wasn’t tight to the fence, the offcut pinched the blade, or your “show face” flipped between cuts. In real shops, you’ll see carpenters mark the face and edge like they’re labeling lab samplesbecause that little pencil note saves a lot of rework.
Another classic experience: the “why is my saw grabby?” moment, especially on sliding saws. The first time someone tries to pull the saw through the cut (like a radial arm saw), the head can lurch forward in a way that feels like the tool suddenly got an opinion. That’s usually the day they learn the push-through technique: start forward, drop in, then push back toward the fence. It feels calmer, cleaner, and more controlledlike the saw is cooperating instead of trying to star in an action movie.
Then there’s crown moldingthe rite of passage. Many DIYers start with the flat/compound method because it sounds “mathematical,” like the angles should solve everything. But houses have a sense of humor. Corners are rarely a perfect 90°, ceilings are rarely perfectly level, and walls sometimes wander like they’re sightseeing. The practical experience is learning to treat settings as a starting point, not a guarantee. People who get good at crown don’t get good because they memorize one magic anglethey get good because they test-fit scraps, label each corner, and adjust the miter (or change methods) until the joint closes.
You also see a lot of “I didn’t know I needed support stands until I did” stories. A long board that sags off the table can lift slightly during the cut, which changes the angle and leaves you with a joint that looks fine on one end and weirdly open on the other. Once someone adds a roller stand or a simple miter saw station with wings, their results jump immediatelynot because their skills changed overnight, but because the wood finally stayed put.
Finally, experienced users develop an almost boring obsession with sequence: line up with the saw off, clamp when needed, let the blade reach full speed, cut smoothly, wait for a full stop, then move the work. It’s not glamorous. But it’s exactly why their cuts look clean and their fingers stay where they startedattached to them.
Conclusion
A miter saw is one of the fastest ways to level up your woodworking and DIY projectsif you treat it like a precision tool, not a shortcut machine. Get the setup stable, keep the work tight to the fence, use clamps and supports, choose a blade that matches the job, and follow a safe cutting sequence (especially on sliding saws). Do that, and you’ll get clean, repeatable cuts that make trim look professional, frames close tightly, and projects go together like you planned it that way.





