Table of Contents >> Show >> Hide
- Do You Actually Need New Rotors?
- Tools, Parts, and Supplies
- Safety Setup (Because Gravity Has a Perfect Record)
- Step-by-Step: How to Replace Brake Rotors
- 1) Prep the brake fluid reservoir
- 2) Remove the wheel
- 3) Remove the caliper (and support it)
- 4) Remove the pads and caliper bracket
- 5) Remove the old rotor
- 6) Clean the hub face (this prevents “mystery vibration”)
- 7) Prep the new rotor
- 8) Install the new rotor
- 9) Service slide pins and hardware (quiet brakes are happy brakes)
- 10) Compress the caliper piston
- 11) Reassemble: bracket, pads, caliper
- 12) Reinstall the wheel and torque lug nuts correctly
- 13) Pump the brake pedal before driving
- Rear Rotors: Special Cases to Know
- Bedding-In New Rotors and Pads (Yes, It Matters)
- Common Mistakes That Cause Vibration, Noise, or Fast Wear
- Cost, Time, and When to Call a Pro
- FAQ
- Real-World Experiences: What DIYers Learn Replacing Brake Rotors
- Conclusion
Replacing brake rotors sounds like the kind of job reserved for people with a lift, a wall of tools, and a mysterious jar labeled “extra bolts.” In reality, many rotors can be replaced at home with basic tools, a little patience, and one key rule: if anything feels unsafe, stop. Brakes are not the place to “send it.”
This complete guide walks you through brake rotor replacement step-by-step, explains why rotors cause pedal pulsation, covers common “why won’t this come off?” moments, and finishes with real-world lessons DIYers learn the hard way (so you don’t have to).
Do You Actually Need New Rotors?
Before you start unbolting things, confirm the problem. Rotors typically need replacement when they’re below minimum thickness, warped (runout), heat-checked/cracked, or deeply scored. The “minimum thickness” spec is usually stamped on the rotor hat or listed in your service manual. If your rotor is at/under that number, it’s doneno spa day (machining) will save it.
Common signs your rotors are the culprit
- Brake pedal pulsation when stopping from highway speeds (often caused by rotor runout or thickness variation).
- Steering wheel shake during braking (often front rotors, but not always).
- Grinding (can be pads-to-metal, which may score rotors fast).
- Visible grooves, hot spots (blue/purple patches), or cracks.
- Rust-jacked rotor edges in salty climates that chew up pads.
Pro tip: If you’re installing new rotors, installing fresh pads at the same time is usually the smart move. New pads on old rotors (or new rotors with half-worn pads) can lead to noise, uneven contact, and less predictable braking.
Tools, Parts, and Supplies
Gather everything first. This prevents the classic DIY finale: the car on stands while you Google “open auto parts store near me” on 2% battery.
Parts
- New brake rotors (correct position: front vs. rear, left/right if directional)
- Brake pads (recommended)
- New caliper bracket bolts or hardware (only if required by your vehicle/pad kit)
- Brake pad hardware kit (clips/abutments) if not included
Tools
- Floor jack + jack stands (never rely on the jack alone)
- Wheel chocks
- Socket set + breaker bar
- Torque wrench (seriouslythis is not optional if you want “correct”)
- C-clamp or caliper piston tool (rear calipers may need a rotate-and-push tool)
- Bungee cord / caliper hook (to support the caliper)
- Wire brush or abrasive pad for hub cleaning
- Rubber mallet (for stuck rotors)
- Impact driver (helpful for rotor retaining screws on some cars)
Chemicals & consumables
- Brake cleaner
- High-temp silicone brake grease (for slide pins and pad contact pointsNOT the friction surface)
- Anti-seize (optional, tiny amount on hub facevehicle-dependent; use sparingly)
- Shop towels, gloves, eye protection, dust mask
Safety Setup (Because Gravity Has a Perfect Record)
- Work on a flat surface.
- Chock the wheels that stay on the ground.
- Loosen lug nuts slightly before lifting.
- Lift at approved jack points and set the car firmly on jack stands.
- Keep brake dust under control: avoid blasting dust with compressed air. Use brake cleaner or wet methods to reduce airborne dust.
Quick reality check: If you don’t feel 100% confident supporting the vehicle safely, this job should be done by a professional shop. The “complete guide” does not include “complete recovery from a car falling.”
Step-by-Step: How to Replace Brake Rotors
Rotor replacement varies slightly by vehicle, but the overall process is consistent. The biggest differences are front vs. rear (parking brake designs) and whether your rear calipers need to be rotated to retract.
1) Prep the brake fluid reservoir
Open the hood and locate the brake fluid reservoir. When you push the caliper piston back, fluid level can rise. If it’s already near “MAX,” you may need to remove a little with a clean turkey baster (not the one from Thanksgivingunless you like living dangerously).
2) Remove the wheel
With the car on stands, remove the lug nuts and take off the wheel. Slide it under the car as an extra safety buffer (not a substitute for stands, just an extra layer).
3) Remove the caliper (and support it)
Turn the steering wheel for access if you’re doing front brakes. Remove the caliper guide/slide pin bolts. Carefully lift the caliper off the rotor and hang it with a bungee cord. Do not let it dangle by the brake hosehoses are not decorative suspension components.
4) Remove the pads and caliper bracket
Pull out the pads and any hardware clips. Many vehicles require removing the caliper bracket (the larger bolts behind the bracket) to free the rotor. These bolts can be tightuse a breaker bar and correct socket to avoid rounding them.
5) Remove the old rotor
Some rotors slide right off. Others behave like they’ve signed a long-term lease with the hub.
- If there are rotor retaining screws, remove them (often Phillips/torx; an impact driver helps prevent stripping).
- If the rotor is stuck from rust, apply penetrating oil around the hub center and let it soak.
- Use a rubber mallet to tap the rotor hat area evenly. Avoid hammering the studs.
- Some rotors have threaded “push-off” holesthread bolts in evenly to press the rotor off the hub.
6) Clean the hub face (this prevents “mystery vibration”)
This step is a vibration-prevention superpower. Rust or debris on the hub face can cause rotor runout, which leads to pedal pulsation after a few hundred miles. Use a wire brush or abrasive pad to clean the hub surface until it’s smooth and flat. Wipe clean with brake cleaner.
7) Prep the new rotor
New rotors often arrive with an oil coating to prevent rust in the box. Clean both rotor faces thoroughly with brake cleaner and a clean towel until there’s no residue. Handle rotors by the hat/edges when possiblefinger oils aren’t catastrophic, but clean is better.
8) Install the new rotor
Slide the rotor onto the hub. If your vehicle uses retaining screws, reinstall them (snug, not “I bench press trucks”). To keep the rotor flush while you work, you can thread on a lug nut backward temporarily.
9) Service slide pins and hardware (quiet brakes are happy brakes)
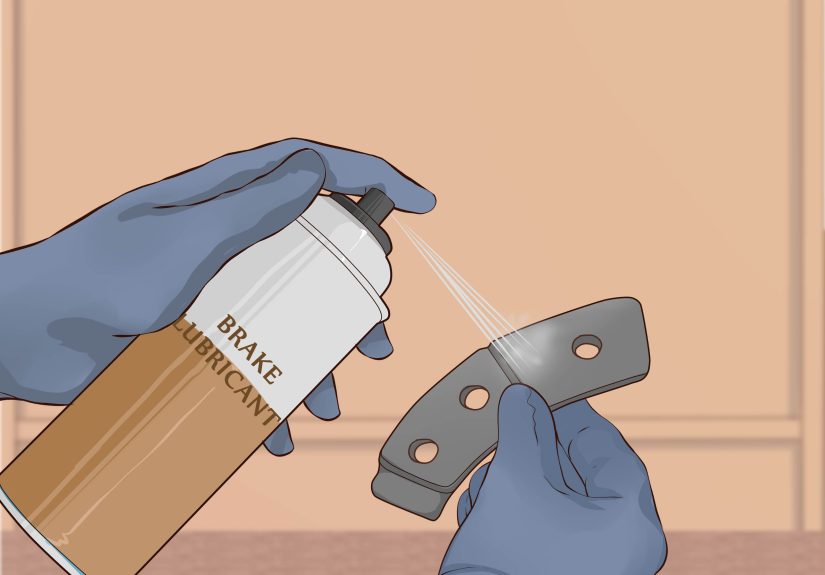
Pull the slide pins, wipe old grease, inspect boots, and re-lubricate with high-temp silicone brake grease. Replace worn clips/hardware so pads move smoothly. Sticking pins = uneven pad wear and heat = short rotor life.
10) Compress the caliper piston
Use a C-clamp or caliper tool to slowly push the piston back into the caliper. Go slowly and watch the brake fluid reservoir. On many rear brakes, the piston must be rotated while pushing (parking brake mechanism). If you force it the wrong way, it won’t moveand it may get damaged.
11) Reassemble: bracket, pads, caliper
Reinstall the caliper bracket and torque bolts to the manufacturer spec. Install new pads and hardware. Reinstall the caliper over the pads and torque the slide pin bolts to spec. Make sure the brake hose isn’t twisted and everything moves freely.
12) Reinstall the wheel and torque lug nuts correctly
Put the wheel back on, hand-tighten lugs in a star pattern, lower the vehicle, then torque lug nuts to spec. Incorrect lug torque (especially uneven torque) can contribute to rotor distortion and vibration over time.
13) Pump the brake pedal before driving
Before you move the vehicle, pump the brake pedal until it feels firm. This seats the pads against the rotor. If you skip this, the first pedal press may go to the flooran exciting moment you do not want at the end of your driveway.
Rear Rotors: Special Cases to Know
Rear brakes can add a few plot twists:
- Drum-in-hat parking brake: Some rear rotors have a small drum brake inside the rotor “hat.” If the rotor won’t come off, the parking brake shoes may be hanging up on a rust lip. You may need to back off the adjuster through an access hole.
- Electronic parking brake (EPB): Some vehicles require “service mode” via a scan tool or dash procedure before retracting rear calipers. Don’t guesscheck your manual.
- Rear pistons that rotate: Common on many cars. Use the correct tool so you don’t tear seals or strip the piston face.
Bedding-In New Rotors and Pads (Yes, It Matters)
Bedding-in (also called burnishing or break-in) helps transfer an even layer of pad material onto the rotor surface. Done right, it can improve feel, reduce noise, and prevent uneven deposits that mimic “warped rotors.”
A safe, generic approach (always follow your pad/rotor manufacturer guidance): perform a series of moderate stops to gradually bring brakes up to temperature, then allow them to cool with minimal braking. Avoid hard panic stops and avoid holding the pedal firmly while stopped immediately after heavy braking (that can imprint pad material).
Common Mistakes That Cause Vibration, Noise, or Fast Wear
- Skipping hub cleaning: Rust scale behind the rotor is a top cause of runout and pedal pulsation.
- Grease on friction surfaces: Keep lubricants on pins and pad contact points only.
- Over/under-torquing: Caliper bracket bolts, slide pins, and lug nuts all matter.
- Reusing damaged hardware: Bent clips and seized pins lead to uneven pad pressure.
- Ignoring caliper problems: A sticking caliper can cook a brand-new rotor.
- Driving without seating the pedal: You need to pump the brakes before rolling.
Cost, Time, and When to Call a Pro
Time: For a first-timer, plan 2–4 hours per axle. Rust, seized bolts, and rear parking brake designs can add time.
Cost: DIY rotor replacement can save labor costs, but don’t cheap out on safety items (stands, torque wrench, quality parts). The “budget brake job” gets expensive if it ends with a tow truck.
Call a pro if: bolts are seized beyond your comfort level, you see leaking brake fluid, you suspect caliper failure, your vehicle requires EPB service mode you can’t access, or you can’t achieve a firm brake pedal after assembly.
FAQ
Can I replace rotors without replacing pads?
You can, but it’s often not ideal. Old pads may have uneven wear patterns and can deposit material unevenly on the new rotor, creating noise or vibration. When in doubt, replace pads with rotors.
Do I need to bleed the brakes after changing rotors?
Usually noif you never opened the hydraulic system (no hose removal, no fluid loss). But if the pedal feels spongy, fluid was contaminated, or a component was replaced, bleeding may be needed.
Why does my car still vibrate after new rotors?
Common causes include hub rust not cleaned, uneven lug nut torque, caliper issues, or uneven pad deposits from improper bedding-in. Also confirm tires and suspension componentsvibration isn’t always brakes.
Real-World Experiences: What DIYers Learn Replacing Brake Rotors
Most brake rotor replacement “horror stories” aren’t about complicated engineeringthey’re about normal, everyday surprises. Here are the experiences DIYers commonly report, and what you can do about them.
1) The rotor that refuses to come off. In dry climates, rotors may slide off with a polite tug. In rust-belt areas, the rotor can fuse to the hub like it’s trying to become a single, unified life form. DIYers often discover (mid-swing) that whacking random places with a hammer is less effective than a method: penetrating oil, tapping the hat evenly, and using push-off bolt holes when available. The “aha” moment usually arrives when they stop fighting the rotor and start working the rust bond strategically.
2) The stripped rotor retaining screw. Many people meet their first truly stubborn fastener here. The screw looks innocenttiny head, big confidence. Then it strips, and suddenly you’re learning new words. DIYers who succeed tend to use the right bit, apply firm downward pressure, and use an impact driver before the screw rounds out. The lesson: small fasteners are still fasteners, and they deserve respect (and the correct tool).
3) “I put it all back together… and the pedal went to the floor.” This is usually not catastrophicmost of the time it’s simply that the caliper pistons were pushed back and the pads aren’t seated yet. Experienced DIYers pump the brake pedal until it’s firm before shifting into gear, every time, no exceptions. They also check the brake fluid level afterward. The shared takeaway is simple: the job isn’t done when the bolts are tight; it’s done when the pedal is firm and the system is checked.
4) The mystery squeak that appears after “everything was perfect.” DIYers frequently learn that brake noise is less about luck and more about details: clean hardware contact points, correct pad clips, properly lubed slide pins, and friction surfaces kept spotless. A tiny rust ridge or dry abutment clip can cause pads to hang up and squeal. People who redo the job and fix the noise usually say the same thing: “I rushed the small stuff.” Brakes are mostly small stuff.
5) Vibration returns a week laterand everyone blames the new rotors. The most common real-world cause isn’t “bad rotors,” it’s rotor runout from hub rust or uneven lug torque, or uneven pad deposits from skipping (or misunderstanding) bedding-in. DIYers who solve it often end up re-cleaning the hub face thoroughly, re-torquing lugs properly, and following a controlled break-in. The lesson is a bit unfair: you can do 95% of the job right and still feel it in the pedal. That last 5% is where the smooth braking lives.
6) Rear brakes introduce plot twists. People doing fronts for the first time often feel victoriousthen they try the rears. Suddenly there’s a parking brake mechanism, a piston that won’t compress unless it rotates, or an electronic parking brake needing service mode. DIYers share that the best move is not brute force, but research: check the service manual, confirm the caliper type, and use the correct piston tool. The “experience” here is humilitywith a side of preparation.
7) The pride of a careful test drive. The best shared experience is the quiet one: a cautious test drive in an empty area, gentle stops, listening for odd sounds, and confirming straight, smooth braking. DIYers who enjoy the results most are the ones who treat the first drive like a system check, not a victory lap. (Victory lap comes after bedding-in and a re-check for leaks and loose hardware.)
Conclusion
Learning how to replace brake rotors is one of the most satisfying DIY maintenance skillsbecause it delivers immediate results you can feel in every stop. If you focus on safe lifting, clean hub surfaces, correct torque, and proper bedding-in, you’ll get smoother braking, longer component life, and a lot more confidence the next time your pedal starts “pulsing a little.”