Table of Contents >> Show >> Hide
- What You’re Making (And Why a Blender Can Actually Do This)
- Ingredients
- Equipment
- The 15-Step Method: How to Make Ice Cream in a Blender with Milk
- Flavor Ideas That Stay Creamy (Not Icy)
- Troubleshooting: Fix Common Blender Ice Cream Drama
- Food Safety & Storage (Because Your Freezer Is Not a Magical Realm)
- FAQ: Quick Answers for Impatient Ice Cream Lovers
- Conclusion
- Extra: Real-World Blender Ice Cream Experiences (The 500-Word “I’ve Been There” Section)
Want homemade ice cream, but you don’t want an ice cream maker taking up precious cabinet space (right next to the waffle iron you “totally use all the time”)? Good news: your blender can absolutely help you make creamy, scoopable ice cream with milkif you play by freezer physics.
This guide walks you through a reliable, repeatable method that uses milk as a key ingredient, plus a few smart tricks to keep your dessert from turning into a sad, icy brick. You’ll get a 15-step process, flavor ideas, troubleshooting fixes, and real-world tips from blender battles won and lost.
What You’re Making (And Why a Blender Can Actually Do This)
“Real” ice cream is a delicate balance of frozen water, fat, sugar, and air. Ice crystals want to grow big and crunchy (rude), while we want them tiny and silky. Without an ice cream machine constantly churning, you need other ways to keep ice crystals small:
- Sugar lowers the freezing point so the mix stays scoopable.
- Fat (from dairy) helps create a creamy mouthfeel and blocks large ice crystal formation.
- Air makes it lighter and less rock-hard.
- Smart freezing (like freezing the base into cubes) lets your blender “churn” in bursts.
Translation: your blender can do a convincing “churn impression” if you freeze the base the right way and blend it at the right time. The result is a homemade, no-churn-style blender ice cream with milk that tastes like you planned aheadeven if you absolutely did not.
Ingredients
The Creamy Blender Base (Milk-Forward)
This makes about 1 to 1.5 quarts, depending on mix-ins and how much “quality control” you do with a spoon.
- 1 cup whole milk (milk is the star here; whole milk is best)
- 1 (14 oz) can sweetened condensed milk (yes, it’s milkjust sweet, thick, and extremely helpful)
- 1 1/2 cups cold heavy cream (for maximum creaminess; see swaps below)
- 2 tsp vanilla extract (or vanilla bean paste)
- 1/4 tsp fine salt (tiny amount, big flavor boost)
Optional Texture Boosters (Choose Your Adventure)
- 1–2 Tbsp vodka or bourbon (optional; helps keep it scoopableskip for kids)
- 1/4 tsp xanthan gum (optional; improves texture and slows iciness if you store it longer)
Milk & Dairy Swaps (If Your Fridge Is Judging You)
- Whole milk gives the best texture. Low-fat milk works, but your ice cream may freeze harder.
-
If you don’t have heavy cream, you can use half-and-half, but expect a slightly icier result.
(Still delicious. Just less “premium pint,” more “charming homemade.”) - Evaporated milk can help if you’re trying to boost creaminess without adding more cream.
Equipment
- Blender (a high-powered blender makes this easier, but a standard blender can work with patience)
- Ice cube tray or silicone cube mold
- Loaf pan or freezer-safe container with lid
- Spatula
- Whisk or fork
- Freezer space (the real luxury item)
The 15-Step Method: How to Make Ice Cream in a Blender with Milk
-
Chill your gear.
Put your storage container (and, if possible, the blender jar) in the freezer for 15–30 minutes.
Cold tools = less melting = smoother ice cream. -
Start with cold dairy.
Use milk and cream straight from the fridge. Warm ingredients melt faster during blending, and nobody wants “ice cream soup… again.” -
Blend the base.
Add whole milk, sweetened condensed milk, heavy cream, vanilla, and salt to the blender.
Blend on low, then medium for 10–15 secondsjust until smooth.
(You’re mixing, not auditioning for a jet engine.) -
Add optional smoothness helpers.
If using vodka/bourbon, add 1–2 tablespoons and pulse to combine.
If using xanthan gum, sprinkle it in while blending on low for a few seconds to prevent clumps. -
Do a quick taste test.
This is important for “quality assurance” and also for morale. Want it sweeter? You can blend in 1–2 tablespoons of sugar or honey.
Want more vanilla? Add a splash. -
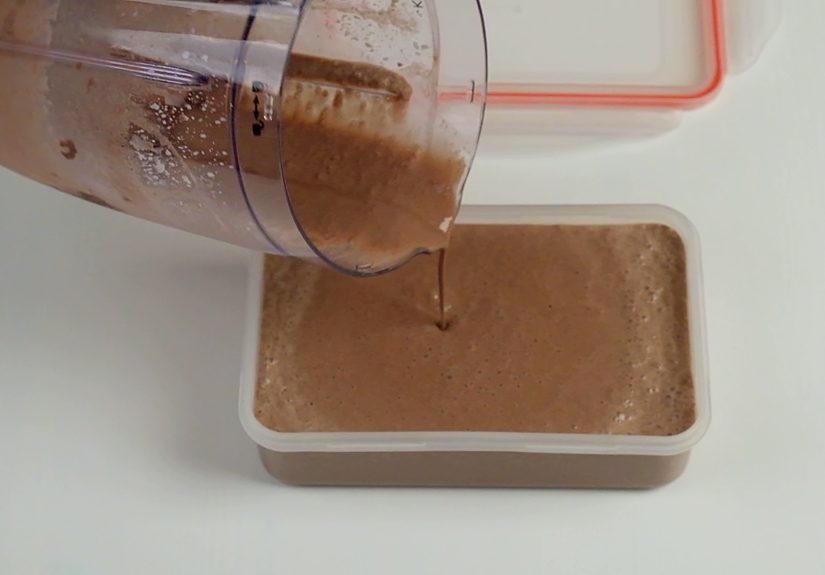
Freeze the base into cubes.
Pour the mixture into an ice cube tray or silicone mold.
Cover (plastic wrap helps prevent freezer smells from joining the party). -
Freeze until solid.
Freeze at least 6 hours, ideally overnight. You want the cubes fully frozen, not “kind of slushy like a bad margarita.” -
Prep for blending.
Pop the frozen cubes out and let them sit at room temperature for 3–5 minutes.
This tiny softening step protects your blender and your sanity. -
Load the blender smartly.
Put about half the cubes in first.
Add 2–4 tablespoons of milk (just a splash) to help the blades catch.
You can add more latergo slow. -
Pulse like you mean it.
Use short pulses at first.
Stop and scrape down the sides as needed.
If your blender complains loudly, it’s not being dramaticadd a teaspoon or two more milk and keep pulsing. -
Blend to soft-serve texture.
Once the cubes break down, blend on medium-high in short bursts until it looks like thick soft serve.
Don’t over-blend into a liquid. If it starts loosening too much, stopvictory is near. -
Stir in mix-ins the right way.
Fold chunky mix-ins (cookies, chocolate chips, toasted nuts) in by hand.
Blending them can turn your ice cream into “mystery speckled dust.” Sometimes that’s fine. Sometimes it’s tragic. -
Swirl, don’t blend, your sauces.
For caramel, fudge, peanut butter, or jam: spoon into the container in layers and gently swirl with a knife.
Thick ribbons stay pretty and taste better. -
Pack and press.
Transfer to your chilled container.
Press parchment or plastic wrap directly on the surface to limit ice crystals.
Lid on. -
Freeze to scoopable.
Freeze 2–4 hours for a firmer, scoopable texture.
For easiest scooping, let it sit on the counter 5–10 minutes before serving.
Congratulations: you made blender ice cream with milk and did not even need an ice cream maker.
Flavor Ideas That Stay Creamy (Not Icy)
The biggest enemy of homemade ice cream without a machine is extra waterespecially from juicy fruits and thin liquids.
Here are flavor ideas that play nicely with your blender method:
Low-Water, High-Impact Add-Ins
- Cookies & candy: crushed sandwich cookies, brownie chunks, chopped candy bars
- Chocolate: cocoa powder (whisk into the base), mini chips, chopped dark chocolate
- Nuts: toasted pecans, salted peanuts, pistachios
- Spices: cinnamon, espresso powder, pumpkin spice
Fruit Without the “Frozen Slush” Problem
- Use freeze-dried fruit powder for big flavor with minimal water.
- Use thick jams as swirls instead of raw fruit puree.
- If you want real fruit puree, cook it down into a thicker compote first (less water = smoother texture).
Troubleshooting: Fix Common Blender Ice Cream Drama
“It froze into a rock.”
- Let it sit 5–10 minutes before scooping.
- Next time, consider 1 tablespoon of vodka (adults only) or a small pinch of xanthan gum for smoother storage.
- Make sure you’re using enough sugar and not swapping in low-fat dairy without adjustments.
“It’s icy.”
- Use whole milk and keep the heavy cream (fat helps).
- Press wrap directly on the surface before freezing.
- Avoid watery mix-ins; thicken fruit into a compote or use jam swirls.
“My blender won’t blend the frozen cubes.”
- Let cubes soften for 3–5 minutes.
- Blend in smaller batches.
- Add milk a teaspoon at a timejust enough to get movement.
- Pulse first; don’t go full speed immediately.
“It turned into a milkshake.”
- You added too much liquid or blended too long. Still delicious.
- Pour it back into the container and freeze 1–2 hours, stirring once halfway if you can.
- Next time: less milk during blending, more pulsing, and stop at soft-serve stage.
Food Safety & Storage (Because Your Freezer Is Not a Magical Realm)
- Keep dairy cold until blending.
- Store in an airtight container with surface wrap to reduce ice crystals.
- For best texture, eat within 1–2 weeks. It’ll still be safe later, but texture tends to decline over time.
FAQ: Quick Answers for Impatient Ice Cream Lovers
Can I make blender ice cream with milk only (no cream)?
You can, but it tends to freeze harder and icier because milk has more water and less fat than cream.
If you go milk-only, consider using higher-fat milk (whole), adding more sugar, and serving it sooner.
For the creamiest “ice cream shop” vibe, keeping some cream (or using evaporated milk strategically) helps a lot.
Why use sweetened condensed milk?
It adds sweetness and reduces iciness because it contains less water and plenty of sugarboth help keep ice cream scoopable.
It’s a classic no-churn trick that also works beautifully in this blender method.
Do I really need to freeze the base into cubes?
If you want the blender to mimic churning, yescubes are the hack.
They let the blender break and aerate the mixture in stages instead of just spinning liquid around.
Conclusion
Making ice cream in a blender with milk is one part recipe and one part strategy game: control ice crystals, keep things cold, and blend like a patient wizard.
Freeze your milk-based base into cubes, pulse your way to soft-serve, then freeze it into scoopable glory.
Once you’ve nailed the vanilla base, every flavor variation becomes fair gamecookies, chocolate, fruit swirls, and whatever your pantry dares you to attempt.
Extra: Real-World Blender Ice Cream Experiences (The 500-Word “I’ve Been There” Section)
The first time I tried blender ice cream, I learned an important lesson: blenders do not respond well to surprises. I dumped a full tray of rock-solid cubes into a standard blender, hit “High,” and immediately invented a new kitchen soundsomewhere between a jackhammer and a stressed-out kazoo. The blender survived, but it made it very clear that I should soften cubes for a few minutes and pulse first. Consider that my blender’s official statement on the matter.
The second lesson was about liquid. In an emotionally reckless moment, I thought, “More milk will make this easier!” It didbrieflyright up until my “ice cream” became an extremely confident milkshake. Not a loss, technically. But if you want scoopable homemade ice cream without an ice cream maker, treat extra milk like hot sauce: you can always add more, but you can’t un-add it once you’ve gotten enthusiastic.
Flavor experiments are where blender ice cream gets fun. One weekend I tried a strawberry version by blending in fresh strawberries. The taste was great, but the texture… crunchy. Not “fun crunch,” like cookiesmore “tiny ice chips,” like a snow cone got promoted and then failed the background check. The fix was simple: either use jam as a swirl, or cook the fruit down into a thicker compote so you’re not adding a bunch of watery puree. After that, strawberry swirl became a regular in my freezer rotation.
Mix-ins also taught me humility. I once blended Oreos directly into the base thinking I’d get cookies-and-cream. I did! Sort of. It was more like “cookies-and-gray,” because pulverized cookie crumbs turn the whole thing a dramatic shade of cement. Still delicious, but not the look I was going for. Now I fold in cookie chunks by hand at the end so you get real bites of cookie instead of existential dessert dust.
If you’re making this for friends, here’s a surprisingly effective move: make two flavors from one base. Blend the cubes into soft serve, then split it into two bowls. Stir cocoa powder into one, keep the other vanilla, and layer them in the container with a fudge swirl. People will assume you own a tiny artisanal ice cream company. You don’t have to correct them. Let them believe.
My biggest “experience-based” tip is this: homemade blender ice cream is best when it’s fresh. Day one and day two are peak texture. After a week, it can start freezing harder and getting icier (still tasty, just less dreamy). So make a batch that fits your household’s realistic ice cream enthusiasm levelwhich is usually higher than you think. And remember: if it freezes too hard, a short countertop rest fixes most problems. Ice cream is forgiving, unlike most group chats.