Table of Contents >> Show >> Hide
- What Is Hemp Paper, Exactly?
- Why Use Hemp for Handmade Paper?
- Best Materials for Making Hemp Paper at Home
- How to Make Hemp Paper: Step-by-Step
- How to Make Better Hemp Paper
- Common Problems and Fixes
- What Can You Use Hemp Paper For?
- Is Making Hemp Paper Worth It?
- Experiences From Making Hemp Paper: What It Actually Feels Like
- Conclusion
If you have ever looked at a sheet of handmade paper and thought, “Wow, that looks expensive,” you were not wrong. But the good news is that making hemp paper at home is absolutely possible, and it is a lot less mysterious than it sounds. You do not need a medieval paper mill, a dramatic apron, or a beard worthy of a frontier poet. You just need fiber, water, a screen, some patience, and a willingness to accept that your first sheet may look less like stationery and more like a very emotional tortilla.
Hemp paper has a long reputation for strength, texture, and natural charm. In modern use, hemp fiber can contribute to paper products because the plant provides useful cellulose-rich fiber, and its stalk contains two main parts: the long outer bast fiber and the inner woody hurd. For home papermaking, though, the easiest route is not building an industrial hemp processing line in your garage. It is using legally obtained, pre-processed hemp fiber, hemp pulp, or a hemp-and-recycled-paper blend to create beautiful handmade sheets in a safe, practical way.
This guide walks through the home method step by step. It also explains what hemp paper is, what tools you need, how to improve sheet strength, and what mistakes to avoid. By the end, you will know how to make hemp paper that is useful for gift tags, cards, art paper, bookmarks, rustic stationery, and craft projects that make people say, “Wait, you made that?”
What Is Hemp Paper, Exactly?
Hemp paper is paper made from hemp fiber, usually from the stalk of industrial hemp. In commercial settings, producers may use bast fibers, hurd fibers, or a blend depending on the final product. Bast fibers are long and strong, which helps create durability. Hurds are shorter and more wood-like, which can make them useful in certain pulp applications. That is the industrial version.
At home, the simpler version is handmade hemp paper. Instead of full-scale chemical pulping, home makers usually work with softened plant fiber, ready-made pulp, or fiber blended with recycled paper. This method is more accessible, more affordable, and much less likely to make your kitchen smell like a failed science fair.
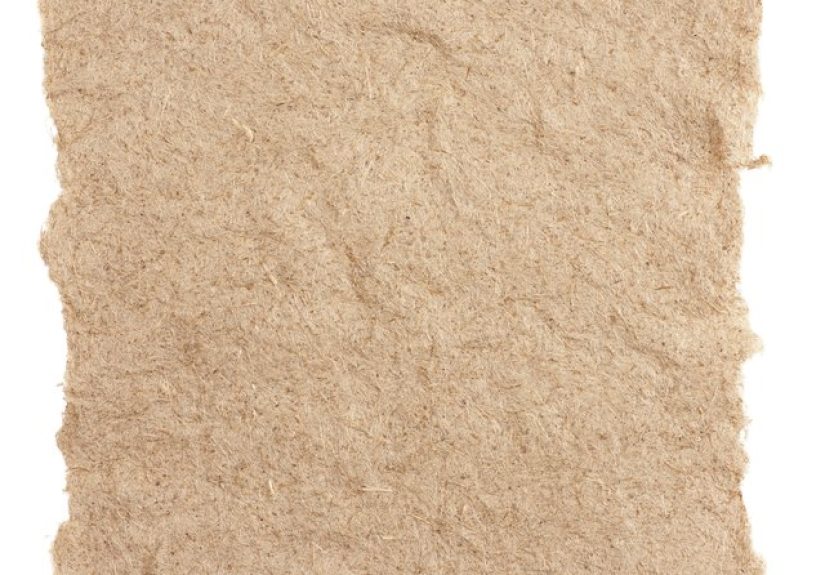
The result is often thicker, more textured, and more character-rich than standard office paper. Handmade hemp paper can look rustic and artsy or surprisingly refined, depending on how smooth your pulp is, how evenly you pull the sheet, and how much patience you have left after your third sponge squeeze.
Why Use Hemp for Handmade Paper?
There are a few good reasons people are drawn to hemp paper. First, hemp fiber has a reputation for strength. Second, it adds visible texture and personality to handmade sheets. Third, it fits beautifully with sustainable craft culture because many makers like working with plant fibers instead of relying only on wood pulp.
Another practical reason is that hemp blends well with other papermaking inputs. If pure hemp fiber feels too tough or slow to process by hand, you can combine it with recycled office paper, cotton rag pulp, or paper scraps. That gives you better formation, easier blending, and a gentler learning curve.
In other words, hemp is the interesting friend in the group project. It brings structure, texture, and a slightly cool vibe. But it also works best when everyone else in the room helps a little.
Best Materials for Making Hemp Paper at Home
Before you begin, remember this important point: the safest and most realistic home approach is to use pre-processed hemp fiber, commercially prepared hemp pulp, or a small amount of clean hemp fiber blended with recycled paper pulp. Industrial pulping involves equipment and processing methods that do not belong in a casual kitchen craft setup.
Recommended materials
- Pre-processed hemp fiber, hemp pulp, or clean legal industrial hemp fiber from a reputable supplier
- Recycled printer paper or uncoated scrap paper for blending
- Warm water
- A large tub or basin
- A blender used only for crafts
- A mould and deckle, or two picture frames with mesh attached to one frame
- Felt, interfacing, towels, or other absorbent couching surfaces
- A sponge
- A rolling pin, wooden board, or small press for flattening
- Optional sizing such as liquid starch or cornstarch for better writing performance
- Optional decorative add-ins like dried petals, thread fibers, or small botanical pieces
What kind of paper scraps work best?
Use clean, non-greasy, uncoated paper. Plain printer paper works well. Watercolor scraps and old notes can also help. Avoid paper with plastic coatings, glitter lamination, food residue, staples, or mystery goo. Mystery goo is never part of a successful artisanal journey.
How to Make Hemp Paper: Step-by-Step
Step 1: Prepare your fiber source
If you are using pre-processed hemp fiber, cut it into smaller pieces and soak it in warm water for several hours or overnight. If you are using ready-made hemp pulp, follow the supplier’s instructions for hydration. If you are using recycled paper too, tear it into small pieces and soak that separately or together, depending on your blend.
A beginner-friendly starting ratio is about 20% to 40% hemp fiber and 60% to 80% recycled paper pulp. This gives you some of hemp’s texture and strength without making the mixture too stubborn to blend. Pure hemp paper is possible, but it is more demanding and less forgiving for a first attempt.
Step 2: Blend the pulp
Fill your craft blender about halfway with water. Add a handful of soaked hemp fiber and paper scraps. Blend until the mixture looks like a smooth, soupy slurry. Think thin oatmeal, not chunky salsa. If the pulp still has big stringy knots, keep blending in short bursts.
Repeat until you have enough pulp for the number of sheets you want to make. Pour each finished batch into your large tub or vat. Add more water so the pulp can float freely. Stir the vat before every sheet because fibers love to settle to the bottom the second you stop paying attention.
Step 3: Add sizing if needed
If you want to write or paint on your finished hemp paper, mix in a small amount of sizing. A little liquid starch or dissolved cornstarch can help reduce absorbency. Without sizing, ink may feather and watercolor may spread more than you want. If your paper is for tags, collage, or decorative use, you can skip this step.
Step 4: Pull the sheet with a mould and deckle
Place the deckle on top of the mould. Stir the vat so the pulp is evenly suspended. Hold the mould and deckle together, dip them into the vat at a slight angle, and lift upward in one smooth motion. Keep the screen level as water drains away.
Give the frame a gentle shake from side to side and front to back. This helps distribute the fibers more evenly and can improve sheet formation. Do not shake like you are trying to wake up a ketchup bottle. Gentle is the magic word here.
Step 5: Let excess water drain
Hold the frame over the vat and let water drip off for a few seconds. The wet sheet will still be delicate at this point. If you see very thin spots, you may need a little more pulp in the next dip. If the sheet looks thick enough to qualify as a roof shingle, use less pulp next time.
Step 6: Couch the paper
Couching means transferring the wet sheet from the screen to an absorbent surface. Lay a piece of felt, interfacing, or towel flat on your workspace. Carefully flip the mould onto it. Use a sponge to press the back of the screen and absorb excess water. Then gently lift the mould away. If everything goes well, the wet paper sheet stays behind on the felt.
If everything does not go well, congratulations, you are now doing real papermaking.
Step 7: Press the sheet
Once you have a few sheets couched, layer another absorbent cloth on top and press down with your hands, a board, a rolling pin, or a simple press. This removes more water and helps flatten the paper. Even moderate pressure makes a noticeable difference in the final texture.
Step 8: Dry completely
Leave the sheets to dry on felts, cloth, boards, or a flat nonstick surface. Some makers air-dry for a day or two, then flip the sheets and let the other side finish drying. Others press partly dried sheets under boards to keep them flatter. Drying time depends on sheet thickness, room humidity, and whether your climate believes in helping you at all.
When the paper is dry, peel it off carefully. If the sheet curls, press it under heavy books overnight. Your hemp paper is now ready for use.
How to Make Better Hemp Paper
Use a blend for smoother beginner results
Pure hemp fiber can be beautiful, but a hemp-and-recycled-paper blend is usually easier for first-time makers. The recycled fiber helps the sheet knit together evenly, while the hemp adds character and strength.
Blend longer for finer texture
The more thoroughly you break down the pulp, the smoother the final paper can become. A rougher pulp gives you a more rustic look. Neither is wrong. One says “fine handmade stationery.” The other says “forest poet with excellent taste.”
Control thickness by adjusting pulp concentration
Too much pulp in the vat gives you thick, slow-drying sheets. Too little gives you weak, patchy paper. The sweet spot depends on your mould size and fiber blend, so expect a little trial and error.
Use clean add-ins
Dried petals, herbs, and threads can look gorgeous in hemp paper, but do not overload the sheet. Small amounts work best. Too many decorations can weaken the structure or create lumpy paper that feels charming until you try to write on it.
Common Problems and Fixes
My paper falls apart
Your pulp may be too coarse, your sheet too thin, or your hemp ratio too high for the blend. Try blending longer, adding more recycled paper pulp, or pulling a slightly thicker sheet.
My paper sticks to the screen
It may need more water removed before lifting, or the pulp may be too mushy and fine. Use your sponge more thoroughly and lift the mould slowly and evenly.
My paper warps as it dries
That usually means uneven moisture or not enough pressing. Press more thoroughly, dry on a flatter surface, and flatten under books after drying if needed.
My paper is too absorbent for ink
Add a small amount of sizing to the pulp next time. Handmade paper without sizing can be lovely for collage and printmaking but frustrating for fountain pens that believe drama is a personality trait.
What Can You Use Hemp Paper For?
Once dry, handmade hemp paper can be used for a surprising number of projects. Here are a few favorites:
- Greeting cards
- Gift tags
- Bookmarks
- Rustic invitations
- Art paper for drawing or collage
- Handmade journal covers
- Small business packaging inserts
If you make thicker sheets, they can look especially nice for craft labels and decorative stationery. Thinner sheets can work for note cards or layered mixed-media pieces.
Is Making Hemp Paper Worth It?
Yes, especially if you enjoy slow crafts, sustainable materials, and projects that feel tactile and satisfying. Hemp paper is not the fastest thing you will ever make, and it probably will not replace your printer paper unless you have an unusually dramatic relationship with office supplies. But it is deeply rewarding.
You are taking loose fibers and water and turning them into something useful, textured, and personal. That is a pretty good day’s work, honestly.
Experiences From Making Hemp Paper: What It Actually Feels Like
The first time I tried making hemp paper, I expected an elegant, old-world craft moment. You know the type: soft sunlight, gentle music, maybe one perfectly folded linen apron. What I actually got was a wet table, a confused sponge, and a sheet of pulp that looked like it had been through a breakup. That was also the moment I realized hemp paper is one of those crafts that teaches you by humbling you a little first.
My earliest mistake was assuming that more fiber automatically meant better paper. It does not. More fiber often means a thick slab that takes forever to dry and feels closer to compressed stuffing than stationery. Once I started using a lighter hand with the pulp, everything improved. The sheets became more even, the edges looked intentional instead of accidental, and the drying time stopped feeling like a test of character.
I also learned that hemp behaves differently from plain recycled paper pulp. It has personality. It wants attention. If the fibers are not soaked enough or blended enough, they can stay stringy and make the sheet look rougher than planned. Sometimes that texture is wonderful. It gives the paper a handmade look that feels earthy and artistic. Other times it makes the sheet harder to write on, especially if you were aiming for something cleaner and smoother. That is when blending hemp with recycled paper really saved the day. The recycled pulp helped everything knit together better, while the hemp still gave the sheet strength and visual character.
One of the most satisfying moments in the process is couching a sheet successfully for the first time. Until that point, papermaking can feel like glorified soup management. Then suddenly you lift the mould, peel it away, and there it is: an actual sheet. Wet, fragile, and slightly dramatic, yes, but still a sheet. It feels oddly magical every time.
Drying taught me patience in a very direct way. If I rushed and peeled a sheet too soon, it stretched or tore. If I pressed more carefully and waited longer, the paper looked flatter and more polished. I began keeping a stack of finished sheets under heavy books overnight, and that small habit made the final result look much more professional.
The best experience, though, was using the finished paper for something real. A handmade tag, a note card, a tiny art print, even a simple thank-you note somehow felt more meaningful on hemp paper. People noticed the texture immediately. They touched it. They asked about it. Store-bought paper rarely gets that kind of reaction unless it arrives with glitter and a sound chip.
So if you are thinking about trying this craft, my honest experience is this: your first batch may be messy, your second batch will be smarter, and by the third you will start feeling like the kind of person who casually says things like, “I made the paper myself.” Which, to be fair, is an excellent sentence.
Conclusion
If you want to learn how to make hemp paper at home, start simple. Use pre-processed hemp fiber or a hemp-and-recycled-paper blend, pull a few small sheets, and focus on the basics: soak, blend, form, couch, press, and dry. Once you understand how the pulp behaves, you can experiment with smoother finishes, decorative add-ins, and stronger sheet formulas.
Handmade hemp paper is practical, beautiful, and memorable. It turns basic materials into something useful and personal, and it gives you a deeper appreciation for the humble sheet of paper sitting on your desk right now, pretending it has always had its life together.