
Table of Contents >> Show >> Hide
- Why Cats Need a Scratching Post in the First Place
- What Makes a Great DIY Cat Scratching Post?
- Materials and Tools You Will Need
- Step-by-Step: How to Make a Cat Scratching Post
- How to Get Your Cat to Actually Use It
- Common DIY Mistakes to Avoid
- Easy Variations You Can Try
- Maintenance, Safety, and Real-Life Use
- Experience-Based Tips: What People Learn After Making a Cat Scratching Post
- Final Thoughts
If you share a home with a cat, you already know one universal truth: your furniture is apparently part of the feline arts program. The sofa arm? A masterpiece. The rug corner? A personal statement. The side of your bed frame? A bold experiment in texture. The good news is that you do not need to choose between a happy cat and a house that looks like it survived a tiny tornado with claws. Learning how to make a cat scratching post is one of the easiest DIY pet projects you can tackle, and it can save your couch, your patience, and possibly your favorite ottoman.
A good DIY cat scratching post is not just a random pole wrapped in rope. It should match the way your cat likes to scratch, feel sturdy under a full-body stretch, and live where your cat actually wants to use it. That last part matters more than many people think. Cats do not scratch just to annoy humans right before company comes over. Scratching is a normal behavior tied to stretching, scent marking, claw maintenance, and stress relief. So the goal is not to stop scratching. It is to redirect it toward something you built on purpose.
In this guide, you will learn what makes a scratching post cat-approved, which materials work best, how to build one with simple tools, and how to convince your cat that your handmade creation is better than the arm of your living room chair. Spoiler: location, texture, and stability matter a lot more than fancy design. Your cat is not impressed by minimalism. Your cat wants leverage.
Why Cats Need a Scratching Post in the First Place
Before you grab a drill and head into DIY mode, it helps to understand why scratching matters. Cats scratch to stretch their bodies, work their muscles, leave visual and scent marks, and help condition their claws. In plain English, scratching is part fitness routine, part communication method, and part manicure. That is why simply telling your cat to “stop it” has roughly the same success rate as asking a toddler not to touch a shiny button.
This is also why the best cat scratching post ideas start with observation. Does your cat scratch vertically on the couch edge? Great, build something tall. Does your cat flatten out and claw the rug like they are auditioning for a tiny construction crew? Then a horizontal scratcher or low slanted post may work better. Some cats love sisal rope. Others prefer cardboard, wood, or carpet-like textures. Your cat is not being difficult. Your cat is being specific.
What Makes a Great DIY Cat Scratching Post?
If you want your homemade scratching post to get daily use, focus on four things: height, stability, texture, and placement.
1. Height matters
A cat should be able to stand on the hind legs and stretch fully while scratching. That means a short, stubby post might look cute, but it often fails the actual cat test. For most adult cats, a post around 30 to 36 inches tall is a strong starting point. Large cats may appreciate even more height.
2. Stability is everything
If the post wobbles, tips, or makes your cat feel like it is standing on a dramatic movie set during an earthquake scene, your cat may avoid it entirely. A wide, heavy base is not optional. It is the foundation of success. Build the post like you expect a determined athlete to launch into it at 2 a.m. because that is exactly what may happen.
3. Texture needs to match your cat’s preference
Sisal rope is a classic for a reason. It is durable, rough enough for a satisfying claw grip, and easy to wrap around a wooden post. Cardboard is another favorite, especially for cats who prefer horizontal scratching. Some cats also like wood or carpet-like materials. If your cat already attacks a certain surface at home, use that clue when choosing materials.
4. Placement can make or break the project
Do not build the world’s greatest scratching post and then hide it in a lonely guest room nobody uses. Cats often prefer to scratch in visible, high-traffic areas or right next to the objects they already target. If the couch is the crime scene, the scratching post should begin its career right there beside it.
Materials and Tools You Will Need
Here is a simple materials list for an easy DIY cat scratching post that looks clean, works well, and does not require a full carpentry workshop:
- 1 wooden post, about 3×3 inches or 4×4 inches, cut to 30 to 36 inches tall
- 1 square wooden base, about 16×16 inches to 20×20 inches, made from plywood or solid wood
- Sisal rope, typically 3/8-inch to 1/2-inch thickness
- Wood screws or lag screws long enough to secure the post to the base
- Drill
- Screwdriver or driver bit
- Sandpaper
- Staple gun or strong non-toxic construction adhesive for securing rope ends
- Optional top cap, toy attachment, or small perch
- Optional carpet or felt for the underside of the base
If you want a budget version, you can repurpose scrap wood and buy sisal rope separately. If you want a cat scratch pad style version, sturdy corrugated cardboard can work well too. But for a durable everyday post, wood plus sisal is the classic combo.
Step-by-Step: How to Make a Cat Scratching Post
Step 1: Cut and prepare the base
Start with a base large enough to resist tipping. A square base between 16 and 20 inches wide works for many cats, but larger or more energetic cats may need more support. Sand all edges so there are no rough splinters. You are building a scratching post, not a surprise trip to the first-aid kit.
If the post will sit on hardwood or tile, add felt pads or a piece of carpet to the bottom so it does not slide around. A stable post encourages confident scratching, while a slippery one makes your cat feel like it is learning ballet against its will.
Step 2: Cut the vertical post
Cut your wood post to the desired height. Thirty-two inches is a nice middle ground for many adult cats. Sand the edges and corners lightly so the wood is smooth but still solid. If you plan to leave any wood exposed near the top or bottom, make sure it is neatly finished and free from splinters.
Step 3: Attach the post to the base
Mark the center of the base, stand the post upright, and secure it from the underside using long screws. For extra strength, use more than one fastener and make sure the post sits perfectly upright. Test it with your hands before you call the project done. If you can wobble it, so can your cat.
Some DIYers like to add corner braces underneath for added reinforcement. That is especially smart if your cat is large, athletic, or blessed with the confidence of a creature that has never paid for furniture.
Step 4: Wrap the post in sisal rope
Now comes the satisfying part. Start near the bottom of the post and secure one end of the sisal rope with a staple or a dab of strong adhesive. Then wrap the rope tightly around the post, keeping each row snug against the next. No gaps, no lazy spirals, no “that looks fine from far away” logic. Tight wrapping helps the rope last longer and gives your cat a better scratching surface.
When you reach the top, secure the end firmly with another staple or adhesive. Tuck any sharp hardware so nothing is exposed. The rope should feel tight enough that it does not shift when pulled.
Step 5: Add optional features
You can stop here and have a perfectly functional DIY cat scratching post. But if you want bonus points from the household feline, consider adding one of these upgrades:
- A dangling toy near the top
- A small platform or perch
- A second horizontal scratch surface at the base
- A simple coat of pet-safe finish on exposed wood, fully cured before use
Just avoid making it too complicated. Cats generally care more about feel and function than whether the post matches your throw pillows.
How to Get Your Cat to Actually Use It
Building the scratching post is only half the project. The other half is cat marketing. Fortunately, your target audience is furry, curious, and often persuadable with catnip.
Put it in the right spot
Place the post near the furniture or area your cat already scratches. Once your cat starts using it consistently, you can gradually move it to a more convenient location if needed. Sudden relocation to a dark corner is rarely a winning strategy.
Make the post interesting
Sprinkle catnip on the rope, rub a little catnip into the surface, or dangle a toy around it during playtime. You can also use treats and praise when your cat scratches the post. Yes, praise. Cats may act emotionally unavailable, but many absolutely notice when good things happen around a certain object.
Never force your cat’s paws onto it
This is a common mistake. Dragging a cat to the post and rubbing the paws on it may make the cat dislike the post entirely. Introduce the scratching post naturally instead. Let curiosity do some of the work.
Make old scratching spots less appealing
While your cat is learning the new habit, cover favorite furniture targets with a tightly fitted sheet, double-sided furniture tape, or another temporary deterrent. The idea is simple: make the old spot less fun and the new post more rewarding.
Common DIY Mistakes to Avoid
Even a simple cat scratching post DIY project can go wrong if you skip the practical details. Watch out for these common problems:
- Using a base that is too small: A narrow base makes tipping more likely.
- Choosing decorative rope instead of sisal: Soft craft rope wears down quickly and may not satisfy the scratching instinct.
- Leaving loose ends: Frayed rope can become messy and unsafe.
- Making the post too short: Many cats want a full stretch, not a half-hearted shrug.
- Hiding the post: Cats usually prefer to mark spaces that matter to them.
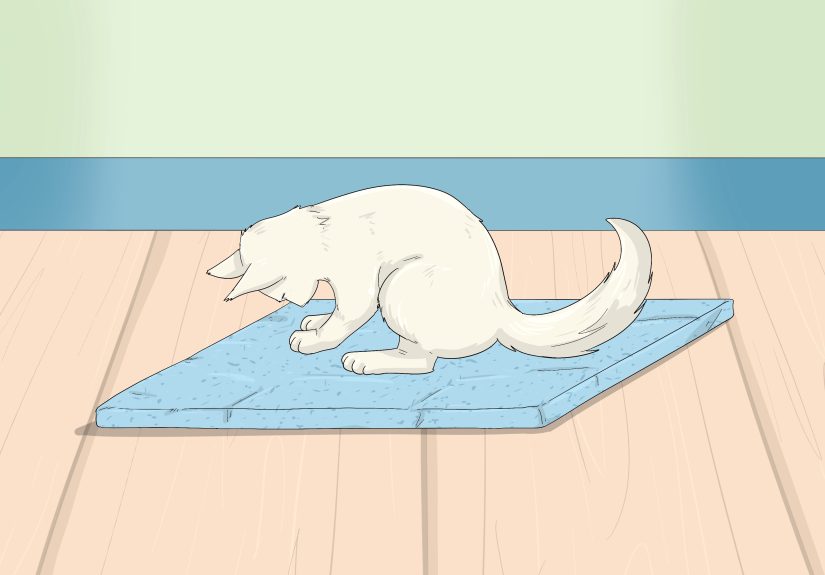
- Ignoring your cat’s style: If your cat loves horizontal surfaces, build a scratch pad too.
Easy Variations You Can Try
Once you know the basics, you can customize your design based on your space and your cat’s habits.
Horizontal cardboard scratcher
Cut strips of corrugated cardboard, roll or stack them tightly, and secure them inside a shallow wooden frame or sturdy box lid. This option is affordable and often a hit with cats who love rug-level scratching.
Wall-mounted scratch panel
If floor space is limited, mount a sisal-wrapped board securely to the wall at your cat’s preferred height. This is especially useful for cats that like to stretch up while scratching door frames or wall corners.
Post with perch
Add a small platform on top and your scratching post becomes part exercise station, part lookout tower. Cats love vertical territory, and you may get more use out of the post if it doubles as a lounging spot.
Maintenance, Safety, and Real-Life Use
A DIY scratching post is not a one-and-done object forever. Check it regularly for loose rope, exposed staples, wobbling, or worn sections. Replace the rope when it gets too shredded or smooth. Tighten screws every so often, especially if your cat launches onto the post like an action hero in a spy movie.
Also keep trimming your cat’s nails as part of normal care. Scratching posts help, but they do not replace routine nail maintenance. And if you get scratched while playing or redirecting your cat, wash the area promptly and keep an eye on it, especially if the skin breaks.
Experience-Based Tips: What People Learn After Making a Cat Scratching Post
One of the funniest things about making a scratching post at home is how quickly you discover that cats are the least polite product testers on earth. Humans tend to admire the build first. Cats tend to ignore the build first. Then, hours later, often when nobody is watching, they silently decide whether your craftsmanship deserves their claws. That can be humbling.
A common experience is realizing that the first version is rarely the final version. Many people build a lovely post, place it neatly in a corner, and then wonder why the cat still attacks the sofa. After a little observation, the problem becomes obvious: the post is fine, but the location is wrong. Move it next to the cat’s favorite scratching target, and suddenly the post becomes interesting. In other words, cats do not always reject the design. Sometimes they reject your interior decorating plan.
Another frequent lesson is that stability matters even more than looks. A post can be wrapped beautifully, finished cleanly, and worthy of a proud social media photo, but if it sways even a little, many cats treat it like a bad investment. DIYers often report that once they upgraded to a heavier base or added extra support, the cat started using the post much more often. That tells you something important: cats want resistance. They like a surface they can really dig into without feeling it shift beneath them.
Texture is another area where experience beats guesswork. Plenty of people assume their cat will love sisal because most store-bought posts use it. Often that is true. But sometimes a cat prefers cardboard, bare wood, carpet-like fabric, or a slanted angle rather than a vertical post. Some households end up with a “main post” plus a flat scratch pad in another room because their cat uses different scratching styles at different times of day. That is not overkill. That is simply good observation turned into better design.
There is also the training side. Many cat owners notice that the post gets more use when they interact with it during play. Dangling a wand toy around the post, tossing a treat nearby, or adding a little catnip can turn a mysterious new object into a familiar part of the cat’s territory. What does not work well, according to many real-life experiences, is physically placing the cat on the post and expecting gratitude. Cats tend to prefer invitations over forced participation. Shocking, truly.
Perhaps the biggest takeaway from DIY scratching post projects is that success comes from paying attention, not spending a fortune. A simple homemade post made with solid wood, tightly wrapped sisal, and smart placement often outperforms a fancier store model that is too short, too light, or in the wrong room. Cats are honest that way. They do not care about branding. They care whether the post feels right under the paws. Once you understand that, building the perfect scratching post becomes much easier.
Final Thoughts
If you have been wondering how to make a cat scratching post that your cat will actually use, the secret is surprisingly simple: build for behavior, not just appearance. Make it sturdy. Make it tall enough for a full stretch. Use a texture your cat likes. Put it where your cat already wants to scratch. Then sweeten the deal with play, catnip, and patience.
The beauty of this DIY project is that it does not require expert woodworking skills or a huge budget. It just requires a little planning and a willingness to think like a cat. That means embracing practicality, respecting preference, and accepting that the final design review may happen at midnight. If your cat starts ignoring the sofa and proudly shreds your handmade post instead, congratulations. That is not destruction. That is success.






