Table of Contents >> Show >> Hide
- Why Cleaning an Aquarium Filter Requires a Gentle Touch
- Before You Start: What You Will Need
- How to Clean Aquarium Filters: 11 Bacteria-Friendly Steps
- Step 1: Clean the Filter During a Routine Water Change
- Step 2: Unplug the Filter and Any Equipment Affected by Water Level
- Step 3: Save a Bucket of Tank Water for Rinsing Media
- Step 4: Open the Filter and Keep the Media in Order
- Step 5: Rinse Mechanical Media Gently
- Step 6: Swish Biological Media, Do Not Scrub It Like a Frying Pan
- Step 7: Replace Chemical Media Only When Needed
- Step 8: Clean the Impeller, Intake, and Hoses
- Step 9: Never Replace All Filter Media at Once
- Step 10: Reassemble the Filter and Restart It Quickly
- Step 11: Refill With Conditioned Water and Monitor the Tank
- Common Mistakes to Avoid
- How Often Should You Clean Aquarium Filters?
- Real-World Experiences: What Aquarists Learn the Hard Way
- Final Thoughts
- SEO Tags
Cleaning an aquarium filter sounds easy until you realize the filter is not just a grime trap. It is also prime real estate for the beneficial bacteria that help process fish waste and keep ammonia and nitrite from turning your tank into a tiny underwater disaster movie. In other words, your filter is both janitor and microbiology lab. Clean it too little, and water flow drops, sludge builds up, and the tank starts looking like it is making questionable life choices. Clean it too aggressively, and you can disrupt the biological stability your fish rely on every day.
The good news is that proper aquarium filter maintenance is not complicated. The goal is not to make every filter part look factory-new. The goal is to restore flow, remove excess debris, and protect the bacteria colony that helps keep water quality stable. Once you understand that difference, cleaning becomes less scary and a lot more effective.
This guide walks through 11 bacteria-friendly steps for cleaning aquarium filters, explains which parts should be rinsed, replaced, or left alone, and shows you how to avoid the common mistakes that make fishkeepers sigh dramatically into a bucket.
Why Cleaning an Aquarium Filter Requires a Gentle Touch
An aquarium filter usually handles three jobs at once: mechanical filtration, biological filtration, and chemical filtration. Mechanical media catches debris such as uneaten food, plant bits, and fish waste. Biological media gives beneficial bacteria a place to colonize and do the invisible work of converting toxic waste. Chemical media, such as activated carbon, removes dissolved impurities, odors, or discoloration.
That middle category is where many beginners get tripped up. Biological filtration is alive. It is not magic foam. It is not decorative gunk. It is a living bacterial colony attached to sponges, ceramic rings, bio-balls, or other porous media. If you scrub everything under hot tap water, let it dry out on the counter, or replace all the media at once, you are not “deep cleaning.” You are basically evicting the employees who keep the tank running.
So yes, clean the filter. Just do it like a smart aquarist, not like someone power-washing patio furniture.
Before You Start: What You Will Need
- A clean bucket used only for aquarium care
- Removed tank water from a water change
- A soft brush or filter brush for tubing and impeller areas
- Fresh chemical media if your manufacturer recommends replacement
- A towel, because aquariums have a weird sense of humor about dripping
- A water conditioner and thermometer for refilling the tank if needed
How to Clean Aquarium Filters: 11 Bacteria-Friendly Steps
Step 1: Clean the Filter During a Routine Water Change
The best time to clean aquarium filters is usually during a partial water change. Why? Because you already have a bucket of old tank water ready to use, and that water is perfect for rinsing reusable filter media. It is also easier to do everything in one planned maintenance session than to start pulling apart equipment randomly on a Tuesday night while your fish stare at you like disappointed supervisors.
Try to keep the water change moderate rather than extreme. A routine partial change paired with a gentle filter clean is usually safer than a huge overhaul. If the tank needs a truly heavy cleaning, consider splitting the work into stages instead of doing everything at once.
Step 2: Unplug the Filter and Any Equipment Affected by Water Level
Before you touch the filter, unplug it. Also unplug the heater if the water level may drop below the safe line. Electricity and aquarium maintenance should never be allowed to become an improvisational team-building exercise.
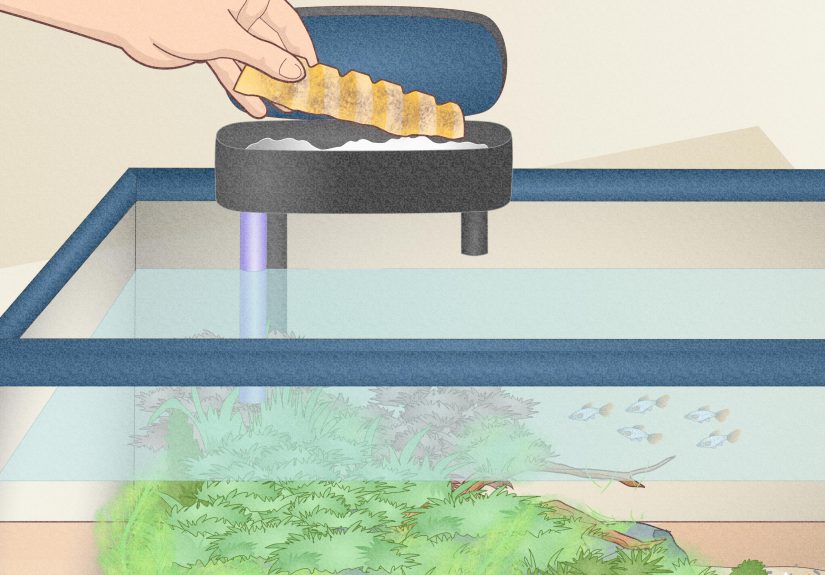
Once the filter is off, remove it carefully so debris does not dump back into the tank. If you are working with a hang-on-back filter, keep the unit upright. If you are cleaning a canister filter, follow the manufacturer’s shutoff and disconnect steps so you do not accidentally create a living-room river.
Step 3: Save a Bucket of Tank Water for Rinsing Media
This is the bacteria-friendly secret sauce. Use water removed from the aquarium during the water change and set it aside in a clean bucket or container. That old tank water lets you rinse sponges, pads, and bio media without exposing them to untreated chlorine or chloramine. It also keeps the media wet, which matters because biological media should not be allowed to dry out.
If you do not have enough tank water, properly dechlorinated water is the next best option. The point is to clean the media gently, not sterilize it.
Step 4: Open the Filter and Keep the Media in Order
As you remove the media, keep track of the order in which it sits inside the filter. Mechanical media usually goes first, biological media typically follows, and chemical media often comes later in the flow path. If you toss everything into a random pile and then reassemble it by vibes alone, the filter may still run, but not as efficiently.
This is also a good moment to inspect the media. A sponge that is discolored but structurally sound is usually fine. A sponge that is falling apart like an ancient kitchen sponge in a horror movie is ready for replacement.
Step 5: Rinse Mechanical Media Gently
Mechanical media traps the biggest load of debris, so it tends to get dirtiest first. Swish or squeeze sponges and pads in the bucket of tank water until the worst sludge is gone and water can move through them more freely. Do not aim for spotless. A light-to-moderate rinse is enough.
If the sponge or floss is reusable, reuse it. If it is a disposable polishing pad or cartridge component that the manufacturer expects you to replace, do so according to the product schedule. Just avoid throwing out all reusable media at the same time.
Step 6: Swish Biological Media, Do Not Scrub It Like a Frying Pan
Biological media needs an even lighter touch. Ceramic rings, bio-balls, porous stones, and similar materials should be gently agitated in tank water to remove loose debris. They do not need a hard scrub. Their job is to stay colonized by beneficial bacteria, so the less dramatic the rinse, the better.
If your biological media looks brown, that is not necessarily a crisis. Brown does not always mean dirty in a bad way. Often it means the media is mature and biologically active. The goal is to clear clogs, not create a showroom finish.
Step 7: Replace Chemical Media Only When Needed
Chemical media such as activated carbon, ammonia-removing pads, or specialty resins does not last forever. Once it is exhausted, it stops being useful even if it still looks respectable. Replace chemical media based on the manufacturer’s schedule or when the tank’s water clarity and odor suggest it is spent.
That said, do not confuse chemical media with biological media. Replacing carbon is not the same as replacing ceramic rings. Carbon is often temporary. Bio media is long-term. Many fishkeepers make life harder by tossing both out together and then wondering why the tank gets moody.
Step 8: Clean the Impeller, Intake, and Hoses
If your filter is noisy, sluggish, or not moving water like it used to, the problem may not be the media alone. Check the impeller, intake tube, spray bar, and hoses for slime, debris, algae, or mineral buildup. These areas can restrict flow and make a healthy filter perform like it is running through syrup.
Use a soft brush or filter brush to clean these parts. Rinse them well. Do not use soap, detergent, or household cleaners. Fish do not appreciate lemon-fresh anything.
Step 9: Never Replace All Filter Media at Once
This is one of the most important rules in aquarium filter maintenance. If multiple media components need replacement, stagger them. Replace the worn mechanical pad now and leave the biological media alone. Or replace half the biological media at one time rather than the entire batch. This gives existing bacteria a chance to colonize the new material.
Think of it as remodeling an apartment building while the tenants are still living there. You can replace one room at a time. Demolishing the whole structure in one afternoon is not “efficient.” It is chaos with fins.
Step 10: Reassemble the Filter and Restart It Quickly
Once everything is rinsed and inspected, put the media back in the correct order, reassemble the filter, and restart it as soon as possible. The longer media sits dry or without water flow, the less bacteria-friendly the process becomes.
Prime the filter if needed and make sure water is moving normally again. Listen for unusual rattling, gurgling, or grinding. A filter that sounds like it is blending gravel usually needs a second look.
Step 11: Refill With Conditioned Water and Monitor the Tank
After cleaning, refill the tank with temperature-matched, conditioned water if you performed a water change. Then observe the aquarium for the next day or two. Watch for reduced flow, odd fish behavior, or cloudy water. If you have a test kit, checking ammonia and nitrite after major maintenance is a smart move, especially in heavily stocked tanks or newly established aquariums.
In a stable tank, a proper bacteria-friendly filter cleaning should not cause drama. Ideally, the fish carry on as usual, the flow improves, and you get the rare and beautiful feeling that you did aquarium maintenance correctly on the first try.
Common Mistakes to Avoid
Cleaning Everything Until It Looks Brand-New
A filter does not need to sparkle. Over-cleaning can do more harm than leaving a little harmless staining behind.
Using Soap or Household Cleaners
Never use soap, glass cleaner, detergent, or disinfectant on aquarium equipment. Even tiny residues can harm fish and invertebrates.
Doing a Massive Deep Clean All at Once
Scrubbing decor, vacuuming heavily, replacing large amounts of water, and cleaning the filter in the same session can be too much change at once. Spread the workload out when possible.
Letting Bio Media Dry Out
Biological media should stay wet during maintenance. Drying it on the counter while you answer messages, make coffee, and reconsider your life choices is not ideal.
Ignoring Reduced Flow
If the filter output has clearly dropped, do not wait forever. A clogged filter loses efficiency and can create dead spots where sludge accumulates.
How Often Should You Clean Aquarium Filters?
There is no single perfect schedule because every tank is different. A lightly stocked planted community tank may go longer between cleanings than a goldfish tank or a heavily fed cichlid setup. In general, check the filter regularly and clean it when you notice reduced flow, visible buildup, or media that is packed with debris.
For many home aquariums, a gentle filter cleaning every few weeks to every few months works well. Mechanical media may need attention more often than biological media. Chemical media follows its own replacement schedule. The smartest routine is not blindly following a calendar. It is watching how your particular tank behaves and adjusting from there.
Real-World Experiences: What Aquarists Learn the Hard Way
In real aquarium life, the most memorable filter-cleaning experiences usually happen right after someone decides to “do a really thorough job.” That phrase has humbled more fishkeepers than almost anything else in the hobby.
One common experience happens in a community tank that looks a little dull, so the owner changes half the water, vacuums the gravel aggressively, scrubs decorations, replaces every cartridge, and rinses the filter under the sink for good measure. The tank looks amazing for about six hours. Then the water turns cloudy, the fish act stressed, and the owner spends the next two days testing water and searching the internet with the energy of a detective in a crime drama. The lesson is simple: clean smart, not hard.
Another classic scenario shows up in goldfish tanks. Goldfish are charming little waste factories, and their filters get dirty faster than many people expect. Owners often assume the brown sponge means the filter is failing, when in reality the filter just needs a gentle rinse in tank water. Once the sponge is squeezed out and the impeller is cleaned, flow improves dramatically. The tank smells fresher, the fish become more active, and everyone involved gets to keep their dignity.
Planted tank keepers often have the opposite problem. Their water looks clear, so they forget the filter exists until the output slows to a trickle. When they finally open it, they discover enough mulm to qualify as a minor geological layer. Here, the experience teaches balance. A filter can be biologically mature and still be mechanically clogged. Bacteria-friendly does not mean neglect-friendly.
Shrimp keepers and fry growers also become very aware of gentle maintenance. In these setups, sponge filters are popular because they provide both biological stability and a safer intake. Cleaning is usually simple: squeeze the sponge in removed tank water, swish it a few times, and put it back. The first time someone sees the brown cloud coming out of the sponge, they often panic. Then they realize the sponge is not dying. It is doing its job.
Canister filter owners learn a different lesson: if you postpone maintenance too long, the actual cleaning is not difficult, but the re-priming can become a full emotional event. Hoses, valves, trapped air, drips on the floor, that one towel that was definitely too small for the mission, all of it becomes part of the story. After that experience, most people suddenly become big fans of regular maintenance.
The best long-term experience is the boring one. The tank stays stable. The fish eat well. The filter runs quietly. You rinse media gently, replace only what is worn out, keep bacteria alive, and never try to win a cleanliness contest your aquarium did not ask for. In fishkeeping, boring is beautiful. Boring means stable water, healthy livestock, and fewer emergency searches at midnight.
Final Thoughts
If you remember only one thing, remember this: cleaning aquarium filters is about preserving function, not chasing perfection. Your filter should move water well, trap debris efficiently, and continue supporting a healthy colony of beneficial bacteria. Once you stop trying to make every part look brand-new, aquarium maintenance becomes much less stressful and much more effective.
Be gentle with reusable media, replace chemical media on schedule, never swap all your bio media at once, and keep an eye on flow. Do that consistently, and your filter will stay cleaner, your water will stay more stable, and your fish will keep living their best little underwater lives.