Table of Contents >> Show >> Hide
- Why Cleaning Your Air Fryer Matters
- How Often Should You Clean an Air Fryer?
- What You Need to Clean an Air Fryer
- How to Clean an Air Fryer Step by Step
- How to Deep Clean a Greasy Air Fryer
- How to Clean an Oven-Style Air Fryer
- What Not to Do When Cleaning an Air Fryer
- How to Keep Your Air Fryer Cleaner for Longer
- Troubleshooting Common Air Fryer Cleaning Problems
- Cleaning Expert Experience: What Actually Works in Real Kitchens
- Conclusion
Your air fryer may be the hero of weeknight dinners, crispy frozen snacks, reheated pizza, and “I swear this counts as cooking” mealsbut it also quietly collects grease, crumbs, sauce splatter, and mystery specks that nobody wants to identify. The good news? Cleaning an air fryer is not complicated. The even better news? If you do it the right way, you can keep your appliance smelling fresh, cooking evenly, and looking less like it survived a mozzarella-stick explosion.
Whether you use a basket-style air fryer, a dual-zone model, or an oven-style air fryer with racks and a crumb tray, the basic cleaning rules are the same: unplug it, let it cool, use gentle tools, avoid soaking the electrical base, and never attack the nonstick coating with anything that looks like it belongs in a garage. This guide breaks down how to clean an air fryer step by step, how often to clean each part, how to remove stuck-on grease, and what cleaning mistakes to avoid.
Note: Always check your air fryer’s user manual first. Most removable baskets and trays are dishwasher-safe, but not every model has the same coating, heating element design, or cleaning instructions.
Why Cleaning Your Air Fryer Matters
An air fryer works by circulating very hot air around food at high speed. That’s what creates the crisp texture people love. Unfortunately, that same airflow can also move tiny droplets of oil, crumbs, seasonings, and food particles around the cooking chamber. Over time, buildup can cause unpleasant odors, smoke, uneven cooking, and a greasy film on the basket or interior walls.
A dirty air fryer can also affect flavor. Yesterday’s garlic wings should not be guest-starring in today’s cinnamon apples. Grease residue can turn sticky, crumbs can burn, and old food particles can make your kitchen smell like a fast-food parking lot after a heat wave. Regular cleaning keeps food tasting like what you actually cooked, not like a greatest-hits album of last week’s leftovers.
How Often Should You Clean an Air Fryer?
The simple answer: clean the removable parts after every use. That includes the basket, tray, crisper plate, racks, and crumb tray if your model has one. These are the parts that touch food and collect grease directly.
After Every Use
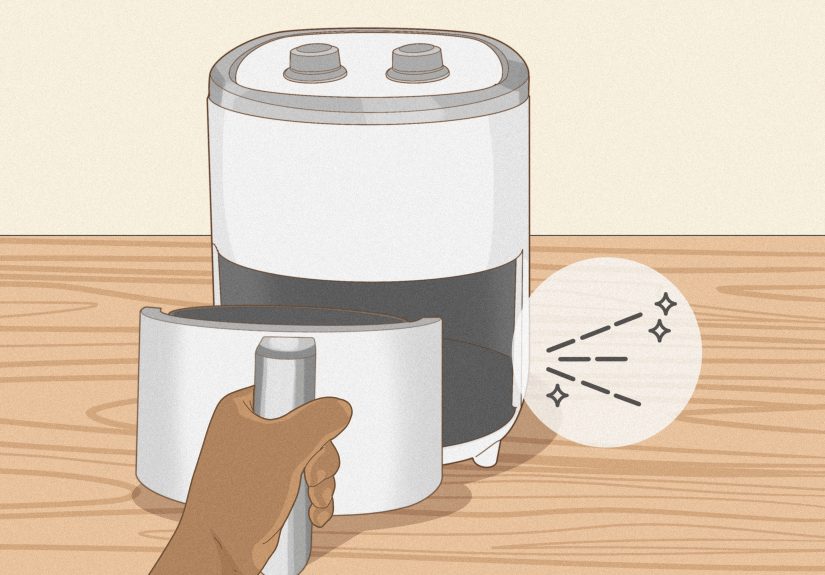
Wash the basket, tray, and crisper plate with warm water, mild dish soap, and a soft sponge. Wipe any visible crumbs or grease from the inside once the appliance is cool. This quick habit takes only a few minutes and prevents the dreaded “baked-on grease archaeology project.”
Weekly or Every Few Uses
Wipe the exterior, handle, buttons, control panel, and surrounding counter area. These spots collect fingerprints, oil mist, and food prep residue. If you use your air fryer daily, give the interior walls and drawer cavity a more careful wipe once a week.
Monthly or When Needed
Deep clean the heating element area, corners, vents, and any stubborn grease stains. You may need to do this sooner if your air fryer smokes, smells burnt, cooks unevenly, or has visible splatter near the top interior.
What You Need to Clean an Air Fryer
You do not need a laboratory, a pressure washer, or a cleaning product with a name that sounds like a superhero villain. Most air fryer cleaning jobs require only basic kitchen supplies.
- Mild dish soap
- Warm water
- Soft sponge or non-abrasive scrub pad
- Microfiber cloth
- Soft-bristled brush or old clean toothbrush
- Baking soda
- White vinegar, used lightly and only where appropriate
- Paper towels or a clean drying towel
- Wooden or silicone spatula for gently loosening stuck food
Avoid steel wool, metal scrubbers, sharp utensils, oven cleaner, bleach sprays, harsh degreasers not labeled safe for food-contact surfaces, and anything abrasive enough to scratch nonstick coating. Once the coating is damaged, food sticks more easily, cleaning gets harder, and the appliance may not perform as well.
How to Clean an Air Fryer Step by Step
Step 1: Unplug the Air Fryer and Let It Cool
Safety comes first. Unplug the appliance before cleaning and let it cool until it is safe to touch. Do not pour water into a hot air fryer basket while it is still inside the unit. Sudden steam, heat, and electrical parts are not a charming combination.
Waiting 20 to 30 minutes is usually enough for routine cleaning, but thicker baskets and oven-style models may hold heat longer. Remove the basket or tray carefully and set it on a heat-safe surface.
Step 2: Remove Crumbs and Loose Food
Before adding water, dump loose crumbs into the trash. Wipe out the basket with a paper towel or dry cloth. This prevents food bits from floating around in your sink like tiny, greasy confetti.
If there is pooled oil in the bottom of the drawer, let it cool, wipe it out with a paper towel, and throw the towel in the trash. Do not pour grease down the sink because it can harden in pipes and create plumbing problems.
Step 3: Wash the Basket, Tray, and Crisper Plate
Fill your sink with warm water and a few drops of dish soap. Wash the removable parts using a soft sponge or cloth. Pay attention to the holes in the crisper plate or mesh basket because crumbs love to hide there like they are paying rent.
If your manual says the removable parts are dishwasher-safe, you can use the dishwasher. However, hand-washing is often gentler on nonstick coatings and may help the basket last longer. If using a dishwasher, place parts securely so they do not bang around during the cycle.
Step 4: Soak Stuck-On Food
For stubborn bits, soaking is your best friend. Let the basket or tray sit in warm, soapy water for 10 to 20 minutes. Then gently scrub with a soft brush or sponge. Avoid scraping with a knife or fork. Your air fryer basket is not a medieval shield, and it does not need battle scars.
For mesh areas, use a soft toothbrush to work around small openings. Rinse thoroughly so no soap residue remains, especially on surfaces that touch food.
Step 5: Wipe the Interior
Once the air fryer is unplugged and cool, wipe the inside with a damp microfiber cloth or soft sponge. Use a small amount of dish soap if the interior feels greasy, then wipe again with a clean damp cloth to remove soap residue.
Do not immerse the main unit in water. Do not rinse it under the faucet. The main body contains electrical components, and water can damage the appliance or create a safety risk.
Step 6: Clean the Heating Element Carefully
The heating element is usually located at the top of basket-style air fryers or inside the cooking chamber of oven-style models. It is also one of the most overlooked areas. Grease splatter near the heating element can cause smoke, burnt smells, and uneven performance.
When the unit is unplugged and completely cool, turn the appliance carefully if your manual allows it, or use a flashlight to inspect the top interior. Gently remove crumbs with a soft, dry brush. If greasy residue remains, use a barely damp cloth or soft sponge. Do not press hard on the coil, bend parts, or use chemical sprays near the heating element.
Step 7: Clean the Exterior
Wipe the outside with a damp microfiber cloth. Pay attention to the handle, buttons, display screen, and top surface. For fingerprints or greasy smudges, a drop of dish soap on a damp cloth usually does the job. Dry with a clean towel to prevent streaks.
Step 8: Dry Everything Completely
Before reassembling your air fryer, make sure every part is completely dry. Moisture trapped in the basket, drawer, racks, or heating area can lead to odors, spotting, or poor performance. Let parts air-dry or towel-dry them carefully.
How to Deep Clean a Greasy Air Fryer
If your air fryer has sticky grease buildup, a basic wash may not be enough. This is where baking soda earns its place in the cleaning hall of fame.
Use a Baking Soda Paste
Mix baking soda with a small amount of water until it forms a spreadable paste. Apply it to greasy or baked-on areas of the removable basket or tray. Let it sit for 10 to 20 minutes, then scrub gently with a soft sponge or toothbrush. Rinse thoroughly and dry.
For very greasy interior walls, use the paste sparingly and avoid getting it into vents, fans, or electrical areas. Wipe with a damp cloth until all residue is gone. Baking soda left behind can turn chalky and may affect the next cooking session.
Use Vinegar for Odors, Not as a Magic Potion
White vinegar can help with lingering smells, but it should be used carefully. A lightly damp cloth with diluted vinegar can wipe odor-prone areas, followed by a clean damp cloth. Do not flood the inside of the appliance, and do not spray liquid directly into vents or around the heating element.
For removable parts, a short soak in warm, soapy water is usually better than dramatic internet hacks involving bubbling volcanoes of vinegar and baking soda. Fun to watch? Sure. Always necessary? Not really.
How to Clean an Oven-Style Air Fryer
Oven-style air fryers have racks, trays, glass doors, and crumb trays, so they need a slightly different routine.
Remove and Wash the Accessories
Take out racks, trays, and the crumb tray. Wash them with warm, soapy water and a non-abrasive sponge. If grease is baked on, soak before scrubbing. For wire racks, use a soft brush to clean between the bars.
Wipe the Door and Interior Walls
Clean the glass door with a damp cloth and mild soap. If grease is stubborn, let a warm damp cloth sit on the spot for a few minutes to soften it. Avoid abrasive powders or rough scrubbers that can scratch glass or damage finishes.
Check the Crumb Tray Often
The crumb tray is the tiny shelf of consequences. If you forget it, crumbs can burn and create smoke. Empty and wash it after messy foods like breaded chicken, fries, toast, or anything with cheese.
What Not to Do When Cleaning an Air Fryer
Cleaning mistakes can shorten the life of your air fryer or make it unsafe to use. Avoid these common errors:
- Do not submerge the main unit. Only removable parts should be washed in water.
- Do not use steel wool or metal scrubbers. They can scratch nonstick surfaces.
- Do not use oven cleaner. It is too harsh for most air fryer interiors and may leave unsafe residue.
- Do not clean while the appliance is hot. Wait until it cools.
- Do not spray cleaner directly into vents. Apply cleaner to a cloth first.
- Do not ignore smoke. Smoke often means grease or crumbs are burning.
- Do not reassemble wet parts. Dry everything before storage or use.
How to Keep Your Air Fryer Cleaner for Longer
Do Not Overfill the Basket
Overcrowding blocks airflow and causes food to cook unevenly. It also increases splatter, crumbs, and greasy buildup. Cook in batches when needed. Yes, it takes a little longer, but so does scrubbing fossilized cheese from a crisper plate.
Use the Right Amount of Oil
Many air fryer recipes need only a light coating of oil. Too much oil can drip into the drawer, smoke, or leave a sticky film. Use an oil sprayer or toss food lightly in a bowl before adding it to the basket.
Use Liners Carefully
Perforated parchment liners or silicone liners can make cleanup easier, but they must not block airflow. Never preheat the air fryer with loose parchment inside because the fan can lift it into the heating element. Always weigh parchment down with food.
Clean Soon After Cooking
The easiest time to clean an air fryer is after it cools but before grease hardens. Let the basket soak while you eat, then wash it after dinner. This small habit can save you from heavy scrubbing later.
Troubleshooting Common Air Fryer Cleaning Problems
Why Does My Air Fryer Smoke?
Smoke usually comes from grease, crumbs, or food residue burning near the heating element or in the bottom drawer. Clean the basket, tray, drawer, and heating area. Also avoid cooking very fatty foods without checking the drip area during use.
Why Does My Air Fryer Smell Bad?
Lingering odors often come from old grease, garlic, fish, strong spices, or trapped crumbs. Wash the removable parts thoroughly, wipe the interior, and let the air fryer air out with the drawer open. A light wipe with diluted vinegar may help, followed by a clean damp cloth.
How Do I Remove Sticky Grease?
Use warm, soapy water first. If grease remains, apply baking soda paste to removable parts, let it sit, then scrub gently. Repeat if needed. Patience beats aggressive scrubbing every time.
Can I Put the Basket in the Dishwasher?
Many air fryer baskets and trays are dishwasher-safe, but you should confirm in your manual. Hand-washing is gentler, especially for nonstick parts. If the basket is dishwasher-safe but you want to preserve the coating, hand-wash it most of the time and save the dishwasher for occasional deep cleaning.
Cleaning Expert Experience: What Actually Works in Real Kitchens
After cleaning many countertop appliances, the biggest lesson is simple: air fryers are easiest to maintain when you treat them like a skillet, not like a toaster. People often assume that because the air fryer uses hot air, it somehow cleans itself. It does not. Heat may dry out crumbs and grease, but it does not politely escort them into the trash. In fact, heat can make grease stickier and harder to remove if you let buildup sit too long.
The best routine I have seen is the “cool, soak, wipe” method. Once dinner is done, unplug the air fryer and let it cool while everyone eats. After the meal, remove the basket and crisper plate, wipe out loose crumbs, and soak the removable parts in warm, soapy water. By the time the plates are cleared, most stuck-on food has softened. A soft sponge can usually finish the job in less than five minutes. This method works especially well after cooking frozen fries, chicken tenders, vegetables, salmon, or anything with a sugary glaze.
Another experience-based tip: pay attention to the top interior. Many people clean the basket beautifully but never look above it. Then they wonder why the appliance smells smoky. Grease splatter can collect near the heating element, especially when cooking bacon, sausages, wings, burgers, or heavily marinated foods. You do not need to scrub the heating element aggressively. In fact, you should not. A soft brush for dry crumbs and a lightly damp cloth for nearby surfaces is usually enough if you do it regularly.
For stuck-on cheese, my favorite approach is patience. Melted cheese turns into kitchen glue when it cools. Instead of scraping it with a metal fork, soak the part in warm, soapy water and loosen the edge with a silicone spatula or soft brush. If a spot remains, baking soda paste can help lift it without damaging the coating. The same method works for sticky barbecue sauce, honey glaze, and breading that fused itself to the tray like it signed a long-term lease.
One thing I do not recommend is relying on flashy cleaning hacks that tell you to fill the air fryer basket with water, dish soap, vinegar, lemons, and then run the machine. Some people do it, but it is not ideal for every model, and it may send steam or liquid where it should not go. Manufacturer instructions are usually more conservative for a reason. Warm water, dish soap, soaking, and gentle hand-washing are boringbut boring is excellent when you are protecting an electrical appliance.
Finally, the cleanest air fryers usually belong to people who prevent mess before it starts. They do not overcrowd the basket. They use only a small amount of oil. They trim excess marinade before cooking. They clean the crisper plate after every use. They check the crumb tray. They let parts dry before reassembling. None of these habits are glamorous, but together they keep the air fryer ready for crispy potatoes, reheated pizza, roasted vegetables, and emergency nuggets without smoke alarms joining the dinner conversation.
Conclusion
Cleaning an air fryer is mostly about consistency, gentleness, and knowing which parts can safely touch water. Wash the removable basket, tray, crisper plate, racks, or crumb tray after every use. Wipe the interior once the unit is cool. Check the heating element area when you notice smoke, odors, or grease splatter. Use baking soda paste for stubborn residue, but avoid harsh chemicals, metal scrubbers, and soaking the main unit.
A clean air fryer cooks better, smells fresher, lasts longer, and keeps your food tasting the way it should. Plus, when the basket is clean, you are much more likely to use the appliance instead of letting it become a countertop decoration with buttons. Treat your air fryer kindly, and it will reward you with crispy fries, golden chicken, roasted veggies, and fewer mysterious kitchen smells.