
Table of Contents >> Show >> Hide
- What Is Framed Chalkboard Art (and Why It Works)
- Materials and Tools
- Pick Your Method: Three Solid Ways to Make a Framed Chalkboard
- Method 1: Turn a Picture Frame’s Glass Into a Chalkboard (Sleek + Marker-Friendly)
- Method 2: Paint a Backing Panel (Classic Chalkboard Feel)
- Method 3: Build a Custom Framed Chalkboard Panel (Perfect Fit for Weird Spaces)
- The Make-or-Break Step: Season (Prime) Your Chalkboard Surface
- Lettering Tips So Your Chalkboard Art Looks Intentional (Not Like a Panic Note)
- Care and Cleaning: Keep It Erasable
- Troubleshooting: Fix the Most Common Chalkboard Problems
- Ideas for What to Put on Your Framed Chalkboard (Besides “Eat More Vegetables”)
- Conclusion: Make It Once, Change It Forever
- Experiences From the Framed-Chalkboard Trenches (The Good, the Dusty, and the “Why Won’t This Erase?”)
Chalkboard art is the rare home-decor unicorn: it’s cheap, customizable, and changes with your mood (or your snack schedule). One day it’s a cozy quote; the next day it’s “DO NOT TOUCH THIS PIE” in all caps. The best part? When you put that writable surface inside a real frame, it stops looking like a classroom reject and starts looking like intentional, stylish wall art.
In this guide, you’ll learn a few reliable ways to make framed chalkboard artfrom repainting an old picture frame to building a custom-sized boardplus how to season it, letter it, clean it, and fix the most common “why is my chalkboard haunted?” problems like ghosting and marker stains. Let’s make something you’ll actually want to display.
What Is Framed Chalkboard Art (and Why It Works)
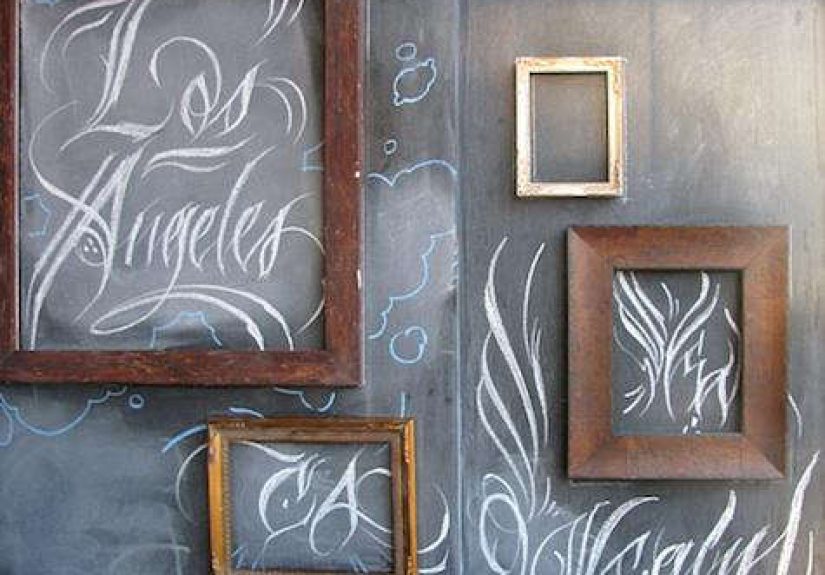
Framed chalkboard art is exactly what it sounds like: a chalk-friendly writing surface set into a picture frame so it feels finished. It can be permanent (a hand-lettered quote you never erase) or “seasonal,” where you swap messages for holidays, menus, reminders, party signage, or kid-friendly doodle zones.
The frame does three helpful things:
- It elevates the look. A simple black board becomes decor when it has a border and a bit of dimension.
- It protects edges. The frame covers rough panel edges and helps reduce chipping.
- It makes hanging easy. Most frames already have hardware or at least a clear path to add it.
The secret to “nice” chalkboard art isn’t mystical talentit’s a smooth surface, proper curing time, and a few lettering tricks that keep your message crisp and erasable.
Materials and Tools
You can keep this project ultra-basic or go full DIY goblin mode with power tools. Either path is valid.
Core Materials (choose based on your method)
- Picture frame (thrift store finds are perfect)
- Chalkboard paint (brush-on or spray) or a clear chalkboard topcoat if you want color underneath
- Surface option A: existing frame glass (great for chalk markers)
- Surface option B: backing panel (hardboard, MDF, plywood, or sturdy frame backer board)
Prep and Painting Supplies
- Cleaning spray or dish soap + water, lint-free cloth
- Fine-grit sandpaper (180–220 grit) or sanding sponge
- Painter’s tape
- Primer (especially for bare wood, slick/glossy surfaces, or glass depending on your approach)
- Dense foam roller or foam brush (for smoother coats)
- Drop cloth or cardboard to protect your workspace
For the “Art” Part
- Traditional chalk (white or colored)
- Chalk markers (best on non-porous/very smooth surfaces)
- Stencil (optional but sanity-saving)
- Soft eraser or microfiber cloth
- Q-tips or a small brush for cleanup details
Optional Upgrades
- Frame paint or stain (to match your decor)
- Hanging hardware (D-rings, wire, sawtooth)
- Backing paper or felt pads (to protect the wall)
Pick Your Method: Three Solid Ways to Make a Framed Chalkboard
The best method depends on what you want to write with and how “erasable” you need it to be. Here’s the cheat sheet:
- Use glass: smooth, crisp lines, chalk markers erase best (winner for neat typography).
- Use a panel: classic chalkboard feel, great for regular chalk, easy to repair/repaint.
- Build custom: perfect sizing for awkward spaces (coffee bars, entryways, pantry doors).
Method 1: Turn a Picture Frame’s Glass Into a Chalkboard (Sleek + Marker-Friendly)
If you love that “clean café sign” look, glass is your best friend. Chalk markers tend to perform better on non-porous surfaces, and glass is basically the VIP lounge of non-porous.
Step 1: Disassemble the frame
Remove the backing, paper, and glass. Set aside anything you want to reuse. If the frame has tiny metal tabs, lift them gently with a flat tool so you can re-bend them later.
Step 2: Clean the glass like it owes you money
Any oil, dust, or fingerprints can cause paint to fisheye or peel. Wash with dish soap and water, rinse, and dry. Finish with a lint-free wipe-down.
Step 3: Mask the edges (optional but neat)
Tape a border on the back side of the glass if you want a clean margin or if your frame overlaps weirdly.
Step 4: Prime (recommended for better adhesion)
Glass is smooth and smug. A primer designed for slick surfaces helps paint stick. Apply a thin, even coat and let it dry fully.
Step 5: Apply chalkboard paint
Use multiple light coats instead of one heavy coat. Whether you’re brushing or spraying, aim for even coverageno drips, no blobs, no “modern art accident” texture. Let it dry between coats.
Step 6: Let it cure before you write
It might feel dry quickly, but chalkboards behave better after a proper cure. Be patient hereyour future self will thank you.
Step 7: Reassemble
Put the glass back in the frame with the painted side facing inward (protected) and the writing surface facing out. Add the backing and close the tabs.
Best for:
- Chalk markers and crisp lettering
- Kitchen menus, party signs, entryway greetings
- People who want minimal chalk dust drama
Method 2: Paint a Backing Panel (Classic Chalkboard Feel)
This method is the reliable workhorse. You paint a flat board that fits inside the frameeither the existing backer board (if it’s sturdy) or a new panel you cut to size. It’s fantastic for traditional chalk and forgiving if you mess up.
Step 1: Size your panel
Trace the existing glass/backing and cut your panel to match. Hardboard is a favorite because it’s smooth and stable. MDF is smooth too, but seal/prime edges well because MDF edges love absorbing paint like it’s their full-time job.
Step 2: Sand and clean
Light sanding helps remove sheen and smooth imperfections. Wipe away all dust before priming.
Step 3: Prime (especially for bare wood/MDF/hardboard)
Primer improves adhesion and creates a uniform base. If you want a smoother chalkboard, lightly sand the primer once it’s dry, then wipe clean.
Step 4: Roll on chalkboard paint in thin coats
Use a dense foam roller for a smoother finish. Apply light coats and avoid over-rolling once it starts to tack up. Two coats usually does it; add a third if coverage looks patchy.
Step 5: Let it cure
Don’t rush to write the moment it’s dry-to-touch. A properly cured board erases better and resists permanent “first message ghosting.”
Step 6: Assemble the frame
Put your finished panel inside the frame (painted side facing out), replace the backing, and secure it. Add hanging hardware if needed.
Best for:
- Traditional chalk + that classic matte chalkboard look
- Rustic decor, farmhouse vibes, kid-friendly boards
- Anyone who wants easy repainting later
Method 3: Build a Custom Framed Chalkboard Panel (Perfect Fit for Weird Spaces)
If you’ve got a narrow wall above a coffee bar or a spot that screams “I need a sign here,” custom sizing is the move. The simplest build is a flat panel with a wood frame attached around it.
Basic build plan
- Cut a panel (hardboard/MDF/plywood) to your final chalkboard size.
- Make a frame from 1x2s or similar trim. Miter corners for a picture-frame look or butt-joint for easy mode.
- Attach the frame to the panel (wood glue + brad nails or screws). Clamp if possible.
- Fill, sand, and finish the wood frame (paint, stain, or distress).
- Prime + paint the panel area with chalkboard paint (tape the frame edge for crisp lines).
- Add hardware (D-rings + wire is sturdy for larger boards).
Best for:
- Large statement chalkboards
- Message centers (add hooks or a small ledge for chalk)
- Custom decor that looks store-bought (but isn’t)
The Make-or-Break Step: Season (Prime) Your Chalkboard Surface
Seasoning is not just a quirky craft ritual. It reduces ghosting by filling tiny pores in the surface before your first real message. If you skip it, your first masterpiece may become a permanent resident, like a ghost that pays zero rent.
How to season a chalkboard
- Wait until the paint is fully cured (not just dry).
- Take a piece of chalk and rub it sideways over the entire surface (cover everything).
- Wipe it off with a soft cloth or felt eraser.
Re-season after deep cleaning, especially if you used water. It keeps the board writing and erasing nicely over time.
Lettering Tips So Your Chalkboard Art Looks Intentional (Not Like a Panic Note)
1) Choose the right writing tool
- Traditional chalk: soft, classic, erasable, a bit dusty. Great on painted panels.
- Chalk markers: bold, smooth, and great for detailed letteringbest on glass or very smooth sealed surfaces.
2) Use a simple layout trick
Lightly sketch guidelines with chalk: a center line, then top/bottom boundaries. This prevents the classic “why is the last word doing a cliff dive off the bottom edge?” issue.
3) Fake it with a stencil (proudly)
Stencils are not cheating. They’re “efficiency.” Tape the stencil firmly, dab or roll paint/marker carefully, and remove slowly. Crisp letters, minimal swearing.
4) Make highlights for a “pro” look
Add tiny white highlights on downstrokes, outline big letters, or include a simple wreath/line border. Small details read as “designed.”
5) Fix mistakes without nuking the whole board
- For chalk: a soft eraser or microfiber cloth usually does it.
- For small areas: use a slightly damp Q-tip, then dry immediately.
- For stubborn ghosting: re-season after cleaning and try again.
Care and Cleaning: Keep It Erasable
A chalkboard is basically a tiny relationship: treat it well, and it stays cooperative.
- Dry erase first: use a felt eraser or dry cloth for everyday changes.
- Use water sparingly: damp cloth is fine for deeper cleaning, but dry it immediately.
- Avoid abrasives: rough sponges can scratch the surface and make future writing messy.
- Re-season occasionally: especially after a wet wipe-down.
Troubleshooting: Fix the Most Common Chalkboard Problems
Problem: Ghosting (old writing won’t fully erase)
Usually caused by skipping seasoning or writing too soon. Fix it by cleaning gently, letting it dry completely, then seasoning again. If ghosting persists, the surface may need another coat of paint.
Problem: Brush marks / roller texture
Use a dense foam roller and thin coats. Over-rolling once paint starts to dry can create texture. If it’s already textured, lightly sand (once fully cured), wipe dust, and apply another thin coat.
Problem: Paint peeling off glass
Glass needs better prep and often a primer for slick surfaces. Clean thoroughly, prime properly, and use light coats. Also make sure the painted side faces inward when reassembled so it’s protected.
Problem: Chalk marker stains that won’t erase
Chalk markers usually erase best on non-porous surfaces like glass. On porous painted boards, they can stain. Test your marker in a corner first. If it stains, switch to traditional chalk or move to the glass method.
Problem: Warping panel
Thin panels can warp with moisture or heavy paint. Seal/prime evenly, store flat while drying, and consider a sturdier panel for larger boards.
Ideas for What to Put on Your Framed Chalkboard (Besides “Eat More Vegetables”)
- Kitchen: weekly menu, grocery list, “coffee bar” sign, recipe conversions
- Entryway: welcome message, reminders, family schedule
- Parties: drink menu, seating notes, photo booth sign
- Kids’ space: doodle board, chore list, reading tracker
- Home office: task priorities, quote-of-the-week, content calendar
Pro tip: if you want something to look “artsy” without trying too hard, write one big word in the center and add tiny supporting text above and below. Big simple typography is basically interior design’s cheat code.
Conclusion: Make It Once, Change It Forever
DIY framed chalkboard art is one of those projects that punches above its weight: it costs little, uses basic tools, and looks like something you’d impulse-buy while “just browsing” a home decor aisle. The keys are simple: prep your surface, apply thin coats, let it cure, season it, then write with the right tool.
Whether you go sleek with glass and chalk markers or classic with a painted panel, you end up with decor that can change as often as your moodor your guests. And if all else fails, you can always erase the evidence. That’s the beauty of it.
Experiences From the Framed-Chalkboard Trenches (The Good, the Dusty, and the “Why Won’t This Erase?”)
People who try framed chalkboard art for the first time often expect it to behave like a whiteboard: write, erase, repeat, perfection. Then reality shows up with a tiny felt eraser and a smug grin. The most common experience is discovering that chalkboards have opinions especially about timing. Write too soon and you may meet your first chalkboard “memory,” a faint shadow of your very first message that lingers like a cheesy rom-com plot. That’s why seasoned DIYers (pun fully intended) start treating curing time like a rule, not a suggestion: they paint, they walk away, and they come back later like responsible adults. It’s not glamorous, but it works.
Another shared experience is the “surface identity crisis.” Many makers begin with a painted backing board because it feels traditional and it is!but then they fall in love with chalk markers on social media. Chalk markers look bold and tidy, so they try them on a painted, slightly porous surface… and suddenly the letters won’t erase cleanly. That moment usually ends with a gentle panic, a damp cloth, and a promise to test markers in the corner next time. After that lesson, a lot of people switch to the glass method for marker-heavy designs, because the surface is smoother and the cleanup is dramatically less dramatic.
Frame selection comes with its own mini-adventures. Thrift-store frames are a bargain, but they’re also a mystery box: you may get real wood, you may get plastic pretending to be wood, or you may get a finish so glossy it could signal aircraft. The experience many DIYers report is realizing that “a quick paint job” is only quick if you clean and scuff-sand first. Skip that step and the frame paint can scratch off if you look at it too intensely. Do the prep, and suddenly that bargain frame looks like boutique decor. It’s an immediate glow-up.
Then there’s lettering, which is where confidence and reality sometimes politely disagree. A lot of folks start with freehand writing, hate it, erase it, try again, hate it slightly less, erase it again, and eventually decide that stencils are not cheatingthey’re emotional support. And here’s the funny part: once you use a stencil for a big word or a fancy phrase, you can add tiny hand-drawn details around it and it still feels personal. The experience becomes less “I am an artist” and more “I am a person with tape and a plan,” which is honestly the most accurate description of DIY.
Finally, people almost always develop a favorite “chalkboard routine.” Some keep a minimal design and change it weekly: menu on Sunday, grocery list midweek, a cute quote when company comes over. Others go full seasonalpumpkins in October, evergreen doodles in December, bright citrus sketches in summer. The board becomes a tiny, changeable landmark in the home. And that’s the real magic: you’re not making one piece of artyou’re making a frame for hundreds of future messages. Plus, it’s one of the few decor projects where mistakes are literally designed to be erased. That kind of forgiveness is rare in both crafting and life.





