
Table of Contents >> Show >> Hide
- Why Spatchcock Chicken Is the Best Way to Grill a Whole Bird
- What You’ll Need
- How to Spatchcock (Butterfly) a Chicken
- The Secret Weapon: Dry Brine (Optional, But Highly Recommended)
- Best Two-Zone Grill Setup (Charcoal and Gas)
- Best Grilled Spatchcock Chicken Recipe (Step-by-Step)
- Timing Guide (So You Don’t Stare at the Grill Like It Owes You Money)
- How to Carve a Spatchcock Chicken (Fast and Clean)
- Flavor Variations (Same Method, Different Vibes)
- Troubleshooting: Common Problems and Easy Fixes
- Food Safety and Doneness (The Non-Negotiables)
- What to Serve With Grilled Spatchcock Chicken
- Conclusion: Your New Go-To Whole Chicken on the Grill
- Extra: Real-World Grilling Experiences and Lessons (500+ Words)
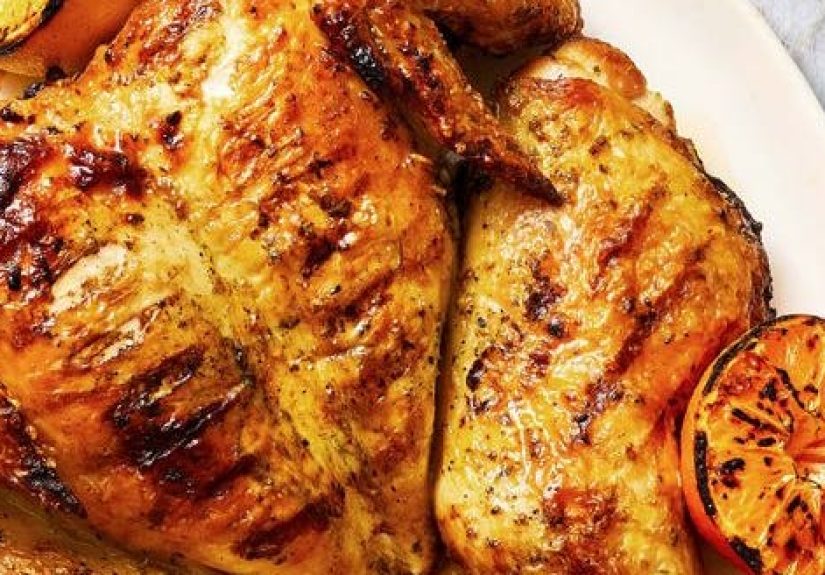
If you’ve ever grilled a whole chicken and ended up with one dry breast, one undercooked thigh, and a grill that looks like it fought a grease fire and lost… welcome. Spatchcocking (a.k.a. butterflying) is the glow-up your chicken deserves. You remove the backbone, flatten the bird, and suddenly everything cooks faster, more evenly, and with more crispy skin per square inch. It’s like turning your chicken from a puffy winter coat into a sleek summer outfit: less bulk, more airflow, better results.
This guide gives you a foolproof, juicy-on-the-inside, crackly-on-the-outside grilled spatchcock chicken recipe with a simple rub, a smart two-zone grilling setup, and the exact timing/temperature checkpoints that keep you in control. We’ll also cover charcoal vs. gas, flare-up prevention, seasoning variations, and the tiny details that separate “pretty good” from “why is everyone suddenly quiet while eating.”
Why Spatchcock Chicken Is the Best Way to Grill a Whole Bird
Spatchcocking is the rare cooking trick that’s both easier and better. Here’s why it wins:
- Even cooking: The breast and thighs sit closer to the same thickness, so you’re not playing “hot/cold roulette.”
- Faster grilling: A flattened chicken cooks quicker than a round, pillow-shaped bird.
- More crispy skin: More skin faces the heat, and it renders better when the lid stays closed.
- Better seasoning coverage: Rub and salt reach more surface area (and more nooks and crannies).
- Easier carving: Once it’s done, it breaks down like a champno wrestling match required.
What You’ll Need
Tools
- Grill (charcoal or gas)
- Instant-read thermometer (your best friend in chicken situations)
- Kitchen shears (for removing the backbone)
- Tongs + a sturdy spatula
- Paper towels
- Optional: a drip pan (prevents flare-ups and keeps cleanup less dramatic)
- Optional: a cast-iron skillet or “grill press” (for extra-crispy skin)
Ingredients (Serves 4–6)
- 1 whole chicken, 3.5–5 lb
- 2–2.5 tsp kosher salt (adjust if using table salt)
- 1.5 tsp black pepper
- 2 tsp smoked paprika
- 1 tsp garlic powder
- 1 tsp onion powder
- 1 tsp dried thyme (or oregano)
- 1 tsp brown sugar (optional, helps browningkeep an eye to avoid burning)
- 1–2 tbsp neutral oil (avocado/canola) or olive oil
- 1 lemon (zest optional, wedges for serving)
- Optional: 1/4–1/2 tsp cayenne or chili flakes
Flavor note: This rub is “backyard classic” with a little swagger. It’s not sweet like candy, not spicy like punishmentjust balanced, grill-friendly, and versatile.
How to Spatchcock (Butterfly) a Chicken
- Remove packaging and pat dry: Take the chicken out, remove any giblets, then pat it very dry with paper towels. Dry skin is crispy skin. Moisture is the enemy. (Moisture is also great in other parts of life. Just not here.)
- Cut out the backbone: Place chicken breast-side down. Using kitchen shears, cut along one side of the backbone from tail to neck. Repeat on the other side and remove the backbone. Save it for stock if you’re that kind of responsible adult.
- Flatten it: Flip chicken breast-side up and press down firmly on the breastbone until it cracks and lies flat. If it feels dramatic, that’s because it isthis is the chicken’s “final form.”
- Tuck tips (optional): Tuck wing tips behind the breast to prevent burning.
Quick hygiene reminder: Wash hands, sanitize the board, and keep raw-chicken tools away from ready-to-eat foods. Your future self will thank you.
The Secret Weapon: Dry Brine (Optional, But Highly Recommended)
If you have time, salt the chicken ahead. This is the low-effort move that gives you juicier meat and better browning.
- Sprinkle the chicken all over with kosher salt (and a little pepper if you want).
- Place it on a tray or plate uncovered in the fridge for 8–24 hours.
- Before grilling, add oil and the rest of the spice rub.
No time? No problem. Even 30–60 minutes of salted rest in the fridge helps. If you’re truly in a rush, season and grillstill delicious.
Best Two-Zone Grill Setup (Charcoal and Gas)
The most reliable way to grill a spatchcock chicken is a two-zone setup: one hot side (direct heat) and one cooler side (indirect heat). Indirect cooks the chicken through gently; direct finishes the skin crispy. It’s basically the chicken version of “bake, then broil.”
Charcoal Grill Two-Zone Setup
- Light a chimney of charcoal. When covered in gray ash, dump it on one side of the grill.
- Leave the other side empty (that’s your indirect zone).
- Place a drip pan on the indirect side if you want fewer flare-ups.
- Target grill temp: 375–425°F with lid closed.
Gas Grill Two-Zone Setup
- Preheat all burners on medium-high for 10–15 minutes.
- Turn off one side (or a middle burner, depending on grill design) to create indirect heat.
- Adjust lit burners to maintain 375–425°F with lid closed.
- Oil grates right before cooking.
Why that temperature range? Hot enough to render fat and brown skin, not so hot that the outside finishes before the inside gets safe and tender.
Best Grilled Spatchcock Chicken Recipe (Step-by-Step)
Step 1: Season Like You Mean It
- In a small bowl, mix pepper, paprika, garlic powder, onion powder, thyme, and optional brown sugar/cayenne.
- Rub chicken lightly with oil (both sides).
- Sprinkle rub evenly over the chicken. Don’t forget the thighs and the “hinge” areas near joints.
- Optional: add lemon zest for extra brightness.
Step 2: Indirect Grill First (Cook Through Gently)
- Place chicken skin-side up on the indirect side of the grill.
- Position legs slightly closer to the heat source than the breast (legs can handle more heat).
- Close lid and maintain 375–425°F.
- Cook for 25–45 minutes depending on chicken size and grill stability.
- Start checking temperature around the 25-minute mark:
- Breast target before crisping: ~150–155°F
- Thigh target before crisping: ~160°F
Step 3: Crisp the Skin Over Direct Heat (The Victory Lap)
- Move chicken to the direct-heat side, skin-side down.
- Grill 2–6 minutes until the skin is deeply golden and crisp. Watch closelythis is where “perfect” becomes “whoops.”
- Flip briefly if needed to even browning, but keep skin-down time as the main event.
Step 4: Final Temperature + Rest
Cook until the thickest part of the breast and thigh reaches a safe internal temperature of 165°F. If you pull it a few degrees early (like 160–162°F), let it rest and confirm it reaches 165°F with carryover heat.
- Transfer to a cutting board.
- Tent loosely with foil and rest 10 minutes.
- Carve and serve with lemon wedges.
Timing Guide (So You Don’t Stare at the Grill Like It Owes You Money)
- 3.5–4 lb chicken: 25–35 min indirect + 2–5 min direct crisping
- 4.5–5 lb chicken: 35–45+ min indirect + 3–6 min direct crisping
Grill conditions vary (wind, fuel, lid-opening habits, the mysterious mood of charcoal), so use these as a mapnot a contract. The thermometer is the truth-teller.
How to Carve a Spatchcock Chicken (Fast and Clean)
- Remove legs: slice through skin between leg and breast, pop the joint, and cut through.
- Separate thighs and drumsticks if desired.
- Remove wings.
- Slice breast meat off the bone on each side, then cut into portions.
Pro move: Serve it family-style on a platter. It looks fancy, but it’s secretly just “I didn’t want to find 6 plates.”
Flavor Variations (Same Method, Different Vibes)
1) Lemon-Herb “Greek-ish”
- Add oregano, garlic, lemon zest, and a splash of olive oil + lemon juice after grilling.
- Serve with cucumber salad, feta, and warm pita.
2) BBQ Dry Rub
- Use your favorite BBQ rub (go lighter on sugar if grilling hot).
- Brush with BBQ sauce only in the last 5 minutes to prevent burning.
3) Five-Spice + Scallion Relish
- Add Chinese five-spice and a pinch of sugar to your rub.
- Top with a quick relish: scallions + vinegar + sesame oil + a little soy.
4) “Chicken Under a Skillet” (Extra Crispy)
- During the indirect phase, set a heavy cast-iron skillet on top of the chicken (carefully!) to press it.
- It boosts contact, helps render fat, and gives you that ultra-crisp skin without actual bricks.
Troubleshooting: Common Problems and Easy Fixes
Problem: Skin is rubbery, not crispy
- Fix: Pat the chicken dry, dry brine if possible, and finish over direct heat.
- Also: Keep the lid closed during indirect cooking so heat circulates and renders fat.
Problem: Flare-ups are trying to end your cookout
- Fix: Use a drip pan on the indirect side, trim excessive fat, and keep a cool zone ready to move the chicken.
- Do not: Spray flames with a water bottle like you’re putting out a candle. It can kick up ash and steam the skin.
Problem: Breast done, thighs not
- Fix: Angle legs toward the hotter side during indirect cooking.
- Fix: Give thighs a little extra direct heat at the endthighs love it.
Problem: Spices burning
- Fix: Reduce sugar in rub, keep most cooking indirect, and only crisp briefly over direct heat.
Problem: Chicken tastes “fine” but not “wow”
- Fix: More salt (within reason), dry brine, and finish with acid (lemon) or a bright sauce.
- Fix: Add a compound butter (herb + garlic) after grilling for instant richness.
Food Safety and Doneness (The Non-Negotiables)
Chicken should reach 165°F in the thickest part of the meat. Always measure with a thermometercolor and “juices run clear” are not reliable. If you use carryover cooking, verify that the temperature reaches 165°F during rest before serving.
For the juiciest results, avoid blasting the breast with intense direct heat for too long. The two-zone method protects the breast while still letting you crisp the skin at the end.
What to Serve With Grilled Spatchcock Chicken
- Grilled corn with lime + cotija
- Watermelon-feta salad
- Roasted or grilled potatoes (par-cook first for speed)
- Simple slaw (vinegar-based keeps it bright)
- Garlic bread (because carbs are the real MVP)
- Any “sauce with attitude”: chimichurri, Alabama white sauce, lemon-garlic yogurt
Conclusion: Your New Go-To Whole Chicken on the Grill
A great grilled spatchcock chicken isn’t about complicated marinades or secret equipment. It’s about smart shape (flat), smart fire (two zones), smart timing (indirect then crisp), and smart temperature checks (thermometer, always). Do that, and you’ll get juicy meat, crackly skin, and the kind of dinner that makes people ask, “Okay, what did you do to this?”
Once you nail the method, you can change the flavors endlesslyGreek, BBQ, five-spice, spicy citrus, herb-butterwithout changing the fundamentals. Master the technique once, and you’ve basically unlocked “weeknight fancy” for life.
Extra: Real-World Grilling Experiences and Lessons (500+ Words)
If you hang around enough backyard grillers, a few patterns show uplike how everyone swears their grill runs “pretty steady,” right before it spikes 75 degrees because someone left the lid open to “just check.” The good news is spatchcock chicken is forgiving if you treat it like a project with checkpoints instead of a mystery novel with a surprise ending.
One of the most common experiences people report is the “looks done, isn’t done” moment. The skin is golden, the smell is incredible, and everyone’s suddenly standing near the grill like it’s a concert. Then you cut into the thigh and realize you’ve been living a lie. This happens because browning is a surface event; doneness is a temperature event. The fix is simple: build the habit of checking the thickest part of the thigh and the thickest part of the breast every time. After a few cooks, you’ll notice your grill has a personalityhotter near the back, or cooler on the leftand you’ll start placing the bird accordingly without even thinking about it.
Another real-world lesson: flare-ups are not a moral failing, they’re just physics. Chicken fat renders, drips, and occasionally chooses violence. People who “never get flare-ups” usually do one of three things: (1) cook more indirectly, (2) use a drip pan, or (3) keep a cooler zone ready and move the chicken the second the flames get ambitious. If you cook skin-side down over direct heat for too long, you’re basically inviting the fire to a party and acting surprised when it shows up loud. The method in this article avoids that by crisping the skin at the endshort, controlled, and supervised.
There’s also the seasoning discovery arc. Many cooks start with a big wet marinade, because it feels like “more effort = better.” Then they try a dry brine plus rub and realize the chicken tastes more like chicken (in a good way), the skin browns better, and the grill stays cleaner. A dry brine also helps the meat hold onto moisture, which matters when you’re cooking over live fire. The funniest part? The “fancy” result comes from doing lesssalt earlier, dry the skin, cook smarter.
If you grill on gas, you’ll probably notice how opening the lid repeatedly makes the temperature bounce around. Gas grills recover faster than charcoal, but you still lose heat every time you peek. Many experienced grillers adopt a simple rule: set a timer, then trust it. Check at 20–25 minutes, then again every 5–10 minutes as you approach target temps. If you grill on charcoal, wind and fuel placement matter more; rotating the chicken 180 degrees during the indirect phase can even things out if one side is cooking faster.
Finally, there’s the crowd factor. Spatchcock chicken is a sneaky win when you’re feeding people because it looks impressive and carves easily into portions. You can scale up by cooking two chickens at onceas long as you keep that two-zone setup and don’t cram the grill so full that hot air can’t circulate. And if you’re serving guests, one of the best “experience-based” moves is finishing with something bright: lemon wedges, a vinegar-based sauce, or a quick herb salsa. That little punch of acidity makes grilled chicken taste lighter, fresher, and more expensive than it has any right to.
The takeaway from all these shared experiences is this: the best grilled spatchcock chicken isn’t luck. It’s a repeatable systemdry skin, two zones, thermometer checkpoints, a short crisp at the end, and a rest before carving. Do that a couple times and you’ll stop “hoping” it’s done and start knowing. That’s when grilling becomes fun instead of stressful.





