
Table of Contents >> Show >> Hide
- Why a Black-Painted Bathtub Works (and When It Absolutely Won’t)
- Painted vs. Refinished vs. Replaced: Choose Your Adventure
- The Black-Painted Bathtub Roundup: 5 Routes to the Dark Side
- 1) The Classic: Two-Part Epoxy “Tub & Tile” Kits (Roll-On/Brush-On)
- 2) The “Looks Like Glass” Option: Pour-On, Self-Leveling Coatings
- 3) The Fast-But-Fussy Route: Spray-On Refinishing
- 4) The Two-Tone Favorite: Paint the Tub Exterior Black (Leave the Basin Light)
- 5) The Pro Move: Professional Reglazing in Custom Black
- Prep Work: The Unsexy Part That Makes It Last
- Finish, Sheen, and the Great Water-Spot Debate
- Styling a Black Tub So It Looks Intentional
- Care & Feeding: Keeping Black Looking Sharp
- Quick Troubleshooting Guide
- Conclusion: Your Best Path to a Black-Painted Tub
- Field Notes: Real-Life Experiences with a Black-Painted Bathtub (Extra )
A black-painted bathtub is the bathroom equivalent of wearing sunglasses indoors: it’s bold, a little mysterious,
and it instantly tells everyone you have opinions. Done right, a black tub looks custom, architectural,
and ridiculously expensive. Done wrong, it looks like a shortcut… because it is a shortcut… that you took while
holding a roller and whispering, “It’ll be fine.” (Spoiler: it can be fine.)
This roundup pulls together the best real-world guidance from major U.S. home-improvement and design sources and
translates it into one practical, non-cringey game planwhether you’re going full-on matte black villain era or
just trying to rescue a sad tub on a human budget.
Why a Black-Painted Bathtub Works (and When It Absolutely Won’t)
Black tubs work because they create contrast and a focal point. They anchor a bathroom the way a black grand piano
anchors a living room: you don’t need a lot of other “stuff” when the centerpiece is doing the most.
But black finishes are also brutally honest. They’ll highlight:
- Uneven prep: any leftover gloss, soap scum, or silicone will telegraph as peeling or fisheyes.
- Mineral deposits: hard-water spots show up like chalk on a blackboard.
- Texture mistakes: roller lint, dust, and drips become “design details” you did not approve.
The good news: you can win this. The not-as-fun news: the win happens in preparation, ventilation, and patience
not in the moment you triumphantly choose “Black” on a product listing at 1:12 a.m.
Painted vs. Refinished vs. Replaced: Choose Your Adventure
People say “painted tub,” but what you’re usually doing is refinishingapplying a hard, chemical-resistant
coating designed for constant water exposure (unlike normal wall paint, which will fail dramatically and quickly).
Your main options:
-
DIY tub refinishing kits (roll-on, brush-on, pour-on): lowest cost, highest prep demands, results
vary with technique. -
Professional reglazing/refinishing: more durable and consistent, can handle custom colors like black,
costs more but saves time and sanity. -
Replacement: best for cracked, flexing, rusted-through, or structurally failing tubs; usually the most
expensive and disruptive.
A quick reality check: if your tub has deep structural cracks, severe rust, or movement underfoot, refinishing is
a glow-up on top of a problem. Fix the problem firstor plan for replacement.
The Black-Painted Bathtub Roundup: 5 Routes to the Dark Side
1) The Classic: Two-Part Epoxy “Tub & Tile” Kits (Roll-On/Brush-On)
This is the mainstream DIY lane: a two-part epoxy (or epoxy-acrylic) coating designed for wet environments. These kits
are widely available at big-box retailers and are formulated specifically for tubs, tile, and sinks.
Best for: porcelain-enamel tubs, fiberglass tubs, and “I can follow directions” adults.
Pros: accessible, tough finish, familiar application (roller/brush).
Cons: fumes can be intense; prep is non-negotiable; many kits lean toward whites/neutral tonestrue black
availability depends on brand.
Black note: If you find a kit in black, verify it’s intended for full tub surfaces (not just touch-ups),
and double-check whether it’s rated for immersion and constant water exposure.
2) The “Looks Like Glass” Option: Pour-On, Self-Leveling Coatings
Pour-on systems are thicker and self-leveling, which can create that smooth “new tub” lookespecially when the tub has
cosmetic wear but is structurally sound. This category often appeals to people who want fewer brush marks and a more
uniform finish.
Best for: a full makeover where you want a cleaner, more uniform surface.
Pros: thicker build, sleek results, often lower odor depending on formulation.
Cons: technique matters (edge control, drips); masking must be meticulous; can cost more than basic kits.
Black note: Some pour-on systems can be sourced in pre-tinted colors, including black, but availability may require
ordering through specific channels rather than grabbing a box off a shelf.
3) The Fast-But-Fussy Route: Spray-On Refinishing
Spray products can be tempting because they feel “easier.” In practice, spraying a bathtub evenlywithout dry spray,
overspray, striping, or textureis a skill. Sprays can work for small areas or specific tub sections, but full-tub results
often depend on your setup and patience.
Best for: smaller refinishing zones, or controlled projects with excellent masking and airflow.
Pros: no roller marks, quick coverage, convenient for tight details.
Cons: overspray risk, texture risk, and a high chance of “patchy noir” if your coats aren’t consistent.
4) The Two-Tone Favorite: Paint the Tub Exterior Black (Leave the Basin Light)
If you love the black-tub look but don’t want to gamble with an all-black bathing surface, consider the two-tone route:
keep the inside finish a durable light color (existing enamel or a standard refinishing tone) and paint the exterior
of the tub black for drama.
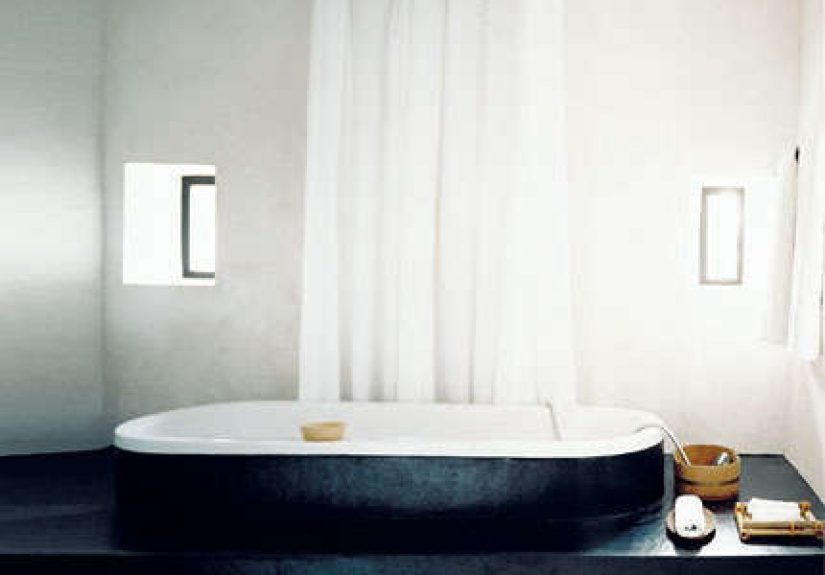
This is especially popular for clawfoot tubs: black outside, light inside, with brass or chrome fixtures. You still need
good prep, but the exterior doesn’t take the same daily abuse as the basin.
Best for: clawfoot tubs, freestanding tubs, and anyone who wants high style with lower risk.
Pros: easier maintenance; fewer water-spot battles; dramatic look.
Cons: still requires careful prep and curing; scuffs can happen if you bump with vacuums or storage bins.
5) The Pro Move: Professional Reglazing in Custom Black
If you want a true, consistent black finish inside the tubespecially in a specific sheen (satin, matte-leaning, etc.)professional
refinishing is often the most predictable path. Pros can also address surface defects more thoroughly, and they typically have coatings and
spraying equipment designed for this exact job.
Best for: “I want it to look factory,” busy households, or bathrooms where failure would be a catastrophe.
Pros: smoother, more consistent results; custom color options; quicker turnaround than a full remodel.
Cons: higher cost than DIY; you’re scheduling a service and trusting someone else’s prep standards.
Prep Work: The Unsexy Part That Makes It Last
Here’s the truth nobody wants on a throw pillow: prep is the project. The coating is just the victory lap.
No matter which route you choose, the consistent best practices look like this:
- Remove hardware and old caulk: coatings don’t bond to silicone, and edges are where failure begins.
- Deep clean like you’re being audited: soap scum, body oils, and cleaners leave residue that blocks adhesion.
- Dull the surface: sanding/etching creates tooth for bonding; glossy tubs need to become uniformly matte.
- Repair chips and pits: fillers and patch compounds prevent “craters” from showing through a dark finish.
- Mask and protect everything: floors, walls, fixturesrefinishing products are stubborn once cured.
- Ventilate aggressively: this is not a “tiny fan and vibes” situation; use real airflow and PPE.
If you skip steps, black will snitch. Dark colors magnify surface issues, so your “good enough” moment becomes your “why is there a bump shaped
like my thumb?” moment.
Finish, Sheen, and the Great Water-Spot Debate
Choosing black isn’t one decisionit’s a family of decisions:
- Gloss black: dramatic and reflective, can look “new,” but highlights scratches and residue.
- Satin black: the crowd-pleaser; slightly softer reflection and more forgiving day-to-day.
- Matte black: designer-cool, but can show mineral spots and soap film unless you’re consistent with wipe-downs.
In real bathrooms, satin is often the sweet spot: it reads modern and intentional, without demanding you become a full-time tub detailer.
Styling a Black Tub So It Looks Intentional
A black tub can feel heavy if everything else is dark. The easiest way to make it look expensive (instead of “I painted my tub and now it’s a void”)
is contrast + texture:
- High contrast: white walls, light tile, or pale microcement makes the tub pop.
- Warm metals: brass and champagne bronze soften black and add “boutique hotel” energy.
- Natural materials: oak vanity, woven baskets, linen curtainsblack loves warmth nearby.
- Repeat the black: echo it once or twice (frame, sconce, faucet) so the tub feels like part of a plan.
Example: In a small alcove bathroom, pair a black-painted tub with white subway tile, light grout, and a warm wood vanity.
Add two matte-black accents (a frame and a sconce) so the tub isn’t the only goth at the party.
Care & Feeding: Keeping Black Looking Sharp
The maintenance mindset is simple: black finishes look best when residue doesn’t get a chance to build a long-term relationship with the surface.
Try this routine:
- After-use rinse + quick wipe: a microfiber cloth or squeegee knocks down spots before they dry.
- Weekly gentle clean: non-abrasive cleaner and a soft sponge; avoid harsh scouring pads.
- Hard-water strategy: if spots are constant, consider a water-softening approach or a filtered shower head; test any DIY solutions
in a hidden area first. - No abrasives: steel wool and aggressive powders can dull or scratch coatings, especially on dark colors.
Think of it like owning a black car: stunning when clean, slightly dramatic about dust, and absolutely worth it if you accept the ritual.
Quick Troubleshooting Guide
- Peeling near edges: often leftover silicone/soap scum or inadequate sanding. Edges need obsessive prep and clean transitions.
- Bubbles or fisheyes: contamination (oil, cleaner residue) or moisture. Clean again, rinse well, and allow full dry time.
- Rough texture: dust, roller fuzz, or spray dry-fall. Control airflow (but avoid blasting dust) and use lint-free tools.
- Dull patches: uneven coat thickness or premature exposure to water/cleaners. Respect cure time like it’s a sacred text.
Conclusion: Your Best Path to a Black-Painted Tub
If you want the black-tub look with the least drama, start by deciding where you need “pretty” versus where you need “indestructible.”
Two-tone (black exterior, lighter interior) is the safest high-style option. If you want a full black basin, choose a system that offers a true black
coating and commit to prep, ventilation, and curing. And if you’d rather spend money than weekends, professional reglazing is the cleanest route to
a uniform black finish that looks intentionalnot improvised.
In other words: go ahead and give your tub its black-tie moment. Just don’t skip the boring steps that make the fancy steps work.
Field Notes: Real-Life Experiences with a Black-Painted Bathtub (Extra )
Living with a black-painted tub is a little like adopting a black cat: gorgeous, photogenic, and occasionally covered in evidence of daily life
that you swear wasn’t there five minutes ago. The first week after refinishing is the honeymoon periodeverything looks crisp, intentional, and
slightly editorial. You’ll walk past the bathroom door and open it for no reason other than to admire your handiwork, like you’re touring a showroom
and the salesperson is you.
Then real life happens. Someone takes a bath with a product that contains oils. A bar of soap slips. The water dries while you’re answering one email
that turns into twelve. The black surface, being the honest little diva it is, starts revealing faint mineral rings and a whisper of soap film. This is
not a failure. This is simply black doing what black does: making contrast obvious.
The households that love their black tubs long-term tend to develop tiny habits that feel almost comically small, but add up to a big difference.
The most common is the “30-second reset”: after the last shower of the day, a quick rinse and a wipe with a microfiber cloth. It’s not deep cleaning.
It’s more like brushing your teethsmall, daily maintenance so you don’t have to do dramatic weekend interventions.
Another real-world discovery: sheen changes how the tub “reads” in different lighting. In daylight, a satin black can look soft and velvety. Under harsh
overhead bulbs, the same surface might look more reflective and reveal more spotting. People who end up happiest usually adjust lighting (warmer bulbs,
softer fixtures) and add one or two warm elements nearbywood, brass, or textured textilesso the black looks rich rather than flat.
On the DIY side, experience teaches a few rules fast. First: masking is not optional, because the stuff that makes tub coatings durable also makes them
extremely committed to any surface they touch. Second: edges are everything. The area near the drain, corners, and where the tub meets tile is where
water lingers and where prep mistakes show up first. People who took extra time removing old caulk, cleaning residue, and ensuring a uniformly dull surface
usually report far fewer “why is it peeling right here?” moments later.
Finally, black-painted tubs change the vibe of bathing. A white tub feels clinical and bright. A black tub feels spa-like and intimatealmost like the
bathroom got quieter. Add a candle (safely), a bath tray, and a fluffy towel, and suddenly you’re not just cleaning upyou’re “taking a moment.”
Is it slightly ridiculous that color can do that? Yes. Will you enjoy it anyway? Also yes. Because at the end of the day, the best bathroom upgrades
aren’t just about resale value. They’re about walking into a room you use daily and thinking, “Okay… this feels good.”





