
Table of Contents >> Show >> Hide
- Before You Begin: What You Need
- How to Remove a Shower Head: 12 Steps
- Step 1: Turn Off the Shower
- Step 2: Protect the Tub or Shower Floor
- Step 3: Inspect the Shower Head Connection
- Step 4: Try Removing It by Hand First
- Step 5: Wrap the Connection to Prevent Scratches
- Step 6: Hold the Shower Arm Steady
- Step 7: Loosen the Shower Head with a Wrench
- Step 8: Use Vinegar for Mineral Buildup
- Step 9: Try Again After Soaking
- Step 10: Remove the Shower Head Completely
- Step 11: Clean the Shower Arm Threads
- Step 12: Check the Shower Arm Before Reinstalling
- What to Do If the Shower Head Is Stuck
- Common Mistakes to Avoid
- When Should You Replace a Shower Head?
- How to Clean a Removed Shower Head
- How to Reinstall or Replace the Shower Head
- Safety Tips for DIY Shower Head Removal
- Experience Notes: What Real Shower Head Removal Teaches You
- Frequently Asked Questions
- Conclusion
Removing a shower head sounds like one of those tiny home projects that should take five minutesright up until the old fixture refuses to move, the pipe starts looking nervous, and you begin questioning every life choice that led you to stand in a bathtub holding pliers. The good news? Learning how to remove a shower head is usually simple, affordable, and very beginner-friendly when you know the right order of steps.
Whether you are replacing an outdated shower head, cleaning mineral buildup, installing a handheld model, or upgrading to a WaterSense-labeled fixture, this guide walks you through the process carefully. You do not need to be a licensed plumber to remove most standard shower heads. You simply need patience, the right tools, and the ability to turn something counterclockwise without declaring war on the entire bathroom.
Below, you will find 12 clear steps for removing a shower head safely, plus troubleshooting advice for stuck fittings, tips for protecting the shower arm, and real-world experience notes to help you avoid common mistakes.
Before You Begin: What You Need
Gathering tools first makes the project smoother. Nobody wants to climb out of the shower area mid-project to hunt for plumber’s tape while dripping confidence all over the floor.
Tools and Supplies
- Adjustable wrench
- Slip-joint pliers or channel-lock pliers
- Soft cloth, towel, or painter’s tape
- Old toothbrush or small cleaning brush
- White vinegar
- Plastic bag and rubber band for soaking mineral buildup
- Plumber’s tape, also called PTFE tape or thread seal tape
- Bucket or towel to catch drips
- Replacement shower head, if installing a new one
How to Remove a Shower Head: 12 Steps
Step 1: Turn Off the Shower
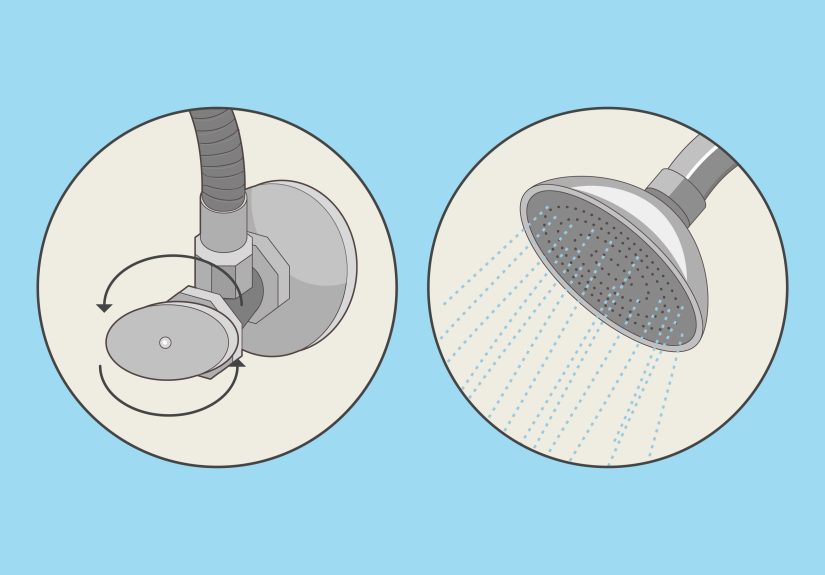
Start by making sure the shower is completely turned off. For most basic shower head removal jobs, you do not need to shut off the water supply to the entire house. The shower valve being off is usually enough because you are working at the fixture end, not opening the water line inside the wall.
However, if your shower valve leaks, your plumbing is old, or you feel unsure, turn off the bathroom water supply or main water valve before beginning. Safety beats surprise indoor rain every time.
Step 2: Protect the Tub or Shower Floor
Place a towel, rubber mat, or folded cloth on the shower floor. This protects the surface if a wrench slips or the shower head drops. It also gives small parts, washers, or filter screens a soft landing instead of letting them bounce dramatically toward the drain like tiny plumbing escape artists.
If your drain is open, cover it with a washcloth or drain cover before you start. Many shower heads contain a rubber washer or small screen inside the connector, and those pieces are easy to lose.
Step 3: Inspect the Shower Head Connection
Look closely at where the shower head connects to the shower armthe angled pipe coming out of the wall. Most standard shower heads screw directly onto the threaded end of the shower arm. The connection may have flat sides for a wrench, a round collar, or a decorative nut.
Check for rust, white crusty mineral deposits, old plumber’s tape, or hardened sealant. These clues tell you whether the shower head will come off easily or whether it needs a little persuasion.
Step 4: Try Removing It by Hand First
Grip the base of the shower head where it meets the shower arm. Turn it counterclockwise. Remember: lefty-loosey, righty-tighty. If the shower head loosens by hand, keep turning until it comes off completely.
Do not grab the spray face and twist aggressively. Hold the connector area instead. Twisting the wrong part can damage the shower head, especially if it has plastic components, a swivel ball, or a handheld hose attachment.
Step 5: Wrap the Connection to Prevent Scratches
If the shower head will not move by hand, wrap a soft cloth or towel around the connector. You can also wrap painter’s tape or electrical tape around the jaws of your pliers or wrench. This simple step protects chrome, brushed nickel, matte black, brass, and other finishes from ugly tool marks.
Skipping this step is how a “quick upgrade” turns into a permanent reminder that metal teeth and shiny finishes are not friends.
Step 6: Hold the Shower Arm Steady
Use one hand or a pair of protected pliers to hold the shower arm steady. This is important. The shower arm threads into a fitting behind the wall, and too much force can loosen or damage that hidden connection.
The goal is to turn the shower head, not twist the shower arm inside the wall. If the arm moves when you apply pressure, stop and reposition your tools.
Step 7: Loosen the Shower Head with a Wrench
Place an adjustable wrench on the shower head’s connector nut. Turn counterclockwise with slow, steady pressure. Avoid sudden jerks. A stuck shower head may need firm pressure, but brute force can bend the shower arm or damage the fitting inside the wall.
If it starts to move, continue turning by hand once it is loose enough. This gives you better control and reduces the risk of dropping the fixture.
Step 8: Use Vinegar for Mineral Buildup
If the shower head still refuses to budge, mineral buildup may be locking the threads together. This is common in areas with hard water. Fill a plastic bag with white vinegar, place it around the connection, and secure it with a rubber band. Let the connection soak for at least 30 minutes. For heavy buildup, you may need several hours.
Be careful with delicate finishes. Vinegar can damage some specialty coatings if left too long, especially certain brass, gold, nickel, or oil-rubbed finishes. When in doubt, test gently and keep soaking time shorter.
Step 9: Try Again After Soaking
After soaking, remove the vinegar bag and wipe the connection with a cloth. Scrub visible buildup with an old toothbrush. Then try loosening the shower head again with your protected wrench.
If the fixture moves slightly and then sticks, work it back and forth gently. Turn counterclockwise a little, then clockwise a little, then counterclockwise again. This can help break up mineral deposits without forcing the pipe.
Step 10: Remove the Shower Head Completely
Once the shower head loosens, unscrew it the rest of the way by hand. Keep one hand underneath it so it does not drop. If you plan to reuse the shower head, set it on a towel and inspect the washer, screen, and connector.
If the old washer stays stuck to the shower arm, remove it carefully. A hidden leftover washer can prevent the new shower head from seating correctly and may cause leaks.
Step 11: Clean the Shower Arm Threads
After the shower head is off, clean the exposed threads on the shower arm. Remove old plumber’s tape, mineral deposits, rust flakes, and grime. A damp cloth may be enough, but a toothbrush can help clean deeper grooves.
This step matters more than many people think. Clean threads help the new shower head screw on smoothly and seal properly. Installing a new fixture over dirty threads is like putting fresh socks on muddy feet. Technically possible, emotionally questionable.
Step 12: Check the Shower Arm Before Reinstalling
Before installing a new shower head or reattaching the old one, inspect the shower arm. Look for cracks, corrosion, bent threads, or movement at the wall. If the shower arm is loose, badly corroded, or damaged, consider replacing it or calling a plumber.
If the arm looks solid, wrap fresh plumber’s tape clockwise around the threads two or three times, unless the manufacturer’s instructions say tape is not needed. Press the tape into the threads, then install the new shower head by turning it clockwise. Hand-tighten first, then use a wrench only if necessary.
What to Do If the Shower Head Is Stuck
A stuck shower head is usually caused by one of three things: mineral buildup, old thread seal tape, or corrosion. The key is to loosen the connection without damaging the shower arm.
Use Gentle, Steady Pressure
Do not attack the fixture like you are opening a pickle jar in a competition. Hold the shower arm steady and apply gradual pressure to the connector nut. If the shower arm flexes or turns, stop immediately.
Soak the Joint
White vinegar can soften mineral deposits around the joint. For tougher buildup, apply vinegar more than once and scrub between attempts. Patience often works better than muscle.
Avoid Excessive Heat
Some people use heat to loosen stubborn plumbing parts, but this can damage plastic shower heads, wall finishes, or nearby materials. For a basic DIY shower head removal, vinegar and careful wrench work are safer choices.
Common Mistakes to Avoid
Twisting the Shower Arm Too Hard
The shower arm connects to plumbing behind the wall. If you twist it too forcefully, you can loosen the hidden fitting or create a leak where you cannot see it. Always stabilize the shower arm when using a wrench.
Scratching the Finish
Bare metal tools can scar polished fixtures quickly. Wrap the tool jaws or fixture with a cloth before gripping.
Forgetting to Remove Old Tape
Old plumber’s tape can bunch up and prevent a tight seal. Remove it before applying fresh tape.
Overtightening the New Shower Head
More force does not always mean fewer leaks. Many modern shower heads seal with a rubber washer and only need hand-tightening. Overtightening can crack plastic connectors or damage threads.
When Should You Replace a Shower Head?
You may want to remove and replace a shower head if it sprays unevenly, leaks at the connection, has heavy mineral buildup, looks outdated, or no longer provides comfortable water flow. Upgrading can also improve water efficiency. Many modern WaterSense-labeled shower heads use no more than 2.0 gallons per minute while still meeting performance standards for spray coverage and intensity.
A new shower head can also make a bathroom feel fresher without a full remodel. Compared with replacing tile, fixtures, or plumbing valves, this is one of the easiest upgrades you can make.
How to Clean a Removed Shower Head
If you removed the shower head for cleaning rather than replacement, soak it in white vinegar to dissolve mineral buildup. Rinse it thoroughly, scrub the nozzles gently with a toothbrush, and check the filter screen inside the connector. If the screen is removable, clean it carefully and reinstall it in the same direction.
Do not poke spray nozzles with sharp metal objects. Many modern shower heads use soft rubber nozzles that can tear. A toothbrush, cloth, or gentle fingertip rub is usually enough.
How to Reinstall or Replace the Shower Head
Once the shower arm threads are clean, wrap plumber’s tape clockwise around the threads if recommended. Two or three neat wraps are usually enough. Too much tape can make the connection bulky and harder to tighten.
Screw the shower head onto the shower arm by hand. Turn clockwise until snug. Turn on the shower and check for leaks at the connection. If you see dripping, tighten slightly. If it still leaks, remove the shower head, check the washer, reapply tape neatly, and try again.
Safety Tips for DIY Shower Head Removal
Use a stable stance and avoid standing on the edge of the tub. Keep tools dry when possible, and do not rush. If you notice water leaking behind the wall, a cracked shower arm, or a connection that feels like it might break, stop and call a plumber. A professional repair costs less than opening a wall because a pipe snapped during a “simple” project.
Experience Notes: What Real Shower Head Removal Teaches You
After removing a few shower heads, you start to notice that the job is less about strength and more about feel. A shower head that has been installed correctly often loosens with one hand. A shower head that has been sitting for ten years in hard water may act like it has signed a lifetime lease.
One useful experience is to listen to the pipe. Not literally, of courseif your shower arm starts talking, that is a different home repair article. But pay attention to movement. If the connector nut turns while the shower arm stays still, you are on the right track. If the shower arm begins rotating with the shower head, stop. That movement means the hidden wall connection may be loosening, and forcing it can create a leak behind the tile.
Another practical lesson is that the cheapest tool is often the towel. Wrapping a cloth around the fixture prevents scratches, improves grip, and helps you avoid the classic beginner mistake of leaving tooth marks on a shiny shower arm. A beautiful new shower head loses some glamour when the pipe behind it looks like it wrestled a raccoon.
Hard water also changes the project. In homes with mineral-heavy water, the white crust around the connector can act like glue. Vinegar soaking is not glamorous, but it works well for many fixtures. The trick is patience. Many people apply vinegar for five minutes, get impatient, grab a wrench, and then wonder why nothing improved. Give the acid time to soften the mineral deposits. For delicate finishes, use shorter soaking times and repeat as needed.
When installing the replacement, the biggest surprise for many DIYers is how little force is needed. Hand-tight is often enough, especially when the shower head has a rubber washer inside. Plumber’s tape helps threaded connections seal, but it should be wrapped neatly in the same direction the new shower head tightens. If the tape is wrapped backward, it can unravel while you screw on the fixture.
Another experience-based tip: test the new shower head before cleaning up. Turn on the water, aim the spray away from your face, and check the connection. If there is a small drip, tighten slightly. If water sprays from the threads, remove the shower head and inspect the washer and tape. Do not keep tightening forever. At some point, more force becomes less repair and more chaos.
Finally, removing a shower head is a great confidence-building DIY project. It teaches you how threaded plumbing connections work, how to use plumber’s tape, and how to distinguish “snug” from “I may have broken something.” Once you finish, you get an immediate reward: better spray, cleaner flow, or a shiny new fixture that makes your shower feel upgraded without turning your bathroom into a construction zone.
Frequently Asked Questions
Do I need to turn off the main water supply to remove a shower head?
Usually, no. If the shower valve is off and working properly, you can remove the shower head without shutting off the main water supply. If your valve leaks or you are replacing the shower arm too, shutting off the water is a smart precaution.
Which direction do I turn to remove a shower head?
Turn the shower head counterclockwise to remove it. Turn clockwise to install or tighten it.
Can I remove a shower head without tools?
Yes, many shower heads can be removed by hand. If it is stuck, use a protected adjustable wrench or pliers while holding the shower arm steady.
Why is my shower head stuck?
The most common reasons are mineral buildup, corrosion, old plumber’s tape, or overtightening during installation. Vinegar soaking and steady wrench pressure usually solve the problem.
Should I use plumber’s tape when reinstalling a shower head?
Often, yes, but check the manufacturer’s instructions. Some shower heads rely on an internal rubber washer and may not require tape. If you use tape, wrap it clockwise around clean threads.
Conclusion
Learning how to remove a shower head is one of the most useful beginner plumbing skills. The process is simple: turn off the shower, protect the finish, loosen the old fixture counterclockwise, clean the threads, and reinstall or replace the shower head carefully. The secret is not force; it is control. Hold the shower arm steady, use vinegar for mineral buildup, and avoid overtightening the new fixture.
With a few basic tools and a little patience, you can remove a shower head in minutes and upgrade your shower without calling in a professional. Your reward? Better water flow, a cleaner fixture, and the quiet satisfaction of completing a DIY project that did not require demolition, panic, or three trips to the hardware store.





