
Table of Contents >> Show >> Hide
- Tip 1: Start with a smart drywall layout before you lift a single sheet
- Tip 2: Fix framing problems before the drywall exposes them to the whole world
- Tip 3: Hang ceilings first and walls second
- Tip 4: Cut drywall cleanly, leave the right gaps, and respect the details
- Tip 5: Fasten like a proconsistent screw depth beats brute force every time
- Tip 6: Keep factory edges together and make seams easier on your future self
- Tip 7: Hang for finishing, not just for attachment
- Final Thoughts
- Experience Section: What Hanging Drywall Really Feels Like on a Real Job
Hanging drywall looks deceptively simple. After all, how hard can it be to screw giant gypsum pancakes to the wall? Then you pick up your first sheet, try to line it up over your head, miss the stud, scuff the paper, and suddenly the room sounds like a workshop and a therapy session at the same time.
The good news is that drywall success is not about secret contractor magic. It is about planning, layout, clean cuts, and a few small habits that prevent big headaches later. A professional-looking job is usually won or lost before the mudding even begins. If the sheets are flat, the seams are smart, and the screws are consistent, finishing gets easier, sanding gets lighter, and your walls stop looking like they were assembled during a mild earthquake.
In this guide, you will learn seven practical tips for hanging drywall like a pro, whether you are finishing a basement, remodeling a bedroom, or finally tackling that room that has been “almost done” since last summer. Let’s get into it.
Tip 1: Start with a smart drywall layout before you lift a single sheet
Professionals do not begin by grabbing the nearest panel and hoping inspiration strikes. They think through the layout first. That means measuring each wall and ceiling, deciding where full sheets can go, and planning seams so they land in the least noticeable and least crack-prone places.
A good drywall layout aims to use the longest sheets you can safely handle. Fewer sheets mean fewer joints, less taping, and fewer opportunities for ugly ridges. On most standard residential walls, horizontal hanging makes sense because it reduces the number of seams and usually makes finishing easier. Instead of stacking a bunch of vertical joints from floor to ceiling, you create longer, cleaner runs that are easier to blend.
You also want to avoid putting seams directly at the corners of doors and windows. Those areas are notorious crack starters because movement around openings puts extra stress on the panel edges. Think of seams near openings as drama magnets: they may look innocent at first, but they usually bring trouble later.
What this looks like in practice
If you are hanging drywall in a typical 8-foot-tall room, plan for full horizontal sheets whenever possible. Stagger end joints from row to row so you do not create one long weak line across the wall. On ceilings, plan the sheet direction so the long edges run perpendicular to the joists. A few extra minutes with a tape measure can save hours of patching, muttering, and “why did I do it that way?”
Tip 2: Fix framing problems before the drywall exposes them to the whole world
Drywall is honest. Brutally honest. If your studs are bowed, twisted, proud, or spaced inconsistently, the drywall will faithfully reveal every one of those flaws. That beautiful flat wall you imagined can quickly become a lumpy topographic map of bad framing decisions.
Before hanging anything, inspect the framing with a straightedge or long level. Look for studs that stick out, dip back, or twist. Check corners and confirm you have solid backing wherever panel edges will meet. If insulation is puffed out too far, tuck it in so the drywall can sit tight against the framing instead of bulging outward.
Shimming low studs and trimming high ones may not feel glamorous, but it is one of the most professional moves you can make. Drywall likes a flat, consistent surface. Give it one, and your screw pattern goes in cleaner, your seams stay tighter, and your finishing work looks smoother.
Pro mindset
Never assume the framing crew left you a perfect canvas. Even in newer construction, a little correction can make a dramatic difference. Drywall does not improve bad framing. It only covers it in a way everyone can still see.
Tip 3: Hang ceilings first and walls second
If your room includes both ceilings and walls, always hang the ceiling drywall first. This is one of those classic pro habits that makes the whole job cleaner. When the ceiling goes up first, the wall panels can be lifted tight to it, helping support the ceiling edges and creating a tighter joint in the corner.
Ceiling work is also the most awkward part of the project. Drywall sheets are heavy, floppy, and deeply committed to making you question your life choices. A drywall lift is worth its weight in gold if you are working alone or with limited help. If you do not have one, recruit a helper and plan your moves before lifting the sheet. Random improvisation is for jazz, not overhead drywall installation.
Mark the joist locations clearly, and keep your panel edges landing where they should. If the sheet will not span the full ceiling, make sure the end lands in the center of a framing member. That gives both adjoining panels proper support and prevents weak floating edges where you do not want them.
One more ceiling rule
Do not fight gravity without a plan. Pre-cut the sheet, mark screw lines, and clear the floor before lifting. The more prepared you are, the less time you spend holding 50 pounds of gypsum above your head while trying to remember where the screw gun went.
Tip 4: Cut drywall cleanly, leave the right gaps, and respect the details
One reason pros make drywall look easy is that they do not overcomplicate cutting it. Most cuts follow a simple rhythm: measure, mark, score the face paper with a sharp utility knife, snap the sheet, and cut the back paper. Clean the edge with a rasp if needed. That is it. No fireworks. No wrestling match.
The key is accuracy without trying to force a perfect zero-clearance fit. Drywall needs a little breathing room. Panels that are cut too tight can bind, break, or refuse to sit properly. A slight gap at the floor is especially important because it helps prevent moisture wicking and gives the assembly room for minor movement. Baseboard will cover that gap later, and nobody will know except you, me, and your trim carpenter.
When cutting around outlets, switches, or ceiling boxes, careful measuring matters more than bravery. Measure from fixed reference points, transfer the marks accurately, and use a drywall saw or rotary cutout tool if needed. Cutouts that are too big create extra finishing work. Cutouts that are too small create… more colorful vocabulary.
Blade rule everyone learns eventually
Change dull blades sooner than you think. A fresh blade glides. A dull blade tears paper, wanders off line, and makes a simple cut feel like you are trying to slice toast with a spoon.
Tip 5: Fasten like a proconsistent screw depth beats brute force every time
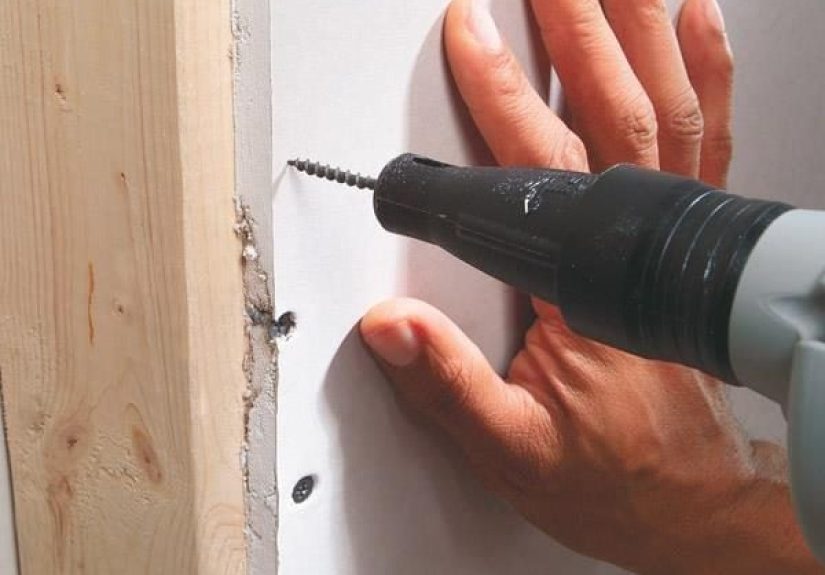
Drywall fastening is not about adding as many screws as humanly possible. It is about placing them correctly and driving them to the right depth. A properly set drywall screw should sit just below the surface in a shallow dimple, while leaving the face paper intact. Break the paper, and you weaken the hold. Leave the head proud, and you create a bump that finishing cannot magically erase.
A drywall screw gun with depth control makes this much easier, but a regular drill can work if you stay attentive. Keep your pattern consistent, follow the framing lines, and avoid placing screws too close to edges where the drywall can crumble. On walls, the goal is a firm, even attachment that keeps the panel tight to the studs without overdriving the fasteners.
This is also where marking stud and joist locations pays off. When your lines are visible on the sheet, you do not have to guess where to drive screws. Guessing is how people end up installing decorative screw art in empty air.
Common fastening mistakes to avoid
Do not start blasting screws in random order. Work methodically so the panel stays tight and flat. Do not ignore a screw that has broken through the paper; add another nearby where it will actually hold. And do not mix “tight enough” with “let me just drive this one into next Tuesday.” Drywall rewards control, not aggression.
Tip 6: Keep factory edges together and make seams easier on your future self
Drywall finishing gets much easier when you think about seams during the hanging stage, not after. The long factory edges of drywall are tapered. That slight recess is designed to accept tape and joint compound so the seam finishes flatter. Whenever possible, place factory edges together on your main joints and save cut edges for corners, tops, bottoms, or less visible areas.
Butt joints, where cut ends meet, are less forgiving because they do not have that recess. They tend to build up more compound and show more easily if they are placed carelessly. That is one reason using longer sheets is so helpful: fewer butt joints means less finishing drama.
You should also stagger joints instead of lining them up in a repeating pattern. A staggered layout looks better structurally and visually. It spreads stress and avoids creating one long continuous seam that can telegraph through paint later.
Think two steps ahead
Every seam you create is something future-you must tape, mud, sand, inspect, re-mud, re-sand, and possibly stare at under unforgiving afternoon sunlight. Make life easier now by putting seams where they belong and minimizing the number you create.
Tip 7: Hang for finishing, not just for attachment
The best drywall hangers are secretly great finishers, because they understand one truth: hanging and finishing are not separate jobs. They are connected. If you hang carelessly, finishing becomes a long, dusty apology.
So as you install each panel, think ahead. Are the joints tight but not jammed? Are the edges supported? Are screw heads set properly? Are corners aligned well? Did you avoid giant gaps that will need half a bucket of compound to hide? A professional-looking wall starts with restraint and precision at this stage.
Even your room conditions matter. Keep the workspace reasonably clean, dry, and organized. Protect floors, manage dust, and avoid banging newly hung panels with ladders and tools. Drywall paper dents more easily than most DIYers expect. It is not fragile, but it is not bulletproof either.
The finishing payoff
When drywall is hung flat, tight, and thoughtfully, taping becomes smoother, mudding becomes lighter, and sanding becomes less of an upper-body punishment program. That is the real “pro” difference. It is not speed alone. It is setting up the next step so it goes right the first time.
Final Thoughts
Hanging drywall like a pro is really about stacking small wins: a smart layout, straight framing, clean cuts, correct screw depth, and seams placed where they belong. None of those steps are flashy, but together they create walls and ceilings that look calm, crisp, and ready for paint instead of patched together by wishful thinking.
If you remember only one thing, make it this: drywall finishing starts when the first sheet goes up. Hang carefully now, and the rest of the project gets dramatically easier. Rush it, and the mud knife will spend the next few days writing your regrets across the wall.
Experience Section: What Hanging Drywall Really Feels Like on a Real Job
Anyone who has hung drywall for the first time usually starts with confidence and ends with respect. On paper, the process seems repetitive. In real life, every wall has its own personality. One stud bows out. One outlet box is just a little off. One ceiling corner is mysteriously not square, despite the room having four very committed opinions about being square. The experience teaches you quickly that drywall is less about muscle and more about rhythm.
A common first-timer mistake is treating drywall like plywood. It is not. Plywood tolerates a little rough handling. Drywall remembers everything. Lean it the wrong way, and the corner crushes. Overdrive one screw, and the paper tears. Cut a box opening too large, and suddenly you are brainstorming creative cover-plate solutions like an inventor under pressure. After a few sheets, though, the work starts to click. You learn how to carry the panel without mangling the edges, how to line up a cut with less second-guessing, and how to hear when a screw is set correctly before you even look at it.
Ceilings are where most people earn their drywall humility badge. Even with help, overhead work is awkward. The first sheet can feel like trying to park a mattress on the moon. But once you have the panel braced, the joists marked, and a system for starting screws, the job becomes less chaotic. That is why pros look calm: they are not winging it. They are following a sequence they trust.
There is also a strange turning point in every drywall project when you realize the cleanest jobs are usually the slowest at the beginning. The person who takes time to shim a stud, remeasure a cutout, or reposition a sheet ends up moving faster later because they are not constantly fixing mistakes. Drywall punishes impatience with compound, sanding dust, and extra weekends.
By the time the room is fully boarded, most people have learned the real lesson of hanging drywall like a pro: the professional look does not come from showing off. It comes from quiet discipline. Measure carefully. Lift safely. Fasten consistently. Respect the seams. And maybe keep a spare blade handy, because the only thing worse than cutting drywall with a dull knife is pretending it is still sharp.





