
Table of Contents >> Show >> Hide
- Why DIY Halloween Broomsticks Work So Well
- 1. The Classic Twig-and-Twine Witch Broom
- 2. The Cinnamon Porch Broom Makeover
- 3. The Floating Broomstick Chandelier
- 4. The Witch Parking Front Door Display
- 5. The Glowing Spellbound Yard Broom
- 6. Mini Halloween Broomsticks for Party Favors and Table Decor
- How to Make Your DIY Halloween Broomsticks Look Better, Not Busier
- Common DIY Mistakes to Avoid
- Conclusion
- Extra: Real-Life Decorating Experiences With DIY Halloween Broomsticks
There are two kinds of Halloween decorators: the ones who stop at a pumpkin on the porch, and the ones who look at a bundle of twigs and think, “Yes, this could absolutely become transportation for a dramatic witch.” If you’re in the second groupor you’re ready to join itDIY Halloween broomsticks are one of the easiest ways to add spooky charm without spending a frightening amount of money.
The beauty of a Halloween broomstick craft is that it can go in almost any direction. You can make one look rustic and storybook sweet, another dark and gothic, and another so playful it practically cackles. They work on porches, front doors, mantels, party tables, classroom treat stations, and costume corners. Better yet, most of these ideas use inexpensive materials like twigs, raffia, twine, paper bags, ribbon, faux florals, and battery lights. Translation: your wallet survives, your decor improves, and your glue gun finally feels appreciated.
In this guide, you’ll find six DIY Halloween broomstick ideas that are stylish, doable, and easy to customize. Some are perfect for beginners. Some are great for outdoor decorating. Some are so cute they may accidentally become your favorite fall decor before Halloween even arrives. Along the way, you’ll also get practical tips for choosing materials, making your broomsticks last longer, and avoiding the classic craft disaster known as “why is everything covered in hot glue strings?”
So grab your twine, queue up a spooky playlist, and let’s make decor that says, “Yes, I celebrate Halloween, and yes, my broom has better style than most people’s front porch.”
Why DIY Halloween Broomsticks Work So Well
Halloween broomsticks hit a sweet spot between rustic fall decor and classic spooky style. They instantly suggest witches, old-world charm, haunted houses, costume drama, and a little bit of mischief. Unlike giant animatronic monsters or yard inflatables the size of a small car, broomsticks are flexible. You can lean them by the door, hang them on the wall, turn them into centerpieces, suspend them from the ceiling, or use mini versions as party favors.
They’re also beginner-friendly. Most DIY broomstick ideas rely on simple techniques: bundling, wrapping, tying, trimming, gluing, and adding embellishments. You do not need expert woodworking skills. You do not need a workshop. You do not need to whisper ancient incantations over a birch branch at midnight. A decent pair of scissors and the ability to make a tight knot will take you surprisingly far.
For the best results, think about where your broomstick will live. Indoor pieces can use lighter materials like tissue paper, crepe paper, burlap, and paper bags. Outdoor versions need sturdier supplies such as real branches, sisal rope, heavier twine, weather-resistant ribbon, and battery-operated lights rated for outside use. Once you match the materials to the purpose, the project gets much easier.
1. The Classic Twig-and-Twine Witch Broom
If you want the Halloween broomstick equivalent of a little black dress, this is it. The classic twig-and-twine witch broom is rustic, inexpensive, and endlessly photogenic. It looks great on a porch, beside a fireplace, or propped near a witch hat and boots for a simple but effective Halloween vignette.
What You’ll Need
- One sturdy branch, bamboo pole, or wooden dowel for the handle
- A bundle of thin twigs, dried grass, raffia, or broom corn for the bristles
- Natural jute twine or black string
- Scissors or pruning shears
- Hot glue gun (optional, but helpful)
How to Make It
Start with your handle and clean it up by removing loose bark, leaves, or awkward bits that look less “witchy elegance” and more “yard debris after a storm.” Cut your twigs or raffia to a similar length and lay them around the lower end of the handle. Wrap tightly with twine about two inches from the bottom, then wrap again slightly higher to secure the bundle.
If you want extra stability, place a thin line of hot glue under the bundle before wrapping. Trim the bottom so the bristles look intentional instead of like they gave up halfway through the project. For a more aged look, keep the ends uneven. For a neater cottage-style version, trim them flatter.
Styling Tip
Add a strip of black velvet ribbon, a bronze bell, or a dried orange slice tied near the top of the bristles. Suddenly your broom looks like it belongs to a witch with opinions about table settings.
2. The Cinnamon Porch Broom Makeover
If you’ve ever walked into a store in fall and been attackedin the best possible wayby the smell of cinnamon brooms, you already know their power. A store-bought cinnamon broom gives you a fast shortcut to Halloween decor that also smells like autumn itself got a job in marketing.
What You’ll Need
- One cinnamon broom
- Black, orange, or deep purple ribbon
- Mini faux pumpkins, black florals, or faux crows
- Floral wire or zip ties
- Optional: matte black spray paint for the handle only
How to Make It
Leave the bristles natural for that warm fall look, or darken the handle with matte black paint to make the broom feel moodier. Next, tie layered ribbons around the top of the bristles where the binding already sits. Add faux berries, miniature pumpkins, lace strips, or a tiny hanging tag that says something fun like “Parking for Witches Only.”
If you’re decorating a porch, use floral wire to attach a few lightweight embellishments securely. Avoid heavy decor that could make the broom flop or twist. The goal is “charming witch lives here,” not “craft project in crisis.”
Best Use
This style works beautifully leaned beside a front door, lantern, stack of pumpkins, or black planter. It blends fall and Halloween decor, which is handy when you want your setup to survive the entire season instead of being packed away the second October ends.
3. The Floating Broomstick Chandelier
Want drama? Here you go. A floating broomstick chandelier is one of those Halloween DIY ideas that makes guests look up and immediately say, “Okay, now that is cool.” It works especially well over a dining table, in a covered porch corner, or at the center of a Halloween party setup.
What You’ll Need
- One sturdy broom or handmade broomstick
- Black twine or fishing line
- Battery-operated tea lights or fairy lights
- Lightweight jars, plastic ornaments, or mini lanterns
- Command hooks or ceiling-safe hanging hardware
How to Make It
Start with a finished broomstick and decide which side should face downward. Attach lightweight hanging elements beneath it using black twine. Small jars with battery tea lights look especially magical, and they create that old apothecary-meets-witch-cottage mood people love during Halloween. Keep the weight balanced on both sides so your broom doesn’t hang like it had one too many potions.
Then suspend the broom from the ceiling with fishing line if you want the floating effect, or black twine if you’d rather the hanging method stay visible. Wrap a few strands of fairy lights around the handle for a subtle glow. If the broom will be above food, keep every attachment secure and lightweight. Haunted is good. Falling mason jars are not.
Why It Works
This idea adds height and movement to your Halloween decor. It also photographs beautifully, which matters if your seasonal decorating goals include “making everyone on social media slightly jealous.”
4. The Witch Parking Front Door Display
This one is playful, eye-catching, and perfect if you want your entryway to feel festive without committing to an entire haunted mansion. The idea is simple: cluster several broomsticks near the front door as if a team of stylish witches has already arrived for the evening.
What You’ll Need
- Three to five brooms or DIY broomsticks in different sizes
- Command hooks, nails, or a secure leaning arrangement
- Optional sign that says “Witch Parking” or “Broom Valet”
- Black boots, lanterns, hats, or doormat accessories
How to Make It
Mix full-size brooms with smaller handmade versions for visual variety. Lean them in a grouped arrangement beside the door, or hang them vertically if you want a more structured look. If you love symmetry, place matching broomsticks on either side of the entry. If you prefer a whimsical effect, cluster them at different heights as though their owners rushed inside for cider and gossip.
Add a sign, a pair of witch boots, and maybe a black hat hanging nearby. Suddenly your front porch tells a story. Not a terrifying onemore like “there’s probably caramel corn inside, but maybe also a spell book.”
Design Advice
Keep the color palette tight if you want a more elevated look. Black, brown, rust, deep plum, and muted gold feel stylish. Too many clashing colors can make the scene look more craft fair than curated Halloween magic.
5. The Glowing Spellbound Yard Broom
If your decorating style leans spooky after sunset, a glowing Halloween broomstick is a fantastic outdoor option. This project takes a basic rustic broom and gives it just enough eerie light to stand out at night without turning your lawn into a theme park parking lot.
What You’ll Need
- One sturdy branch or wooden handle
- Raffia, twigs, or weather-tolerant decorative grass
- Black zip ties or heavy-duty twine
- Battery fairy lights or micro LEDs
- Optional stakes or planter base for stability
How to Make It
Build the broom as you would a standard twig broom, but before finishing the final wrap, tuck a strand of lights into the bristles and spiral another strand lightly around the handle. Hide the battery pack near the binding area using ribbon, faux moss, or a small fabric pouch in a matching color.
If the broom will stand outdoors, secure it in a planter filled with sand, gravel, or foam, or attach it discreetly to a porch post. Outdoor decorating is all fun and games until your broomstick tumbles dramatically into the hydrangeas.
Where It Shines
This broom looks great next to hay bales, lanterns, faux ravens, or a lineup of glowing pumpkins. It’s especially effective on porches and walkways where the light can guide trick-or-treaters in with just the right amount of suspicious charm.
6. Mini Halloween Broomsticks for Party Favors and Table Decor
Not every broomstick needs to be life-size. Mini broomsticks are adorable, budget-friendly, and useful in about ten different ways. They can be napkin accents, place card holders, treat toppers, party favors, tiered tray decor, or tiny props for a kids’ craft table.
What You’ll Need
- Pencils, paper straws, twigs, or skewers as handles
- Burlap, paper lunch bags, raffia, or tissue fringe for bristles
- Twine, ribbon, or embroidery floss
- Scissors
- Candy, tags, or name cards if using them as favors
How to Make It
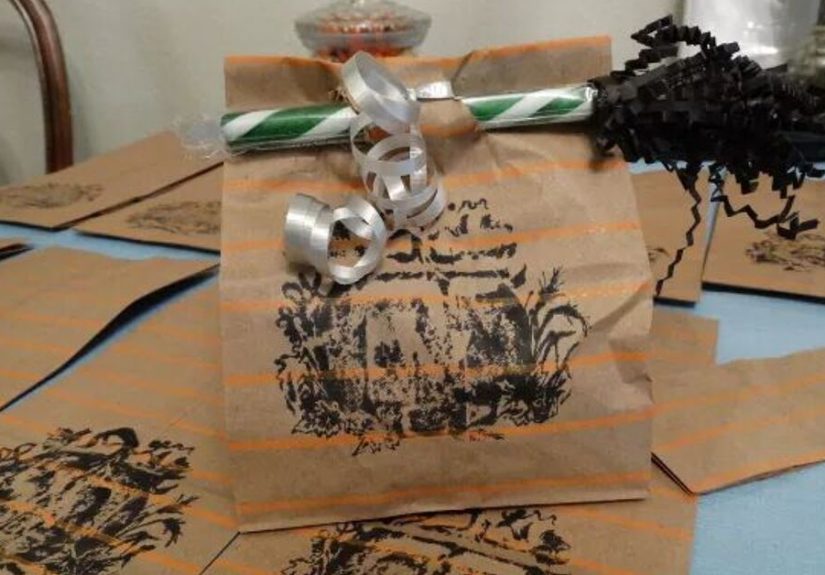
For the easiest version, cut burlap or brown paper into fringe and wrap it around the end of a pencil or straw. Tie tightly with twine and fluff the fringed ends. If you’re making treat favors, use small paper bags filled with candy, fringe the top portion, and tie the bag around a twig or pretzel rod so it resembles a broom.
These mini brooms are charming because they feel handmade in the best way. They also let you repeat the broomstick theme throughout your decor without putting a full-size broom in every room like a very festive janitor.
Best For
Halloween dinner parties, classroom treats, boo baskets, kids’ craft afternoons, and appetizer tables that deserve more personality than a paper plate and an apologetic bowl of chips.
How to Make Your DIY Halloween Broomsticks Look Better, Not Busier
The difference between “beautifully spooky” and “why is there a toy spider glued to absolutely everything?” usually comes down to restraint. Pick one main style direction for your broomsticks. Rustic witch cottage? Go with natural fibers, dried oranges, velvet ribbon, and muted tones. Gothic glam? Try black satin, metallic accents, feathers, and dark florals. Cute and playful? Use patterned ribbon, mini pumpkins, friendly signs, and brighter pops of orange and purple.
Texture matters even more than color. Twigs, raffia, sisal, burlap, lace, gauze, velvet, and weathered wood create depth that makes simple projects feel rich and intentional. Lighting also helps. A string of micro LEDs can elevate a basic broomstick from “nice craft” to “main character on the porch.”
And please, for the love of all things haunted, trim your loose strings. Nothing ruins witchy elegance like one piece of twine hanging off the handle like it lost the will to live.
Common DIY Mistakes to Avoid
- Using flimsy handles: If the handle bends, the finished broom will always look a little sad.
- Overloading the bristle end: Too many embellishments can make the broom droop or twist.
- Ignoring scale: A giant porch arrangement and a tiny indoor centerpiece should not be built exactly the same way.
- Choosing indoor-only materials for outdoor projects: Paper and delicate fabric do not enjoy surprise rainstorms.
- Skipping a test arrangement: Before gluing everything down, lean it, hang it, or style it in place first.
Conclusion
DIY Halloween broomsticks are proof that great seasonal decor does not have to be expensive, complicated, or powered by twelve extension cords. With a few basic materials and a little creativity, you can make decor that feels playful, stylish, and unmistakably Halloween. Whether you love the rustic charm of a twig besom, the cozy scent of a cinnamon broom, the drama of a floating chandelier, or the cuteness of mini party favors, there’s a broomstick idea here for every decorating style and skill level.
The best part is that these projects are easy to personalize. Dress them up, keep them simple, make them spooky, make them funny, or make them look like they belong to the most fashionable witch on the block. However you style them, they’ll bring texture, character, and a little old-school Halloween magic to your space. And honestly, that’s a lot of decorating power for something that started as sticks and string.
Extra: Real-Life Decorating Experiences With DIY Halloween Broomsticks
One of the most interesting things about making DIY Halloween broomsticks is how quickly they change the mood of a space. A pumpkin says “it’s fall.” A broomstick says “someone magical definitely lives here.” The first time I used handmade broomsticks in a Halloween setup, I expected them to be background decor. Instead, they became the thing everyone noticed first. Guests pointed at them, kids asked whether they were “real witch brooms,” and one person laughed and said the display looked like a coven had valet parked outside.
That’s the charm of this kind of project: it feels personal. Store-bought decor can look polished, but handmade broomsticks have character. The crooked branch you almost didn’t use ends up being the perfect handle. The uneven twigs create movement. The slightly frayed ribbon makes the whole thing look older, moodier, and somehow more convincing. Even little imperfections help. In Halloween decorating, perfection can actually make things less interesting. A broom that looks a little wild often feels more authentic than one that looks factory finished.
Another thing you notice when working on these projects is how versatile they are across age groups. Adults can make elegant porch displays with dried florals and antique-looking ribbon, while kids can create mini broomsticks from paper, pencils, and candy bags without needing advanced craft skills. That makes broomstick projects especially useful for families, classrooms, or weekend decorating parties. Everyone can participate, but the results do not all look the same. That variety is part of the fun.
There’s also something satisfying about the materials. Twine, raffia, burlap, dried branches, cinnamon brooms, and battery lights all have strong seasonal texture. When you handle them, the project already feels like fall before the broom is even finished. Add a cup of cider, a windy afternoon, and a playlist full of spooky soundtracks, and suddenly the craft becomes part of the season itself. It stops feeling like a task and starts feeling like an experience.
Practically speaking, DIY broomsticks are also one of the easiest decorations to move around when you’re styling a home. If the front porch looks too busy, shift the broom beside a mantel. If the mantel feels crowded, move a smaller one to a dining bench or entry table. If a room needs height, lean one in a corner. If a party table needs personality, mini brooms fix that fast. Very few Halloween decorations are this flexible. A giant skeleton tends to have one job. A broomstick is surprisingly cooperative.
What many people enjoy most, though, is the storytelling element. A cluster of boots, a hat, and a broom near the door instantly creates a scene. A hanging broom with lights suggests motion and mystery. A small broom tied to a favor bag makes guests smile before they even open it. Good decor tells a story without needing a paragraph taped beside it, and broomsticks are excellent at that. They hint at a character, a mood, and a little bit of chaosin the best way.
If you’re trying these projects for the first time, the biggest lesson is simple: start with one broom and let the idea grow from there. Halloween decor has a way of escalating once inspiration kicks in. Today it’s one twig broom by the porch. Tomorrow it’s a broom chandelier, a witch parking sign, and a suspicious amount of black ribbon in your online shopping cart. That, frankly, is part of the magic.





