
Table of Contents >> Show >> Hide
- Start Here: Identify the Scratch Before You Touch It
- What You Need for Leather Shoe Scratch Repair
- Way #1: Fix Light Scratches With Conditioner and Buffing
- Way #2: Fix Moderate Scratches With Matching Cream Polish
- Way #3: Fix Deep Scratches With Leather Repair Cream or Filler
- Common Mistakes That Make Leather Scratches Worse
- When a Cobbler Is the Better Option
- How to Prevent Scratches in the Future
- Conclusion
- Experience and Practical Lessons From Repairing Scratched Leather Shoes
- SEO Tags
Leather shoes have a funny habit of looking polished and confident right up until they meet a stair edge, office chair leg, or sidewalk curb. Then suddenly your favorite pair looks like it lost a small argument with the real world. The good news is that many scratches on leather shoes can be repaired at home. The trick is choosing the right fix for the kind of damage you actually have.
If the mark is light, a little conditioning and buffing may be enough. If color has rubbed off, cream polish usually does the heavy lifting. If the leather grain is broken, you will need a repair cream or filler. In other words, not every scratch needs a dramatic rescue mission. Some just need moisture, some need color, and some need a little rebuilding.
This guide covers all three methods, plus the tools to use, the mistakes to avoid, and how to know when it is time to let a cobbler take over. Whether you are dealing with dress shoes, loafers, boots, or leather flats, these steps can help bring back color, shine, and dignity.
Start Here: Identify the Scratch Before You Touch It
Before you reach for polish, figure out what kind of damage you are dealing with. That makes the repair easier and helps you avoid making the scratch worse.
- Light scratch or scuff: mostly cosmetic, with little or no texture change.
- Moderate scratch: visible color loss and a slightly rough feel.
- Deep scratch: broken grain, lifted edges, or a gouge that polish will not hide.
This article is written mainly for smooth leather shoes. If your shoes are suede, nubuck, patent leather, or exotic leather, do not use the same methods automatically. Smooth leather likes creams and conditioners. Suede definitely does not.
What You Need for Leather Shoe Scratch Repair
- Soft cloths or microfiber towels
- Horsehair brush or another soft shoe brush
- Mild leather cleaner or a barely damp cloth
- Leather conditioner
- Cream polish in a matching color or neutral
- Wax polish for finishing protection
- Cotton swabs or a small dauber brush
- Leather repair cream or filler for deeper damage
- Optional: very fine sandpaper for rough edges
One rule matters more than all the others: test first in a hidden spot. Leather can darken, absorb color unevenly, or react differently depending on age and finish. Shoes are not the place for reckless optimism.
Way #1: Fix Light Scratches With Conditioner and Buffing
This is the best option for faint scratches, dryness, and mild surface scuffs. Many light marks look worse than they are because the leather is dry and dull.
Step 1: Clean the Shoe
Brush away dust and dirt, then wipe the shoe with a soft cloth. If the pair is especially dirty, use a small amount of leather cleaner. Let the leather dry fully before moving on.
Step 2: Apply Conditioner Sparingly
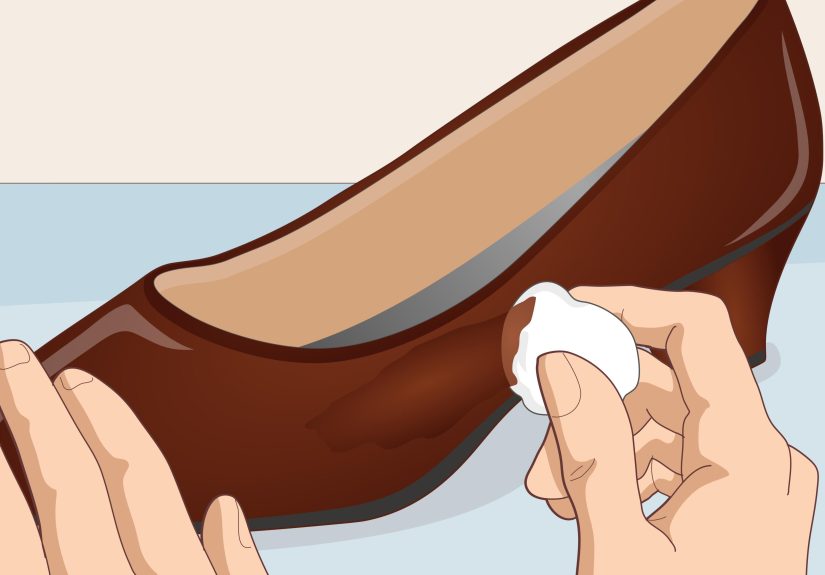
Put a small amount of leather conditioner on a clean cloth or cotton swab and work it into the scratched area using gentle circular motions. Spread it slightly beyond the mark so the finish blends naturally. Do not drench the leather. A thin layer is enough.
Step 3: Let It Absorb and Buff
Allow the conditioner to settle in, then buff gently with a horsehair brush or soft cloth. The goal is to restore moisture, soften the surface, and make the scratch less visible.
Best for: light scratches, dry leather, faint scuffs from normal wear.
Result: the scratch may not disappear completely, but it often fades enough that it stops drawing attention.
Way #2: Fix Moderate Scratches With Matching Cream Polish
If the mark is still obvious after conditioning, the problem is probably color loss. That is where cream polish becomes your best friend. A good cream polish adds pigment, nourishment, and a more even finish.
Why Cream Polish Works
Cream polish does two useful things at once: it conditions the leather and helps recolor scratched or scuffed areas. That makes it ideal for toe scuffs, rubbed edges, and scratches that have faded the finish.
Step 1: Start With a Clean, Dry Surface
Always remove surface dirt before applying polish. Otherwise, you may grind grit into the leather while trying to repair it, which is a deeply unhelpful plot twist.
Step 2: Apply Thin Layers to the Scratch
Use a cloth, cotton swab, or dauber brush to apply a small amount of matching cream polish directly over the scratch. Feather it outward into the surrounding area so the repair does not look like a painted dot. If needed, apply a very light layer to the rest of the shoe for a more uniform finish.
Step 3: Dry and Buff Thoroughly
Let the polish dry, then buff well with a horsehair brush. This blends the pigment, evens the sheen, and helps the repaired area disappear into the rest of the shoe.
Optional: Add a Light Wax Finish
Once the color looks right, you can add a little wax polish to the toe or heel for extra shine and surface protection. Wax is not the main repair tool, but it can help the finished result last longer.
Best for: moderate scratches, visible color loss, scuffs on smooth leather shoes and boots.
Result: richer color, better shine, and a scratch that blends much more naturally.
Way #3: Fix Deep Scratches With Leather Repair Cream or Filler
When the leather grain is actually broken, conditioner and polish usually are not enough. Deep scratches need a product that can rebuild the damaged surface before recoloring it.
Step 1: Clean the Damaged Area
Deep scratches can trap dirt, so clean the area carefully and let it dry fully.
Step 2: Smooth Loose Edges
If the scratch has raised fibers or rough edges, trim them carefully or smooth them very lightly with fine sandpaper. Be gentle. You are evening out the surface, not refinishing the whole shoe.
Step 3: Apply Repair Cream or Filler
Use a fingertip, cotton swab, or small applicator to press a thin layer of repair cream into the scratch. Smooth it over the damaged spot and let it dry. If necessary, repeat with another thin coat rather than one thick one.
Step 4: Recolor and Blend
Once the filler dries, apply matching cream polish over the repair so the color matches the rest of the shoe. Then buff lightly.
Step 5: Finish With Protection
If desired, add a small amount of wax polish for a cleaner final look and a bit more protection.
Best for: gouges, broken grain, deeper scratches that remain visible after polishing.
Result: strong cosmetic improvement, though very deep damage may still be faintly visible up close.
Common Mistakes That Make Leather Scratches Worse
- Using too much product: thick layers create buildup, not beauty.
- Skipping the patch test: some products darken leather.
- Treating suede like smooth leather: wrong method, wrong result.
- Rubbing too hard: leather responds better to patience than force.
- Ignoring the whole shoe: one repaired patch can stand out if the rest is dry and dull.
When a Cobbler Is the Better Option
DIY repair is great for many scratches, but not every problem belongs on your kitchen table. Consider a professional if the leather is torn, the scratch is large, the color is tricky to match, or the damage is close to seams and structural parts of the shoe. A good cobbler can do refinishing and restoration that most home kits cannot match.
How to Prevent Scratches in the Future
- Brush shoes after wearing them
- Condition leather regularly so it stays flexible
- Use cream polish before shoes look badly faded
- Add a light wax layer to high-contact areas
- Store shoes with shoe trees
- Rotate pairs instead of wearing one pair every day
Healthy leather hides wear better. Dry leather highlights every scrape like it is making a public announcement.
Conclusion
Scratched leather shoes do not have to stay scratched. Most damage falls into one of three categories, and each one has a practical fix. For light scratches, start with conditioner and buffing. For moderate scratches, use cream polish to restore color and shine. For deeper damage, use a repair cream or filler, then recolor the area so it blends back into the rest of the shoe.
The biggest secret is not speed. It is restraint. Clean first, work in thin layers, buff between steps, and avoid trying to force a perfect result in one pass. Leather rewards calm, steady care. Give it that, and your shoes can look polished, expensive, and well-loved instead of battered and abandoned.
Experience and Practical Lessons From Repairing Scratched Leather Shoes
Anyone who wears leather shoes often learns the same lesson sooner or later: the first scratch feels catastrophic, and the tenth scratch feels educational. At first, a mark on the toe of a favorite pair of shoes can seem like permanent damage. You notice it every time the light hits, and somehow it appears larger each hour. But once you start repairing leather the right way, you realize that many scratches are not disasters at all. They are maintenance signals.
One of the most common real-world experiences is finding out that a scratch looked far worse because the shoe was already dry. Dry leather exaggerates everything. A tiny scrape on neglected leather can look dramatic, while the same scrape on a conditioned shoe may barely register. This is why people are often shocked after the first basic repair session. They expected a miracle product, but what really helped was the full routine: cleaning, conditioning, a little recoloring, and patient buffing.
Another practical lesson is that color matching is a skill worth respecting. Many unsuccessful repairs happen because someone grabs the wrong shade of polish, uses too much, and creates a dark blotch that is more noticeable than the original scratch. The better experience nearly always comes from going slowly. Test the polish in a hidden area. Apply a tiny amount. Let it dry. Buff it. Then decide whether the area needs another coat. Leather shoes respond much better to layering than flooding.
People also learn that the tools matter, even when the products are simple. A soft cloth, horsehair brush, and decent cream polish usually outperform rushed improvisation. Using the right brush makes buffing easier. Using a cotton swab helps keep color exactly where it belongs. Using a hidden patch test saves you from turning a brown shoe into a slightly different brown shoe with an identity crisis.
There is also the very relatable moment when you repair one shoe, compare it to the untouched mate, and suddenly realize the scratched one now looks better. That usually means the repair session doubled as overdue maintenance. It is a funny reminder that leather shoes rarely need rescue only after damage. They often need regular care long before the scratch shows up.
Perhaps the most useful experience of all is the mindset shift that happens over time. Instead of seeing leather shoes as fragile, people start seeing them as maintainable. Scratches stop being proof that the shoes are ruined and start becoming part of normal ownership. That confidence changes how you care for footwear. You brush more often, condition before the leather feels dry, and catch small issues before they become large ones.
And finally, there is a truth that every seasoned leather-shoe owner understands: not every repair has to be invisible. Sometimes the goal is not total perfection. It is bringing the shoe back to a balanced, polished, intentional look. A well-cared-for pair of leather shoes can still show a little life. Character is charming. Neglect is not. That difference is exactly what good scratch repair creates.





