
Table of Contents >> Show >> Hide
- Before You Start: Check Your Brick, Lights, and Safety Setup
- Method 1: Use Brick Clips for a No-Drill, Damage-Free Display
- Method 2: Use Outdoor Adhesive Clips on Smooth, Sealed Brick Areas
- Method 3: Use Hot Glue for Temporary Holiday Lights on Brick
- Which Method Is Best for Your Brick Home?
- Design Ideas for Christmas Lights on Brick
- Common Mistakes to Avoid
- Safety Tips for Hanging Christmas Lights on Brick
- of Real-World Experience: What Actually Works When Hanging Lights on Brick
- Conclusion
Brick homes look magical during the holidays. The texture, the warm color, the classic curb appealit all makes Christmas lights sparkle like they were born to live there. The only problem? Brick is not exactly the most cooperative decorating partner. It does not politely accept thumbtacks, tape gives up faster than a New Year’s resolution, and nobody wants to drill random holes into a perfectly good wall just to hang a string of twinkly snowflakes.
Good news: you can hang Christmas lights on brick without turning your house into a masonry experiment. The best methods are simple, affordable, and renter-friendly when done correctly. In this guide, we will cover three easy ways to hang Christmas lights on brick: brick clips, outdoor adhesive clips on smooth surfaces, and hot glue for temporary seasonal displays. You will also learn how to choose the right method, avoid common mistakes, and keep your holiday setup safe, tidy, and worthy of at least one neighbor saying, “Okay, that looks really good.”
Before You Start: Check Your Brick, Lights, and Safety Setup
Before grabbing clips, glue, or a ladder, take five minutes to inspect the area. This small step can save you from sagging lights, broken bulbs, chipped mortar, and the deeply humbling experience of re-hanging everything in cold weather.
Look at the brick and mortar
Not all brick walls are the same. Some bricks protrude slightly from the mortar joints, which makes them perfect for brick clips. Others are almost flush, meaning clips may not grip properly. Older homes may also have soft or crumbling mortar, so avoid pulling, scraping, or forcing hardware into weak joints.
Use outdoor-rated lights
For exterior displays, choose lights labeled for outdoor use. Outdoor-rated Christmas lights are designed to handle moisture and temperature changes better than indoor-only strands. LED lights are usually a smart choice because they use less energy, stay cooler, and are lighter than many older incandescent strings.
Inspect every strand
Check for cracked sockets, exposed wires, loose bulbs, and damaged plugs. If a strand looks questionable, retire it. Holiday lights are cheaper than house repairs, and dramatically less stressful.
Plan your power source
Use outdoor-rated extension cords and plug lights into a GFCI-protected outlet whenever possible. Do not overload outlets, do not run cords through doors or windows where they can be pinched, and do not create a cord maze across walkways. A festive display should say “Merry Christmas,” not “Welcome to the ankle obstacle course.”
Method 1: Use Brick Clips for a No-Drill, Damage-Free Display
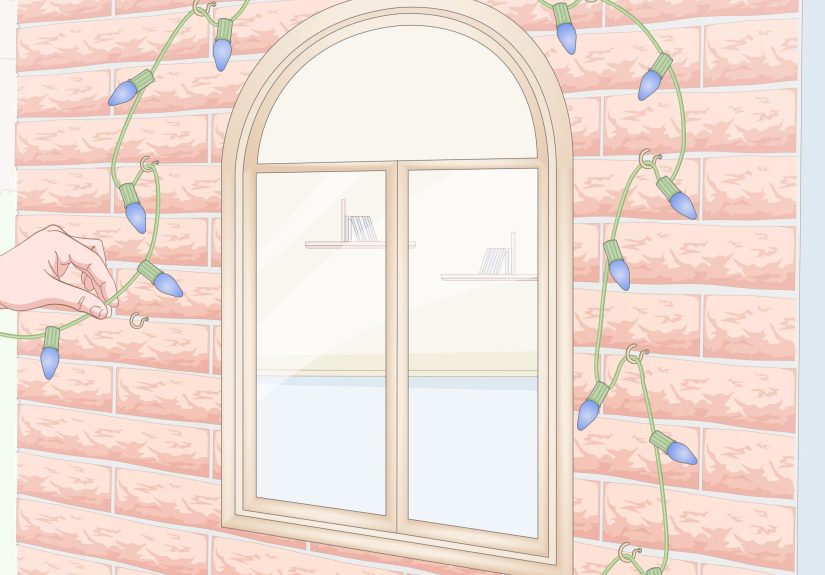
Brick clips are one of the easiest ways to hang Christmas lights on brick because they do not require drilling, adhesives, or permanent hardware. These small metal clips grip the top and bottom edges of individual bricks. Once attached, they give you a hook or tab where you can secure light strands, garland, wreaths, or lightweight decorations.
Best for
Brick clips work best on walls where the brick sticks out slightly from the mortar. If the mortar is recessed enough for the clip to grab the brick edges, this method is fast, clean, and reusable. It is especially useful for outlining windows, doors, porch columns, fireplaces, and brick facades.
What you need
- Brick clips sized for your brick height
- Outdoor-rated Christmas lights
- Plastic light clips or small zip ties, if needed
- A tape measure
- A sturdy ladder for higher areas
How to hang Christmas lights with brick clips
- Measure your brick height. Brick clips come in different sizes, so check the height of your bricks before buying. A clip that is too small will fight you; a clip that is too large will wobble.
- Test one clip first. Attach it to a brick at a low, easy-to-reach spot. It should feel snug and secure without cracking mortar or scraping the brick face.
- Place clips along your design path. For a clean look, space clips evenly around windows, doorways, or along the top of a brick wall.
- Attach the light strand. Hook the wire gently onto the clip. If the wire slips, use a small zip tie or light clip to hold it in place.
- Step back and adjust. Look at the line from the sidewalk or driveway. A small adjustment now can make the whole display look polished.
Pros of brick clips
Brick clips are reusable, easy to remove, and do not leave sticky residue. They are also great for people who want a temporary holiday light display without damaging brick. Once the season is over, pop them off, store them in a labeled bag, and feel wildly organized for approximately four minutes.
Cons of brick clips
They do not work on every brick wall. If your mortar is flush with the brick, the clip may not have enough edge to grip. They can also be visible during the day, especially if you use large metal clips on a front-facing wall. Still, for many homes, brick clips are the best first option.
Method 2: Use Outdoor Adhesive Clips on Smooth, Sealed Brick Areas
Outdoor adhesive clips are another popular way to hang Christmas lights without drilling. These clips use weather-resistant adhesive strips and are designed for temporary outdoor decorating. However, there is one important catch: adhesive clips usually work best on smooth, sealed, and clean surfaces. Rough brick is tricky because the adhesive cannot make full contact with all those tiny bumps, pits, and dusty grooves.
So, should you use adhesive clips directly on brick? Sometimes, but only with realistic expectations. They are more reliable on painted brick, sealed brick, smooth stone, metal trim, vinyl, glass, doors, window frames, and gutters than on raw, rough brick. If your brick surface feels sandy or uneven, adhesive clips may not hold well in cold, wet weather.
Best for
This method is best for smooth or painted brick, sealed masonry, window trim, door frames, porch columns, and nearby non-brick surfaces. It is also useful when brick clips will not fit but you still want a no-drill option.
What you need
- Outdoor-rated adhesive light clips
- Outdoor Christmas lights
- Dry cloth or brush
- Isopropyl alcohol for compatible smooth surfaces
- Timer or smart outdoor plug, optional
How to hang lights with adhesive clips
- Choose the right surface. Look for smooth, clean, sealed areas. Avoid dusty, crumbling, or heavily textured brick.
- Clean the surface. Remove dirt and debris with a dry cloth. On smooth trim or glass, follow the clip manufacturer’s cleaning instructions.
- Apply clips before hanging lights. Press each clip firmly in place. Many adhesive products require waiting before adding weight, so read the package directions.
- Hang lightweight strands only. Adhesive clips are better for mini lights and LED strands than heavy commercial-style bulbs.
- Check after the first night. Cold, moisture, and wind can reveal weak spots. Add support before a section falls.
Pros of adhesive clips
Adhesive clips are inexpensive, easy to find, and nearly invisible from the street. They are great for neat outlines around windows and doors. They also remove cleanly when used on recommended surfaces and removed according to instructions.
Cons of adhesive clips
They are not the most dependable choice for rough brick. Dust, moisture, freezing temperatures, and uneven texture can weaken the bond. If your display is in a windy area, use more clips than you think you need. Christmas lights have a surprising talent for finding the one weak clip and staging a dramatic escape.
Method 3: Use Hot Glue for Temporary Holiday Lights on Brick
Hot glue may sound like something from a craft drawer, but many holiday decorators use it to attach Christmas lights to brick, stone, and stucco. When applied carefully, hot glue can hold lightweight light sockets in place for the season and peel away later. This method is especially common for commercial-style Christmas light bulbs and textured masonry where clips or adhesives do not work well.
The key phrase is “applied carefully.” Hot glue is temporary, but it can leave residue or pull loose bits from delicate surfaces. Always test in a hidden area first. If your brick is painted, sealed, historic, flaking, or fragile, skip this method or proceed with extreme caution.
Best for
Hot glue is best for unpainted, sturdy brick where you need a temporary hold and cannot use brick clips. It works well for outlining arches, columns, mailboxes, short garden walls, and rough brick surfaces that reject tape.
What you need
- Outdoor-rated Christmas lights
- Hot glue gun
- Glue sticks suitable for exterior use
- Extension cord for the glue gun
- Gloves to protect your fingers
- Plastic scraper for removal
How to hang Christmas lights with hot glue
- Test first. Apply a small dot of glue in a hidden spot, let it cool, and remove it later to see whether it leaves residue or damages the surface.
- Clean the brick lightly. Brush away loose dust, cobwebs, and debris. The glue needs contact with the brick, not last summer’s pollen collection.
- Apply glue to the socket base. Avoid putting glue directly on wires. Place a small bead of glue on the plastic base of the light socket.
- Press gently onto the brick. Hold for a few seconds until the glue sets.
- Continue along your layout. Keep spacing consistent for a professional look.
- Remove carefully after the season. Gently peel or scrape glue away. Do not yank the light strand from the wall.
Pros of hot glue
Hot glue can work where clips and tape fail. It creates a clean, custom layout and can hold lights closely against textured brick. It is also affordable and quick once you get the rhythm.
Cons of hot glue
It is not ideal for all brick surfaces. It can be messy, removal takes patience, and cold weather may affect how well the glue bonds during installation. You also need to be careful with the hot glue gun because, as the name politely warns, it is hot.
Which Method Is Best for Your Brick Home?
The easiest method depends on your brick surface, your light style, and how long you want the display to stay up.
Choose brick clips if…
Your bricks protrude from the mortar and you want a reusable, no-residue option. Brick clips are excellent for renters, homeowners, and anyone who values easy cleanup.
Choose adhesive clips if…
You have smooth, sealed, or painted surfaces near the brick. Adhesive clips are best for light-duty decorating around windows, doors, gutters, and trim.
Choose hot glue if…
Your brick is textured, sturdy, and unpainted, and you need a temporary seasonal hold. Hot glue is useful for custom designs, but it requires testing and careful removal.
Design Ideas for Christmas Lights on Brick
Once you know how to attach the lights, the fun part begins. Brick gives you a beautiful backdrop, so you do not need to overdo it. A simple, balanced design often looks better than a front yard that appears to be signaling aircraft.
Outline windows and doors
This is the classic look for a reason. Outlining windows and doors highlights the architecture of your home and creates a warm, welcoming glow. Use warm white lights for a timeless style or multicolor lights for cheerful nostalgia.
Frame porch columns
If your porch has brick columns, wrap or outline them with lights. Keep the spacing even so the display looks intentional. Add garland for extra texture, but avoid making it too heavy for your clips or adhesive supports.
Create a lighted brick arch
Brick arches look stunning with lights following the curve. Hot glue or closely spaced clips can help maintain the shape. This works especially well around entryways and garden gates.
Highlight the roofline nearby
If your brick wall meets gutters or fascia, use standard gutter clips along the roofline and brick clips or adhesive clips around the masonry below. Mixing attachment methods is perfectly fine as long as the final look is consistent.
Common Mistakes to Avoid
Using indoor lights outdoors
Indoor lights are not built for rain, snow, or outdoor temperature swings. Always check the label before installing lights outside.
Depending on regular tape
Standard tape rarely holds well on brick, especially outdoors. It may stick for an hour, then surrender in the night like a tiny plastic coward.
Pulling lights too tight
Leave a little slack. Tight wires put stress on clips, sockets, and plugs. A relaxed strand is less likely to pop loose when temperatures change.
Ignoring wind
If your home gets strong winter wind, use more attachment points. The wider the spacing, the more the strand can move.
Skipping a test section
Always test your chosen method in a small area before decorating the whole wall. Brick surfaces vary, and what works beautifully on one house may fail on another.
Safety Tips for Hanging Christmas Lights on Brick
A beautiful display should also be safe. Work during daylight, use a sturdy ladder on level ground, and ask someone to spot you if you are decorating high areas. Avoid metal ladders near electrical lines. Keep plugs and extension cord connections off wet ground, and turn off lights when you go to bed or leave the house. A timer makes this easy and prevents the classic midnight debate: “Did we unplug the lights?”
Do not staple or nail through light wires. Use proper clips instead. Also, check manufacturer limits for how many strands can be connected end to end. LED strands usually allow more connections than incandescent lights, but the package instructions are the final boss here. Read them.
of Real-World Experience: What Actually Works When Hanging Lights on Brick
In real life, hanging Christmas lights on brick is less about finding one perfect product and more about matching the method to the mood of your wall. Some brick is smooth and polite. Some brick is dusty, uneven, and apparently opposed to holiday cheer. The first thing experienced decorators learn is this: test before committing. Put up three or four feet of lights, wait a day, then decide whether the method deserves your whole Saturday.
Brick clips are usually the least frustrating option when the wall allows them. They feel a little strange the first time you use them, but once you understand how they grip, installation becomes fast. The trick is buying the correct size. People often assume all bricks are standard, but small differences matter. A snug clip feels secure immediately. A bad clip feels like it is auditioning for a slapstick comedy scene.
Adhesive clips are useful, but expectations matter. They are fantastic on smooth trim beside brick, painted surfaces, glass, and metal. On raw brick, they can be unpredictable. If the surface is rough, cold, dusty, or damp, the adhesive may fail. The best experience with adhesive clips comes from using them strategically rather than forcing them to do a job they dislike. For example, instead of sticking them to rough brick around a window, attach them to the window frame and let the lights visually outline the brick opening.
Hot glue is the method many people doubt until they see it work. It can hold surprisingly well on sturdy brick, especially for lightweight LED strands. The best approach is to use small dots, not giant blobs. Large glue blobs are harder to remove and can look messy in daylight. Apply glue to the socket base rather than the wire, press gently, and keep the strand relaxed. If you pull the strand tight, the glue has to fight constant tension, and tension usually wins.
Another lesson: layout matters more than quantity. A clean outline around a doorway can look better than six tangled strands across a wall. Before hanging anything, plug in the lights on the ground and arrange them roughly where they will go. This helps you find dead bulbs, plan plug direction, and avoid ending with the female plug at the power source, which is a small but memorable holiday tragedy.
For removal, patience is everything. Do not rip clips, adhesive strips, or glued lights off the wall. Brick may be strong, but mortar edges can chip. Remove one section at a time. Store clips in labeled bags and wrap lights around cardboard or a reel. Future you will be grateful. Future you may even brag a little.
Conclusion
Hanging Christmas lights on brick does not have to involve drilling holes, wrestling with duct tape, or muttering seasonal words that do not belong in a greeting card. The three easiest methods are brick clips, outdoor adhesive clips, and hot glue. Brick clips are the best no-drill option when your bricks protrude enough from the mortar. Adhesive clips work well on smooth, sealed surfaces near brick. Hot glue can help with textured brick when used carefully and temporarily.
The smartest approach is to inspect your brick, choose outdoor-rated lights, test a small section, and use enough attachment points to handle wind and weather. With a little planning, your brick home can glow beautifully all season longwithout damage, drama, or a ladder-related comedy routine.





