Table of Contents >> Show >> Hide
- Start With the Right System for Your Space
- What You Need Before You Begin
- How To Set Up a Surround Sound System Step by Step
- 1. Pick your main listening position first
- 2. Build the front soundstage
- 3. Place the surround speakers
- 4. Add rear surrounds only if your room supports them
- 5. Put the subwoofer in a smart spot
- 6. Decide whether Atmos is worth it
- 7. Run the wiring cleanly
- 8. Connect the TV and sources properly
- 9. Run room correction and manual checks
- 10. Test with real content, not just test tones
- Surround Sound Tips for Different Spaces
- Common DIY Mistakes to Avoid
- Conclusion
- Real-World DIY Experiences: What Setting It Up Actually Feels Like
- SEO Tags
If your TV audio currently sounds like it’s coming from a stressed-out toaster, it may be time for a proper surround sound setup. The good news is that building a great home theater does not require a contractor, a second mortgage, or a PhD in cable spaghetti. With the right speaker layout, a little patience, and a smart plan for your room, you can set up a surround sound system yourself and get sound that feels bigger, clearer, and dramatically more cinematic.
The trick is understanding that surround sound is not just about buying more speakers. It is about putting the right speakers in the right places, choosing a layout that actually fits your room, and calibrating everything so dialogue sounds crisp, effects feel immersive, and bass hits with authority instead of turning your floor into a drum solo. This guide walks through exactly how to do that, whether you live in a small apartment, have an open-concept living room, or are building a dedicated movie cave where popcorn becomes a personality trait.
Start With the Right System for Your Space
Before you run a single wire, decide what kind of surround sound system makes sense for your room. Bigger is not always better. A 7.1.4 setup in a tiny den can feel like parking a school bus in a one-car garage.
What the numbers mean
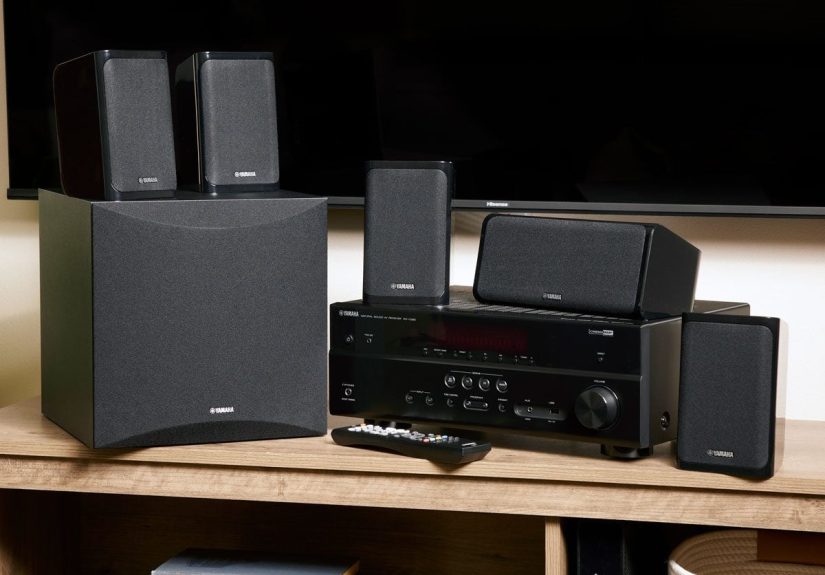
Surround sound layouts use a simple numbering system. In a 5.1 system, the first number is your ear-level speakers, and the second is your subwoofer. So 5.1 means five main speakers and one sub. A 7.1 system adds two rear speakers. A 5.1.2 system means five ear-level speakers, one subwoofer, and two height channels for Dolby Atmos. Once you understand that pattern, the mystery disappears and the shopping becomes much less chaotic.
Best setup by room type
For a small room, bedroom, office, or apartment living room, a 3.1 or 5.1 system is often the sweet spot. A 3.1 setup gives you left, center, right, and a subwoofer, which dramatically improves dialogue and bass without making your room look like a recording studio exploded.
For a medium-size family room, 5.1 is the classic choice. It gives you a true surround field without demanding a huge amount of space. If you want a more immersive movie experience and your room has decent ceiling conditions, 5.1.2 is a strong upgrade.
For a larger room or dedicated theater, 7.1, 5.1.4, or 7.1.4 can make sense. These systems create a larger sound bubble, but only if you have enough room behind and around the seating area to place the speakers correctly. If not, those extra channels are mostly expensive decorations with excellent branding.
What You Need Before You Begin
A solid DIY surround sound setup starts with a simple checklist: an AV receiver, speakers, subwoofer, speaker wire, HDMI cable, measuring tape, labels or tape for wire runs, and a calibration microphone if your receiver includes one. You do not need exotic accessories blessed by mountain monks. You do need enough cable, a plan, and five uninterrupted minutes where nobody asks where the batteries are.
The receiver is the brain of the system. It powers passive speakers, switches inputs, decodes surround formats, and runs room correction. Choose one with enough channels for your current setup and at least a little upgrade room for later. If you are building 5.1 now but think Atmos might happen later, buy accordingly. Future-you will be grateful and slightly smug.
For wiring, 16-gauge speaker wire usually works well for typical home theater runs up to around 50 feet. If your speaker runs are longer, or if you are using lower-impedance speakers or a higher-current amp, 14-gauge is the safer move. It is not glamorous advice, but neither is troubleshooting weak connections at 11:30 p.m. because the right surround channel vanished during an action scene.
If your TV and receiver support ARC or eARC, use the matching HDMI ports. That makes it easier to send TV audio back to the receiver and simplifies daily use. If you stream from your TV apps, eARC is especially helpful because it supports higher-bitrate multichannel audio.
How To Set Up a Surround Sound System Step by Step
1. Pick your main listening position first
This is the anchor for the whole room. Your couch, recliner, or favorite movie chair determines where the speakers should aim. Try not to shove the main seat hard against the back wall if you can help it, because that usually makes bass less even and leaves no room for rear speaker placement in larger systems.
Think of this position as the center of your sound bubble. Every major placement decision should work around it. If your room has multiple seats, optimize for the main seat first and then make reasonable compromises for the others.
2. Build the front soundstage
Your front left and right speakers should sit on either side of the TV and, ideally, form a near-equilateral triangle with your listening position. That is the classic rule because it helps lock voices, music, and effects into a believable front soundstage. Keep them at roughly ear height when seated, and angle them slightly toward the main seat if needed.
The center channel goes directly above or below the TV, centered as precisely as possible. This speaker handles most of the dialogue, so do not tuck it into a cabinet cave unless your goal is to make every actor sound like they are speaking through a pantry door. Pull it toward the front edge of a shelf if needed and avoid blocking the front grille.
3. Place the surround speakers
In a 5.1 surround sound system, the surround speakers usually go to the left and right of the seating position or slightly behind it. If your room allows true side placement, that is excellent. If not, placing them a little behind the couch and aiming them toward the listening area still works well.
In a perfect setup, surrounds are placed symmetrically. That matters more than people think. If one surround is three feet from your ear and the other is hanging out across the room by the ficus, your receiver can help, but physics still gets a vote.
How high should they be? In a focused one-seat setup, ear level works beautifully for precise imaging. In a living room with multiple listeners, kids, lamps, and other real-world obstacles, placing the surrounds about 1 to 2 feet above ear level can create a more spacious, less localized effect. The best answer is the one that fits your room while preserving symmetry and clear direction toward the seating area.
4. Add rear surrounds only if your room supports them
A 7.1 home theater setup adds two rear speakers behind the listening position. These are not the same as side surrounds. They belong behind you, evenly spaced, and aimed toward the main seat. If your couch is slammed against the back wall, a 7.1 layout is often more trouble than it is worth. In that case, a great 5.1 system will usually beat a compromised 7.1 system every day of the week and twice on movie night.
5. Put the subwoofer in a smart spot
Subwoofer placement is where many DIY setups either become glorious or mildly haunted. A good starting point is near the front wall, often close to the front speakers or in a front corner. Corner placement can increase bass output, but it can also exaggerate room peaks, so do not assume “louder” automatically means “better.”
If the bass sounds boomy in one seat and weak in another, move the sub and test again. This is why people talk about the “subwoofer crawl.” You place the sub temporarily at the main listening position, play bass-heavy content, move around the room listening for the smoothest bass, and then put the sub in that spot. It is not elegant, but it works surprisingly well and gives you permission to crawl around your living room for science.
If you are using dual subwoofers, common starting points include the front corners, opposite diagonal corners, or the midpoints of opposing side walls. Dual subs can help smooth bass across more seats, which is especially useful in larger rooms.
6. Decide whether Atmos is worth it
If you want overhead effects for movies, games, and premium streaming, Dolby Atmos can be a worthwhile upgrade. The two most common DIY entry points are 5.1.2 and 7.1.2. You can do this with in-ceiling speakers, on-ceiling speakers, or upward-firing Atmos-enabled modules.
Discrete overhead speakers generally give the most precise height effects. Upward-firing modules are easier to install and can still sound very good, especially in rooms with a flat, reflective ceiling that sits roughly 7.5 to 12 feet high. If your ceiling is vaulted, very high, or covered in highly absorptive materials, do not expect bounce effects to perform magic tricks.
7. Run the wiring cleanly
Measure every speaker run before cutting wire. Label both ends. Leave a little slack so you are not working with cable tension that feels like a medieval punishment. Keep polarity consistent: positive to positive, negative to negative. Most speaker wire marks one side with a stripe or text to make this easier.
If you are running wire through walls, use in-wall rated cable where required. If you are staying surface-mounted, cable raceways can keep everything tidy and a lot more spouse-friendly. A clean install is not just about looks. It makes troubleshooting easier later when you forget which black cable goes to which speaker and briefly question your life choices.
8. Connect the TV and sources properly
Connect your receiver to the TV using the HDMI port labeled ARC or eARC on both devices if available. Then connect your streaming box, game console, Blu-ray player, or other sources to the receiver. That way the receiver handles audio decoding and switching, which is exactly the job it trained for.
If you use only TV apps, ARC or eARC lets the TV send audio back to the receiver through a single HDMI cable. Check your TV audio settings and make sure output is configured correctly for multichannel sound rather than defaulting to stereo.
9. Run room correction and manual checks
Most modern receivers include room correction such as Audyssey or Yamaha YPAO. Use it. It measures speaker distance, level, timing, and room acoustics, and it usually gets you much closer to excellent sound in one session than guessing ever will.
Set the calibration microphone at seated ear height. On many Audyssey-enabled receivers, the microphone should point toward the ceiling. Follow the on-screen instructions and measure several listening positions around the main seat instead of stacking all the measurements in one tiny spot.
Before calibration, if your subwoofer has its own controls, set the volume around the middle, turn the low-pass or crossover to its maximum or bypass position if the receiver will manage bass, and disable standby or auto-off temporarily. After calibration, check the settings. A common starting crossover is 80 Hz, though smaller speakers may benefit from a higher crossover point.
10. Test with real content, not just test tones
Once the system is calibrated, try actual movies, shows, and music. Listen for clear dialogue in the center, smooth pans across the front, convincing surround effects, and bass that feels deep but controlled. If the subwoofer overwhelms everything like it is auditioning for its own franchise, trim it down a little. If dialogue still sounds buried, recheck center channel placement and level.
Surround Sound Tips for Different Spaces
Small apartment or condo
Keep it simple. A compact 3.1 or 5.1 setup is usually enough. Use bookshelf or on-wall speakers, avoid giant subs unless you enjoy tense elevator conversations, and focus on clear dialogue plus controlled bass. If you want immersive sound without drilling holes, a quality soundbar with rear surrounds can be a practical alternative, though discrete speakers still create more accurate placement.
Open-concept living room
Symmetry gets harder in open layouts, so do your best with the front stage and prioritize correct seating alignment. If one side wall is missing, use stands or wall mounts to create a balanced surround field. Room correction becomes even more important here because the room itself is refusing to cooperate like a proper rectangle.
Dedicated media room
This is where you can stretch out. A full 5.1.2, 7.1, or 7.1.4 setup can shine if you have enough depth behind the seats. Consider dual subwoofers for smoother bass and spend extra time on acoustic basics like rugs, curtains, and reducing harsh reflections. Fancy gear helps, but a room full of hard reflective surfaces can make even good equipment sound edgy.
Bedroom or office
Do not force a giant system into a small space. A carefully placed 2.1 or 3.1 setup can sound fantastic. If you do go with 5.1, use compact surrounds and keep the listening position centered. Near-field listening can be extremely immersive when everything is positioned correctly.
Common DIY Mistakes to Avoid
One of the biggest mistakes is choosing too many channels for the room. More speakers do not automatically create better surround sound. Better placement does. Another common issue is cramming the center speaker into a cabinet or blocking it with the TV stand. If dialogue sounds muffled, this is often the culprit.
Many DIY users also place surrounds too far away, too high, or wildly asymmetrical. Others set the front speakers wherever the furniture allows and hope calibration will fix everything. Calibration is helpful, but it is not a wizard. Start with good geometry and let the software fine-tune from there.
Then there is subwoofer chaos. If the bass sounds muddy, do not instantly blame the subwoofer itself. Placement, crossover, and level are usually the real issue. Finally, check your TV and streaming device settings. More than one excellent system has been reduced to stereo because a menu setting was left on the audio equivalent of “meh.”
Conclusion
Learning how to set up a surround sound system for any space is really about making smart choices, not extreme ones. Start with the room, choose a layout that fits, place the speakers with intention, wire everything cleanly, and let room correction handle the fine details. A well-planned 5.1 system in an ordinary living room can absolutely outperform a poorly arranged “bigger” system that looks impressive on paper but sounds confused in practice.
The best DIY surround sound setup is the one that matches your space, your gear, and your actual habits. If you mostly stream movies in a small apartment, build for that. If you host game nights in a large den, build for that. Once everything is dialed in, you will not just hear the difference. You will wonder how you ever watched action movies with flat TV speakers and called that a plan.
Real-World DIY Experiences: What Setting It Up Actually Feels Like
The first thing most people notice after a successful surround sound setup is not the explosions. It is the dialogue. Suddenly, voices sound anchored to the screen instead of floating around the room like confused ghosts. In real homes, that often becomes the biggest quality-of-life improvement. Families stop reaching for the remote every ten minutes. You stop turning subtitles on for every show. The center channel quietly becomes the hero of the entire system, which is a very on-brand plot twist for a speaker designed to do the talking.
In small spaces, the experience is usually less about raw power and more about precision. A modest 5.1 setup in an apartment can feel shockingly immersive when the speakers are placed correctly. Footsteps behind you in a thriller suddenly have direction. Rain sounds wider. Crowd noise in sports broadcasts feels like a real environment instead of a flat wash of noise. Owners often describe the moment of realizing that good surround sound does not need to be loud to feel dramatic. It just needs to be believable.
Open-concept rooms create a different kind of experience. They are harder to tame, but when you get them right, the room feels more unified. One common DIY lesson is that the setup process becomes a game of trade-offs. You may not get textbook symmetry, but careful angling, smart speaker stands, and room correction can still produce a convincing sound field. The reward is a system that feels customized to the way the room is actually lived in, not just the way a diagram on a product box imagined it.
Another very real experience is discovering how much subwoofer placement changes everything. Many DIY users start by dropping the sub wherever there is floor space, then assume something is wrong when the bass sounds bloated or weak. After moving it around and re-running calibration, the system often transforms. Movies gain impact, music gains weight, and the bass stops behaving like an overcaffeinated roommate stomping through every scene.
Atmos adds its own kind of fun. When height effects are working well, people tend to grin like they just got away with something. Helicopters feel overhead. Storms feel taller. Big action scenes gain a sense of scale that regular surround cannot fully replicate. The funny part is that Atmos can also teach humility. If the ceiling is wrong or the speaker placement is rushed, the result is often “pretty good” instead of “wow.” That is why the best DIY experiences usually come from patience, testing, and a willingness to move things more than once.
What many homeowners remember most is not the installation itself but the first night everything clicks. A favorite movie sounds new again. A familiar concert film suddenly feels alive. Even ordinary TV becomes more engaging. That is the real payoff of a DIY surround sound project. You are not just adding equipment. You are changing the way your room feels when entertainment starts, and once you hear that difference done right, going back to tiny TV speakers feels a little like trading a great road trip for a stationary bike.