
Table of Contents >> Show >> Hide
- Why a Le Creuset Dutch Oven Is Perfect for Pork Tenderloin
- Know Your Cut: Pork Tenderloin 101
- Food Safety and Ideal Internal Temperature
- Ingredients for Dutch Oven Pork Tenderloin
- Step-by-Step: How to Bake Pork Tenderloin in a Le Creuset Dutch Oven
- Timing, Temperatures, and Doneness Tips
- Common Mistakes (and How to Avoid Them)
- Serving Ideas for Dutch Oven Pork Tenderloin
- Leftovers, Storage, and Reheating
- Real-Kitchen Experiences: Making Pork Tenderloin in a Le Creuset Dutch Oven
- Conclusion
If you’ve ever pulled a dry, sad pork tenderloin out of the oven and silently apologized to everyone at the table, this guide is for you. A Le Creuset Dutch oven plus a simple, smart technique turns this lean cut into a juicy, impressive dinner that tastes like you secretly went to culinary school.
In this article, we’ll walk through exactly how to bake pork tenderloin in a Le Creuset Dutch ovenfrom choosing the right cut and seasoning it properly, to searing, roasting, checking the internal temperature, and building a quick pan sauce and veggie side, all in one pot. You’ll also get practical timing tips, food-safety guidelines, serving ideas, and real-life lessons from home cooks who’ve been there, overcooked that.
Why a Le Creuset Dutch Oven Is Perfect for Pork Tenderloin
A pork tenderloin loves consistent heat, gentle roasting, and a bit of steamall of which a cast-iron, enameled Dutch oven delivers beautifully. The heavy lid traps moisture so the meat doesn’t dry out, while the thick walls hold heat like a champion, giving you even browning and steady oven cooking.
Le Creuset’s enamel makes deglazing easy: after searing, all those browned bits stuck to the bottom dissolve into a flavorful pan sauce with just a splash of broth, cider, or wine. No scraping, no drama, just flavor.
Other perks of using a Le Creuset Dutch oven:
- Stovetop-to-oven convenience: Sear and roast in the same pot (fewer dishes, more happiness).
- Excellent heat retention: Helps maintain an even oven temperature and reduces hot spots.
- Great for one-pot meals: You can tuck in potatoes, carrots, onions, or fennel to roast right alongside the pork.
Know Your Cut: Pork Tenderloin 101
First, a quick but crucial PSA: pork tenderloin is not the same as pork loin. Tenderloin is long, narrow, and very lean; loin is wider, thicker, and cooks differently. The two cuts are not interchangeable in this recipe.
Why this matters:
- Pork tenderloin: Best when seared quickly and roasted briefly at a relatively high temperature.
- Pork loin: Larger and denser, often cooked lower and slower, more like a classic roast.
For this Dutch oven method, you want 1 to 1.5 pounds of pork tenderloin, trimmed of silver skin (that tough, shiny membrane on the surface). Removing the silver skin helps the meat cook evenly and keeps each slice tender.
Food Safety and Ideal Internal Temperature
Modern guidelines from the USDA and pork industry recommend cooking fresh pork cuts, including tenderloin, to an internal temperature of 145°F (63°C) followed by a 3-minute rest.
At 145°F and with a rest, your pork may still have a faint pink centerthis is both safe and ideal for flavor and juiciness. The key is using a reliable digital meat thermometer and checking in the thickest part of the tenderloin.
Ingredients for Dutch Oven Pork Tenderloin
Here’s a straightforward base recipe that you can customize with your favorite flavors:
For the pork
- 1–1.5 lb pork tenderloin, trimmed
- 2 tablespoons olive oil (divided)
- 1–1½ teaspoons kosher salt
- ½ teaspoon black pepper
- 1 teaspoon garlic powder
- 1 teaspoon smoked or sweet paprika
- 1 teaspoon dried Italian seasoning or thyme
For the veggies & pan sauce
- 1 medium yellow onion, sliced
- 3–4 carrots, cut into 1-inch chunks
- 1–1½ pounds baby potatoes, halved or quartered
- 2–3 cloves garlic, smashed
- ¾–1 cup low-sodium chicken broth or apple cider
- 1 tablespoon Dijon or whole-grain mustard (optional, for pan sauce)
- 1–2 teaspoons honey or maple syrup (optional, for a touch of sweetness)
- 1 tablespoon butter (to finish the sauce, optional)
The flavor combo of garlic, herbs, and a little sweetness is inspired by popular Dutch oven pork tenderloin recipes that pair the meat with honey, maple, apple, or Dijon for a balanced glaze.
Step-by-Step: How to Bake Pork Tenderloin in a Le Creuset Dutch Oven
Step 1: Prep the pork and vegetables
- Trim the tenderloin: Use a sharp knife to remove the silver skin and any large pockets of fat. This helps with tenderness and even cooking.
- Pat dry: Blot the pork with paper towels. Dry surfaces brown better.
- Season generously: Sprinkle salt, pepper, garlic powder, paprika, and Italian seasoning evenly over the tenderloin. Press spices in so they adhere.
- Prep the veggies: Slice the onion, chop carrots, and cut potatoes into even pieces so they roast at roughly the same rate.
Step 2: Sear in the Dutch oven
- Place your Le Creuset Dutch oven on the stovetop over medium-high heat.
- Add 1 tablespoon olive oil and heat until shimmering.
- Add the seasoned pork tenderloin and sear for about 2–3 minutes per side, turning with tongs until all sides are nicely browned. Searing builds flavor and helps lock in juices.
- Transfer the seared pork to a plate. Don’t wash the potyou want those browned bits.
Step 3: Build the flavor base
- Reduce heat to medium. If the pot looks dry, add another splash of olive oil.
- Add sliced onion and a pinch of salt. Cook 3–4 minutes, stirring, until the onion begins to soften and picks up some of the browned bits.
- Add carrots, potatoes, and smashed garlic. Cook another 3–4 minutes, stirring occasionally.
- Pour in ¾–1 cup broth or apple cider to deglaze the pot, scraping up the flavorful browned bits from the bottom. This liquid will steam the pork and become your pan sauce.
Step 4: Roast the pork tenderloin
- Preheat your oven to 400°F (200°C).
- Nestle the seared pork tenderloin on top of the vegetables in the Dutch oven.
- Cover with the lid and transfer the pot to the oven.
- Bake for about 12–15 minutes, then check the internal temperature with a meat thermometer inserted into the thickest part.
- Continue roasting, checking every 3–5 minutes, until the pork reaches 140–145°F. For most tenderloins, total oven time is often 15–20 minutes, depending on thickness and your oven’s quirks.
Don’t panic if the veggies need a bit more time. If the pork is done before the potatoes are perfectly tender, you can temporarily remove the pork, keep it warm, and return the pot of veggies to the oven for a few more minutes.
Step 5: Rest, slice, and make a quick pan sauce
- When the pork hits 145°F, remove the Dutch oven from the oven. Transfer the tenderloin to a cutting board and tent loosely with foil. Let it rest at least 3–5 minutes so juices redistribute.
- Meanwhile, put the Dutch oven back on the stovetop over medium heat if you want to enhance the sauce.
- Whisk in 1 tablespoon Dijon mustard and 1–2 teaspoons honey or maple syrup to the cooking liquid for extra depth. Simmer for a couple of minutes to slightly thicken.
- Finish with a tablespoon of butter if you’d like a glossy, restaurant-style sheen.
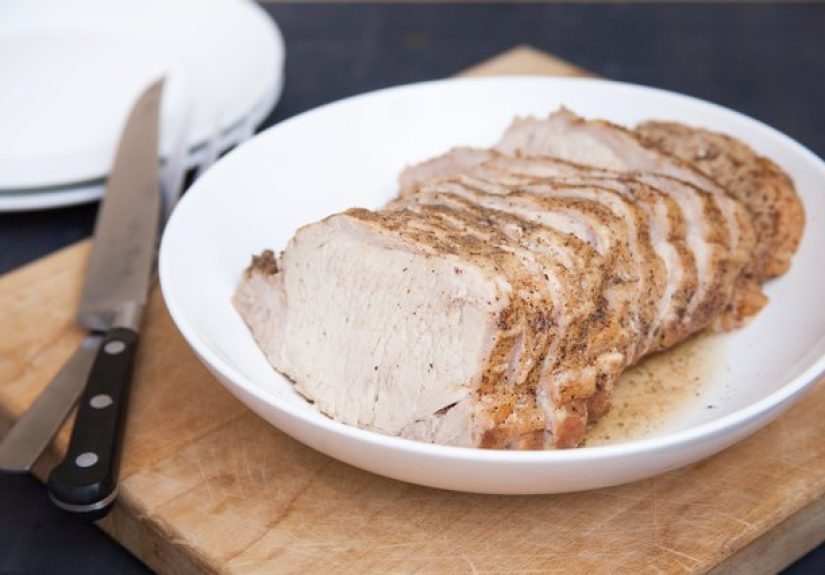
- Slice the pork into ½-inch medallions and serve over the vegetables, spooning the pan sauce over the top.
Timing, Temperatures, and Doneness Tips
Because pork tenderloins vary in thickness, there isn’t one “magic number” for oven time. Instead, think in ranges and use your thermometer as the final judge:
- Typical range: 12–20 minutes at 400°F after searing, for a 1–1.5 lb tenderloin.
- Pull temperature: 140–145°F in the thickest part.
- Rest time: At least 3 minutes; during this time, carryover cooking may nudge the temperature a few degrees higher while keeping the meat juicy.
Signs your pork tenderloin is ready:
- Temperature reads 145°F after resting.
- Juices run mostly clear with a faint pink tint.
- The center is slightly rosy but not translucent or gummy.
Resist the urge to cook pork all the way to 160°F “just to be safe”you’re more likely to end up with dry meat and disappointed guests. Modern safety standards are built around that 145°F + rest combo.
Common Mistakes (and How to Avoid Them)
Mistake 1: Using the wrong cut
Grabbing a pork loin instead of tenderloin is probably the #1 recipe-wrecker. Loin is thicker and needs more time and a different approach. Always check the label for “pork tenderloin”.
Mistake 2: Skipping the sear
If you skip searing, you miss out on flavor. That golden crust adds texture and gives the sauce a deeper, richer taste. It only takes a handful of minutes and happens right in your Le Creuset pot.
Mistake 3: Overcrowding the Dutch oven
Stuffing too many veggies or more than one large tenderloin into a smaller Dutch oven can trap steam and prevent browning. If you’re feeding a crowd, use a larger pot or cook two batches.
Mistake 4: Ignoring rest time
Cutting into the meat immediately lets the juices pour out onto the board instead of staying in the pork. Those 3–5 minutes of rest time make the difference between “meh” and “wow.”
Serving Ideas for Dutch Oven Pork Tenderloin
The beauty of this recipe is that the vegetables cook in the same pot, so you already have a built-in side dish. To round out the meal, you can:
- Serve with a crisp green salad with a tangy vinaigrette to cut through the richness.
- Add a hunk of crusty bread to mop up the pan sauce.
- Sprinkle chopped fresh parsley, chives, or thyme over the top for freshness.
- Pair with a light, citrusy white wine or sparkling water with lemon.
Leftovers, Storage, and Reheating
As with most roasts, Dutch oven pork tenderloin makes excellent leftovers:
- Refrigeration: Cool leftovers within 2 hours and store in an airtight container in the fridge for 3–4 days.
- Freezing: Slice the pork, spoon some pan juices over it to prevent drying, and freeze for up to 3 months.
- Reheating: Reheat gently in a covered dish at 300°F with a splash of broth or water until warmed through, or warm slices in a skillet over low heat with extra sauce.
Leftover pork medallions are fantastic in grain bowls, sandwiches, fried rice, or tacos. If anyone complains about leftovers after that, check their taste buds.
Real-Kitchen Experiences: Making Pork Tenderloin in a Le Creuset Dutch Oven
Once you’ve made Dutch oven pork tenderloin a few times, you start to collect little “a-ha” momentsthe kind you don’t always see in a traditional recipe card. Here are some lived-in tips and experiences that can help your version turn out better from day one.
1. The “too much color” scare. The first time many cooks sear tenderloin, they get nervous when the outside darkens quickly. The instinct is to crank down the heat and rush to the oven. In reality, a deep golden sear (not black, but confidently brown) is your friend. That color equals flavor, and because tenderloin is still raw in the center when you finish searing, the oven time is where you gently bring it up to temperature. Once you trust the process and your thermometer, you stop panicking every time the meat looks darker than beige.
2. The magic of layering vegetables. A Dutch oven practically begs for layers. Many home cooks discover that placing onions on the bottom, then carrots and potatoes, with the pork on top, works best. The onions almost melt into the sauce, the carrots stay tender but not mushy, and the potatoes absorb flavors from both the pork and the liquid. The first time you lift the lid and see everything bubbling away in one happy, aromatic ecosystem, you realize why “one-pot meal” is such a beloved phrase.
3. How small choices change the flavor profile. Swap broth for apple cider and suddenly you’ve got a hint of sweetness and fall vibes. Stir a spoon of Dijon into the juices and it leans French-bistro. Use maple syrup and a few sprigs of rosemary and it feels cozy and wintery. One of the fun parts of this recipe is how tiny tweakschanging the liquid, adding a spice, or tossing in fennel or parsnipscreate a new personality without changing the technique.
4. Learning your oven’s personality. Not all ovens are honest about their temperature. Some run 25°F hot or cool, and pork tenderloin will tattle on your oven quickly. After a couple of tries, you’ll notice a pattern: maybe your pork is consistently done at the 12-minute mark, or maybe it always needs closer to 20. Once you learn that pattern, you can set a reminder to start checking early and adjust your expectations. A small oven thermometer tucked inside can confirm the truth and save you from guesswork.
5. Using leftovers smarter, not sadder. Dutch oven pork tenderloin leftovers can be upgraded instead of tolerated. Thin slices warmed in a skillet and piled on toasted bread with a bit of the pan sauce become a diner-style open-faced sandwich. Diced pork tossed into a quick vegetable stir-fry or grain bowl makes a faster weeknight dinner than takeout. Many home cooks find that once they realize how versatile leftover pork can be, they start cooking an extra half-tenderloin on purpose just for future meals.
6. The confidence boost factor. There’s something about pulling a heavy Le Creuset Dutch oven out of the oven, lifting the lid, and seeing a perfectly roasted tenderloin surrounded by vegetables that makes you feel like a pro. You didn’t need fancy gadgets or complicated techniquesjust a good pot, a thermometer, and a bit of patience. That confidence tends to spill over into other dishes: if you can nail pork tenderloin, suddenly braises, stews, and other roasts feel much less intimidating.
Over time, “How do I bake a pork tenderloin in a Le Creuset Dutch oven?” turns into “How many different ways can I make this?”and that’s when cooking stops being stressful and starts being fun.
Conclusion
Baking a pork tenderloin in a Le Creuset Dutch oven is a smart way to get juicy, flavorful meat and a complete one-pot dinner with minimal cleanup. By choosing the right cut, searing thoroughly, roasting to 145°F with a rest, and letting the Dutch oven do the heavy lifting, you can count on tender slices, well-seasoned vegetables, and a built-in pan sauce every single time.
Once you’ve tried this method, you’ll probably find yourself using your Dutch oven for all kinds of roastsand wondering how you ever lived without that big, colorful workhorse on your stove.






